Variable Binding
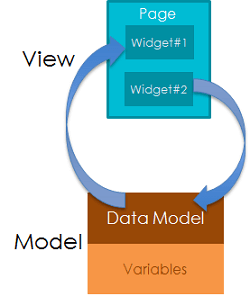
WaveMaker leverages the concept of Data Binding by Angular, to bind Widgets with Variables. Widgets can be configured to bind the UI Elements to specific fields of the Data Model.
Binding is used to serve two purposes:
Binding to Widgets
Once you have created the necessary variables (Variable Access), you can display the data or capture user input by binding data to a component/widget. The connection between a widget (or widget property) and a source of data is called the binding.
- To bind widgets to data, you need to use the Bind dialog.
- In the Properties Panel, anything that can support data from a different source is marked with the bind chain icon. You can edit or delete the bindings. Click the bind icon to display the Bind dialog.
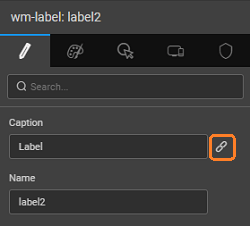
- Clicking on the bind chain icon next to any widget property will open a Bind dialog. From this dialog you can:
- see a listing the various binding options, fields along with the data types,
- do multiple bindings, that is all the fields can be bound at the same time,
- do a parent level binding using the objects
- understand the binding requirement.
- The Bind dialog displays the binding options i.e. a list of everything that you can bind to, including all variables, widgets and so on. You can bind to widgets, variables that are defined on the current page, or that are defined at the app level.
The compatible types are indicated by success or failure message once you select a field from the variable list.
- Variable: List of available variables are listed here.
- Widgets: List of all the widgets on the current page.
- Resource: List of resources included in the project, including images, HTML, CSS, and JavaScript.
- Use Expression: Any JavaScript expression.
- Localized Messages: Any of the application messages that you created in the Application Messages repository.
- Select the appropriate binding options and click Bind.
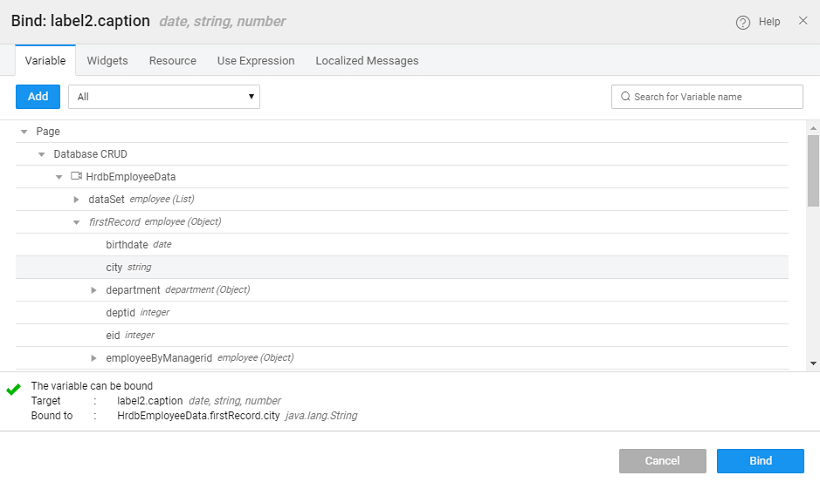
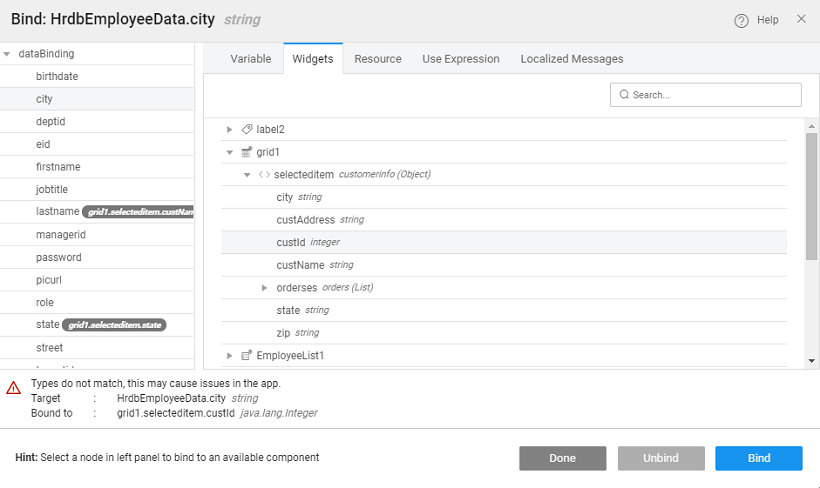
- A validation message will be displayed to indicate whether the binding is valid or not.
Along with the message, you will see the expected data type (Target) and your selection (Bound to). Based on this information, you may either choose to ignore the message or change the binding accordingly.
Binding to Data from Variables
Variables can be bound to each other. Usually, this is the requirement with Variables when the data needs to be filtered i.e. output limited by a constraint or when a Variable which needs parameters as input in order to process information from the data source. These input/filter parameters will be available from the Data tab of the Variable. For example, the Variable corresponding to the Employee CRUD API from the sample hrdb can be filtered on any field of the dataset:

Clicking on the bind chain icon next to any parameter will open a Bind dialog. From this dialog you can:
- see a listing the various binding options, fields along with the data types,
- do multiple bindings, that is all the fields can be bound at the same time,
- do a parent level binding using the objects
- understand the binding requirement.
Binding Options
- Variable: List of available variables are listed here.
- Widgets: List of all the widgets on the current page.
- Resource: List of resources included in the project, including images, HTML, CSS, and JavaScript.
- Expression: Any JavaScript expression.
- Localized Messages: Any of the application messages that you created in the Application Messages repository.
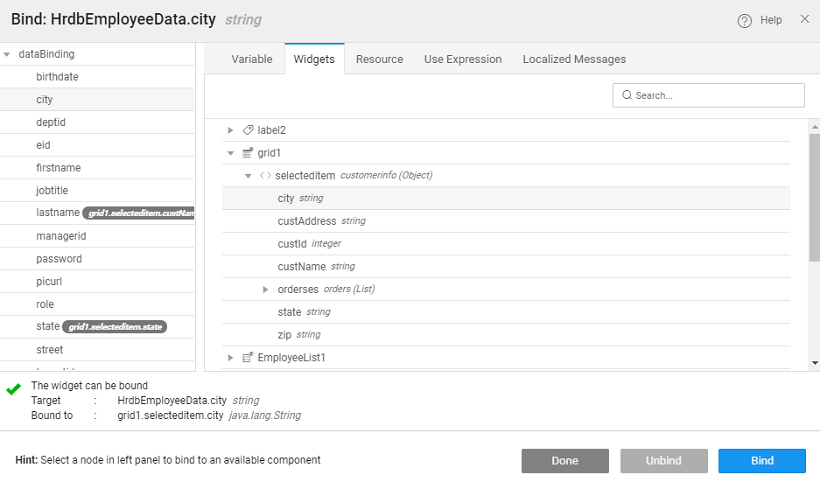
A validation message will be displayed to indicate whether the binding is valid or not. Along with the message, you will see the expected data type (Target) and your selection (Bound to). Based on this information, you may choose to ignore the message or change the binding accordingly.
Binding Options
Binding to Variables
We can use bind option to bind variables to appropriate widgets or another variable. Note:
- When binding to Service Variables make sure that the Request data on page load is selected to ensure the component/widget is initialized with data at the time of page (application in case of app owned variables) load.
- Use Update data on input change to trigger the live variable automatically when the filter condition or the input parameter value changes.
Binding to Widgets
You can bind a widget value to another widget value. For example, you can bind a Text widget to a selected value from the Data Table or Live List.
Binding to Resource
You can bind your widgets to images, videos etc.. For this you have to Import Resource first.
Binding using Expression
From the Use Expression tab, you can write a custom expression to change the display setting. The expression can be simple string concatenation expressions or HTML syntax following AngularJS conventions for binding. For complex expressions, it is advisable to write a function. For example, when displaying name you want the display to say User Name is: some_value, you can achieve this by using the expression:
You can also change the data format, combine various data fields and do much more using the Expressions to bind your widgets. You can select the variable you want to bind this text box from the left side panel. Using the arithmetic symbols you can build an expression involving multiple variables and the format you want it to be displayed. Currently, there are the following formatting options to choose from:
- numberToString - formats number to a string. Fraction Size specifies the number of decimal places to round the number to. Eg: If the value is 12345.6789 and fraction size is 3, then the formatted value is 12,345.679.
- prefix - allows you to add a prefix to the expression,
- stringToNumber - formats string to a number. Eg: If value is '123', then formatted value is 123
- suffix - allows you to add a suffix to the expression,
- timeFromNow - Formats date and time to a relative time. Eg: If the value is 5 PM and the current time is 6 PM, formatted value is 'an hour ago'. Moment library is used for this functionality. Moment supports localization. Moment locale files are bundled with the project. Thus at runtime, when the locale changes, the respective locale file is loaded and all-time conversions are localized accordingly.
- toCurrency - lets you define the type of currency thus giving the appropriate display symbol and specify the precision value,
- toDate - lets you select the date format, and
- toNumber - allows you to convert the text to number format for use in arithmetic operations and specify the precision value.
Binding to Localized Messages
You can bind your custom Application messages and bind them to a widget. This is particularly useful when trying to implement localization in your app. See here for more.