Creating a Registration Page
Registration is a common process in web applications and many apps have the facility to self-register and then allow registered users to login. Logging to app requires security setup.
Learn how to create a registration page in WaveMaker Studio. In this section, see:
- How to design a registration page.
- How to link the registration page to the inbuilt security and login page.
- Add security encryption to password field using a Java Service.
- Add user database - this should contain the details of the users, their usernames, password, and more.

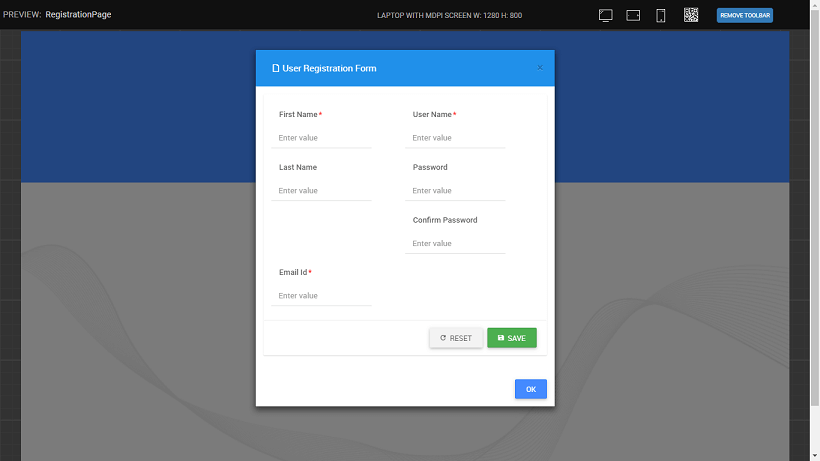
Designing a Registration Page
Create a partial page to allow a new user to enter details. Live Form allows user to enter their details, including inserting the records into a database table.
Drag and drop a Live Form widget, use the Database CRUD from the UserDB service and the UserDetails table and set the properties, as per your app requirements. We have used the following settings:
- Two column layout with first name, last name and email id in the first column; username, password, and role in the second column.
- Set
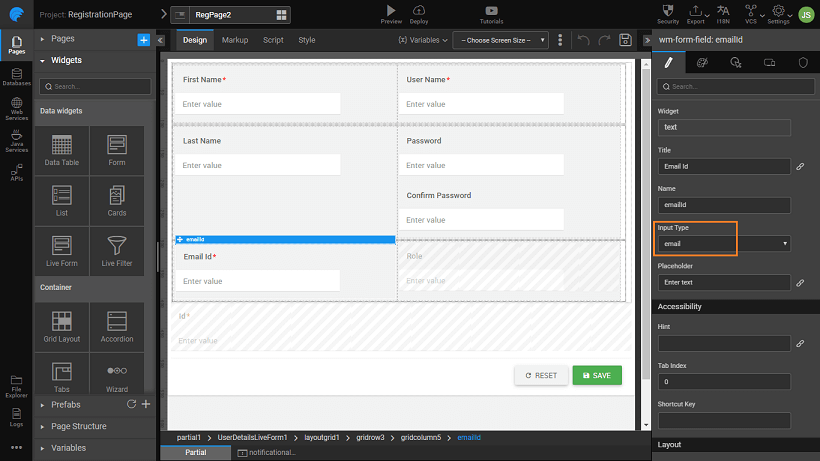
First Name,Username, andEmail IDas Required fields. - For
Email ID, set input Type toemail. This will auto validate the field entry to be in the email format with an@symbol.
- Add a text widget for confirm password field.
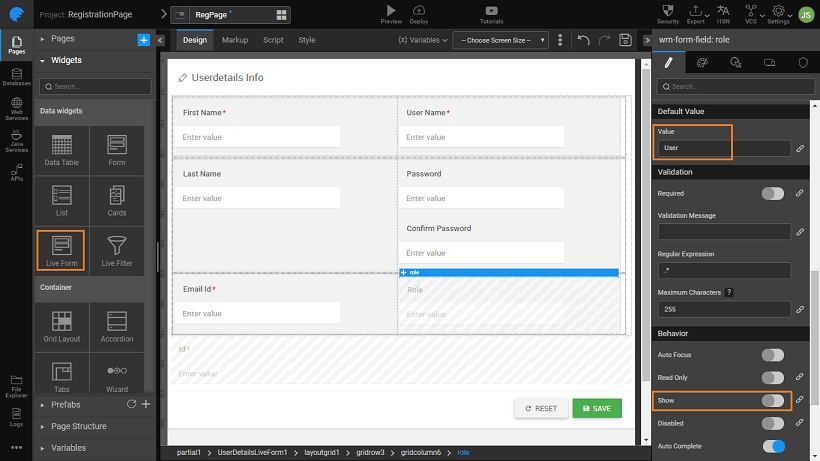
- Set
default valuefor Role field to 'User' and set it as hidden.
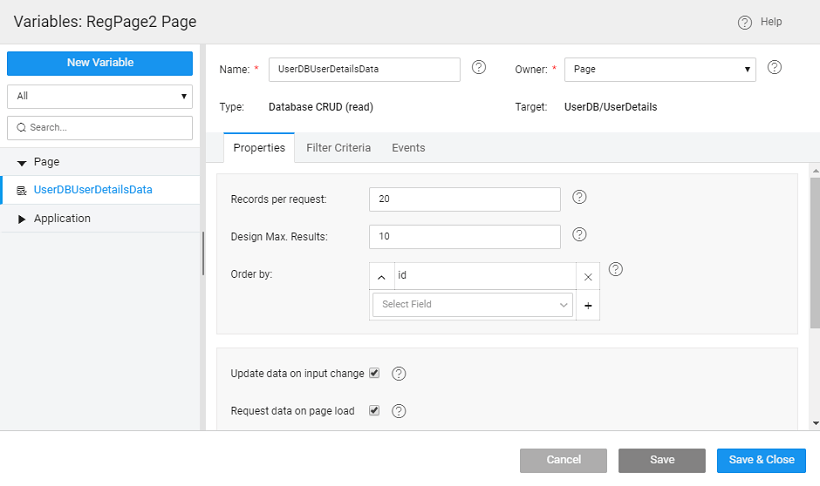
A Variable with source as the User table is created which will perform the insert into the database automatically.
In case of any process before insertion, you can do it from the Form on Before Service Call event. You can add any other validation checks here. For example, in this script we are ensuring the the password entries match. The appropriate message is loaded into the Notification Action and is invoked.
We have already created a Notification Action that needs to be created.

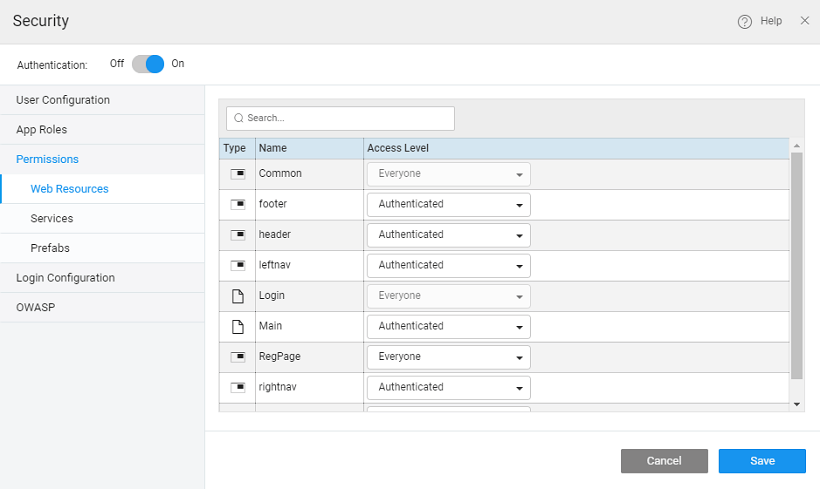
Enable Security
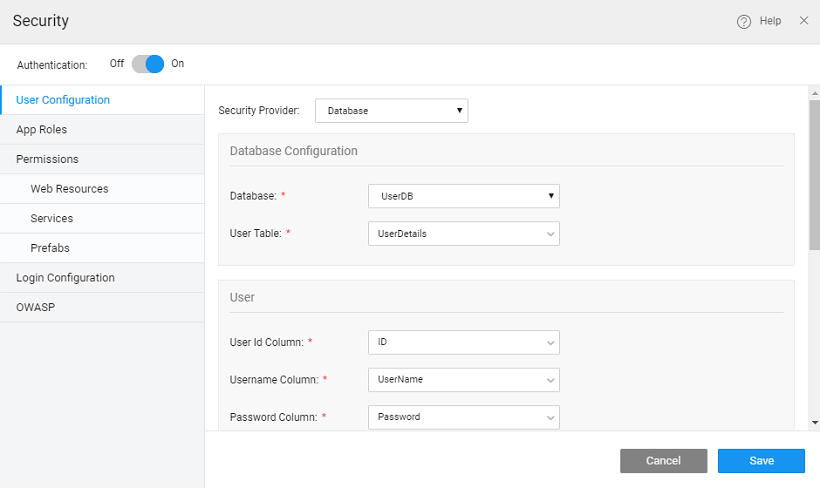
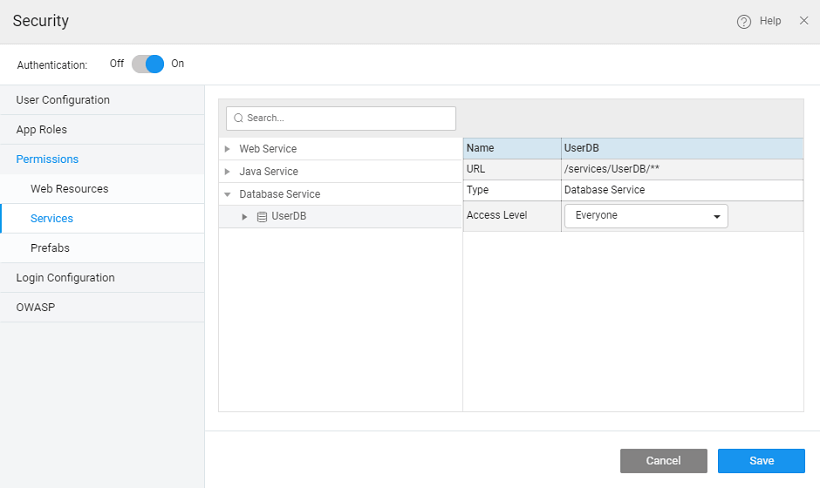
Enable Security and set the Security Provider to be the UserDB from step 1
Set the permissions level for registration page, and userdb to permit all. This is essential since we want the new users to be able to access to the registration page and add their details to the database.
Redesign login page
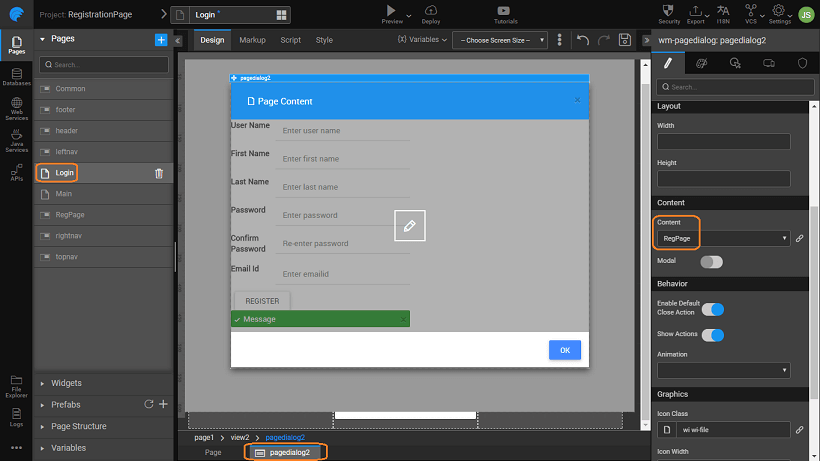
- Open the Login page by selecting it from the Pages Resources
- Add a pagedialog widget, with content as the registration partial page.
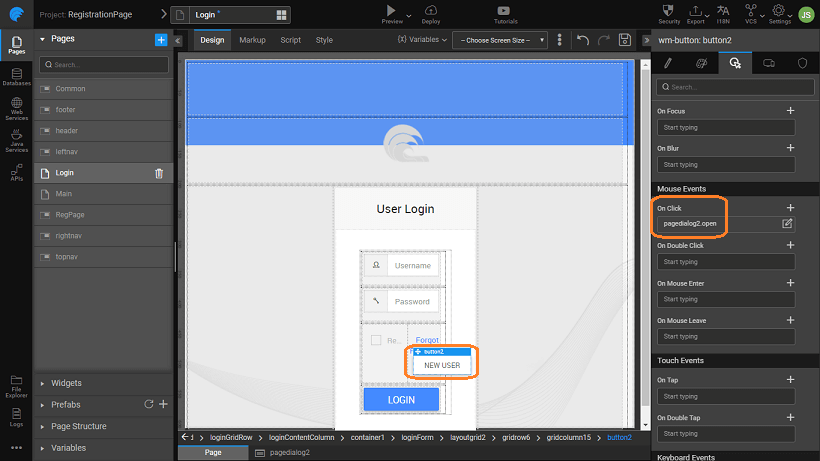
- Go back to the
login page(select the Page tab from the bottom). - Add New User button,
onClickevent should open the registration page dialog.
- Now when you run the application, you see the New User button on the
loginpage.

- Clicking on it will take you to the
New Registrationpage.
- Clicking on the Register button without entering the
user nameor withpasswordsnot matching in the two fields, will display anerror message. - Entering all required data and clicking Save button, displays a
success message.
Now you can login with the new credentials.
Password Encryption
To ensure that the password field is secure, it is advisable to store it in an encrypted format. For this, we will use an md5 code to encrypt the password entry before passing it onto the live variable for insert into the database table.
This method is useful for enforcing two-way encryption, that is, in addition to the SSL communication, you can encrypt the password before sending it to the backend. In case you want to use the one-way digest method of scrambling the encrypted value to produce a digest we suggest you follow the steps given in this document.
- Create a Java Service called MD5 Encryption.
- Add the following to the Java Service code. Here we are using an MD5 hashing algorithm to generate a checksum for the password field, refer here for more details. Ensure that the length of the password column in the database is greater than the length of the result from the encryption algorithm used, in this case, it should be greater than 32.
Imported files
Encrypt password
Use the following method to encrypt the password:
- Create a variable to invoke the Java Service created above
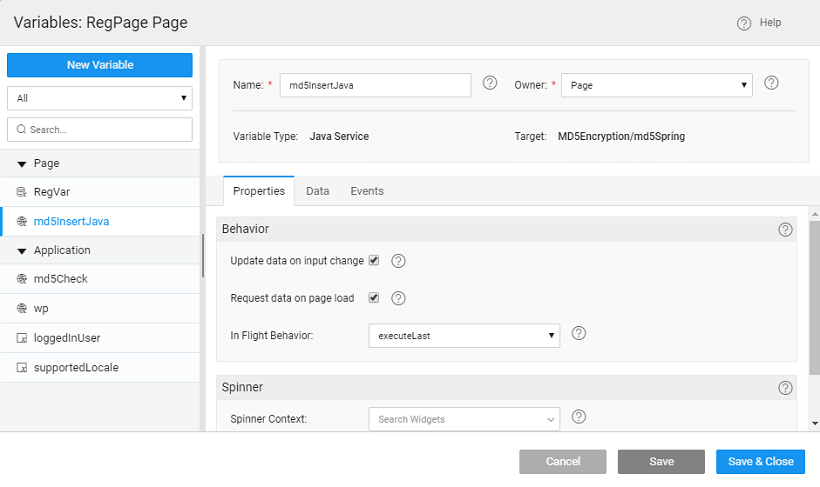
- Set the input data to the password widget of the registration page.
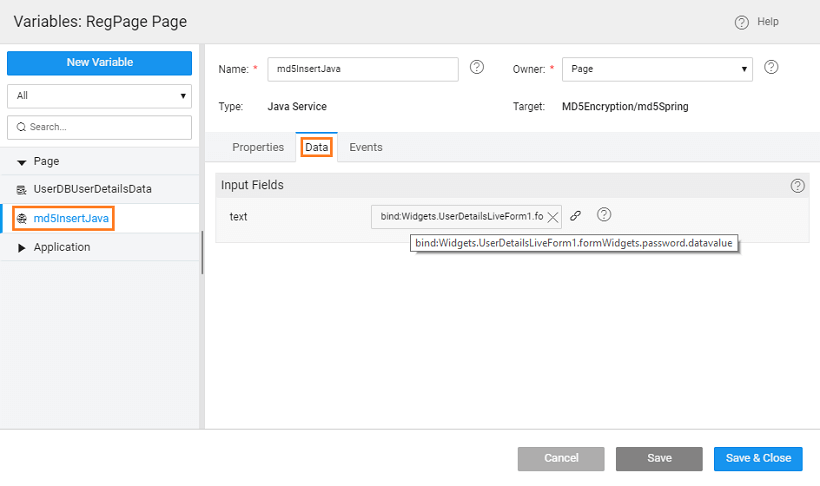
- The Password field needs to be replaced with the encrypted one returned from the above Java service. For this, we will be using the
Before Service Callevent of the Live Form, we are invoking the Java service variable and setting the password field to the value returned from the Java Service.
Ensure that in the Security dialog box, the Java Service created has PermitAll permission level.
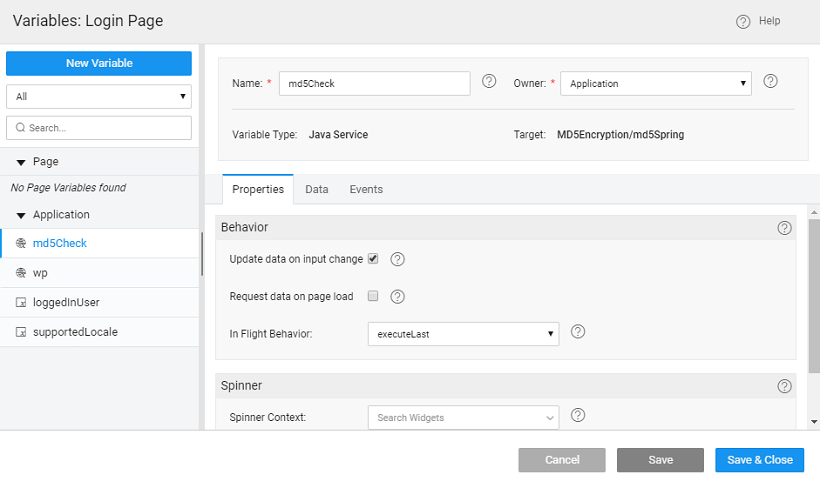
loginpage Set up
- Create a variable for the
Java Servicecreated,
- Bind the
input datato thepasswordwidget on the login page,
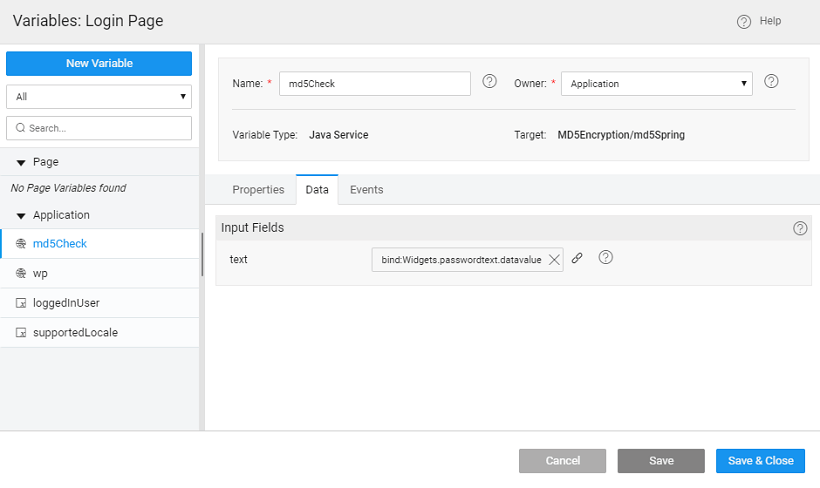
- Next, set the
LoginActiondata to the value returned by the above service variable.

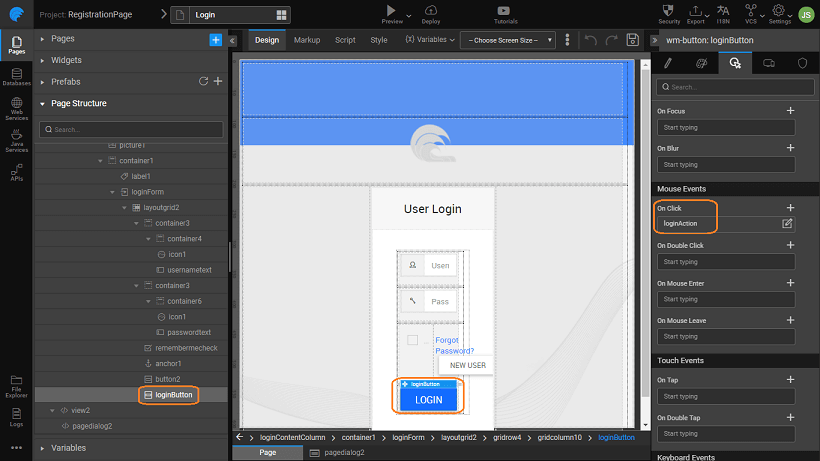
- Set the
onClickevent of the Sign In tologinAction. This will ensure that when any user logs in, the password is encrypted before checking it against the database by the login variable.
Your application will work as before. The only change would be the values stored in the database, now the password field will be encrypted.
