Navigation - Basic Usage
Steps to Create Navigation
In this post, we will walk through the steps to create a simple navigation, with icons and links to pages.
We will be using a Model Variable for the purpose of this example:
- Create or Open page where you want to use the Nav Widget.
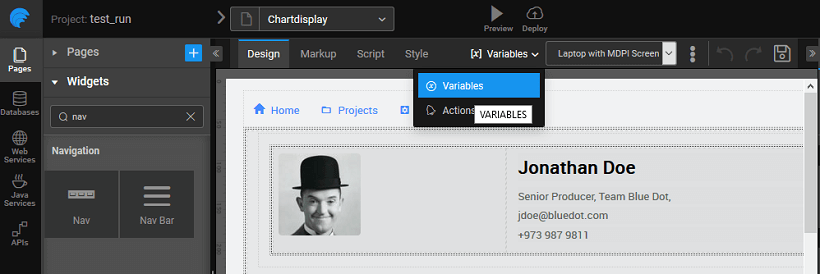
- Open the Variables dialog from the Variables menu and using New Variable create a Model variable (Know more about variables).
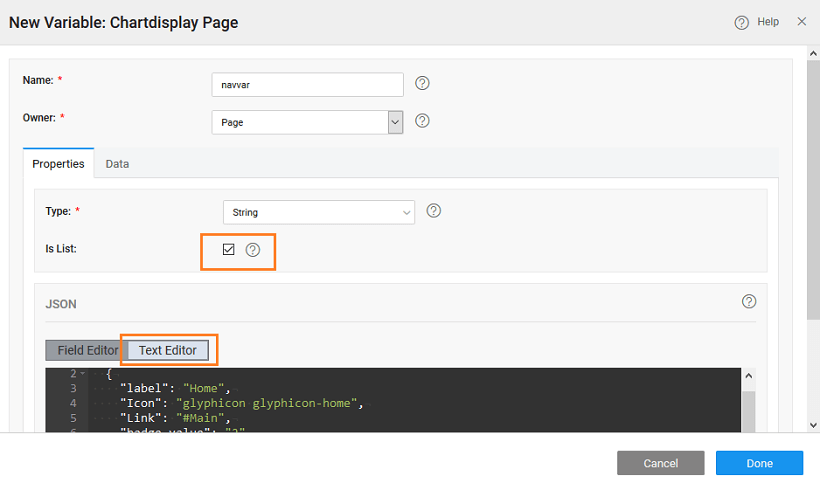
- Create a new Model Variable called as navvar and select isList.
- Add the following in the Text Editor, this defines the structure for Menu identifying Label, Icon, Link, Badge Value and sub-action. Icons can be halflings from glyphicons or font awesome icons.
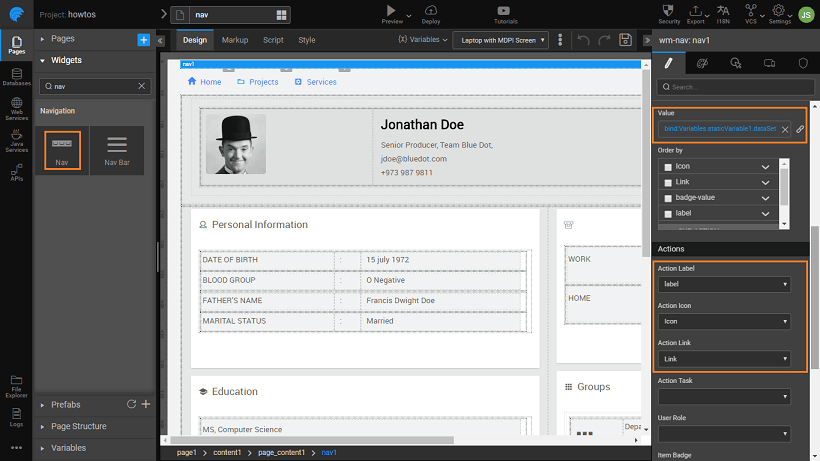
- Bind the Value property of the Menu widget to the variable created in the previous step.
- Set the
Action Label to label,
Action Icon to Icon,
Action Link to Link,
Item Badge to badge-value,
Sub Actions to sub-action.
If you need you can modify the JSON structure given for the Model Variable and do the appropriate settings.
- Run the application and see the menu in action.
Multilevel Nav
You can have multiple levels of nav-items. Follow the steps from the above example, replace the Variable JSON with the below code:
You will get the following nav.


