Preparing Infrastructure on AWS
Prerequisites
- AWS (Amazon Web Service) account with access to launch instances and to create security groups.
- For information on creating infrastructure in AWS, see AWS documentation for creating EC2 Linux instance.
- Users need IAM (Identity and Access Management) policies and user permissions to view and work to create and manage Amazon EC2 (Amazon Elastic Compute Cloud) instances and security groups in a specified VPC (Virtual Private Cloud) resource in the Amazon EC2 console.
- For IAM permissions and details, see AWS IAM policies.
Creating Security Groups
- For creating security group, you need VPC. If you don't have a VPC and want to create one, to learn more about it, see AWS documentation for creating VPC.
- For creating security groups, see AWS documentation for creating security groups.
- For WME setup, it requires you to have three security groups in AWS EC2. Those are,
- Open the Amazon VPC console VPC console amazon. Or, under Networking & Content Delivery, select Networking & Content Delivery, and choose VPC.
- In the navigation pane, choose Security Groups, and then select Create Security Group.
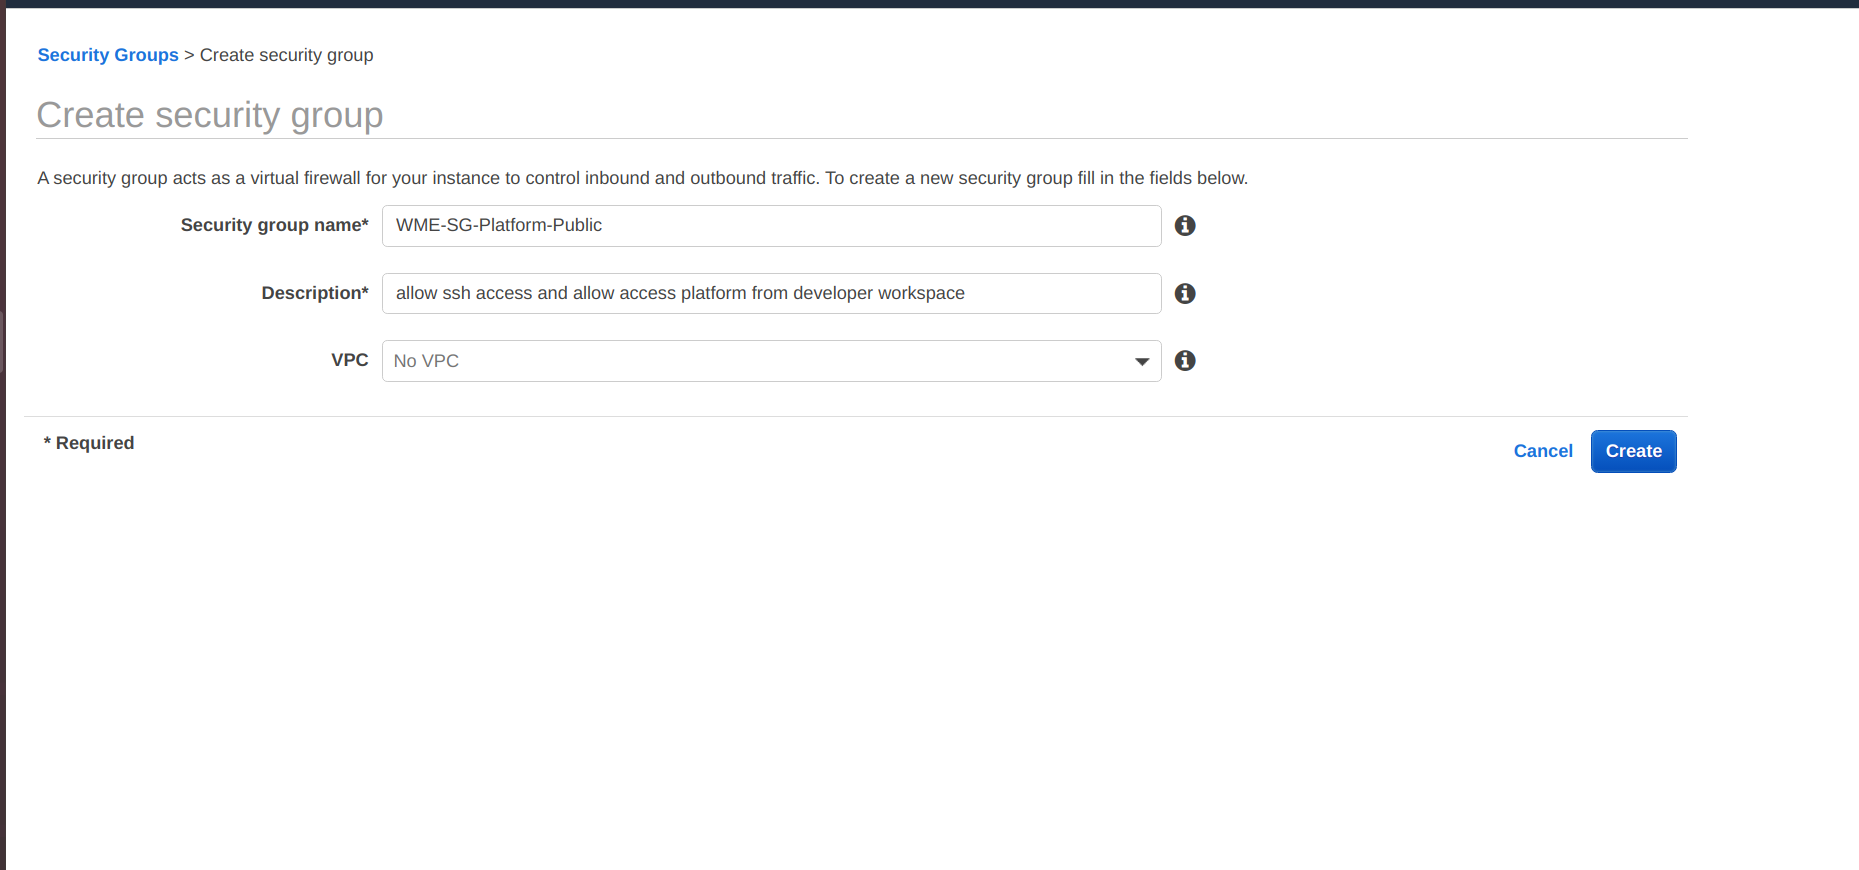
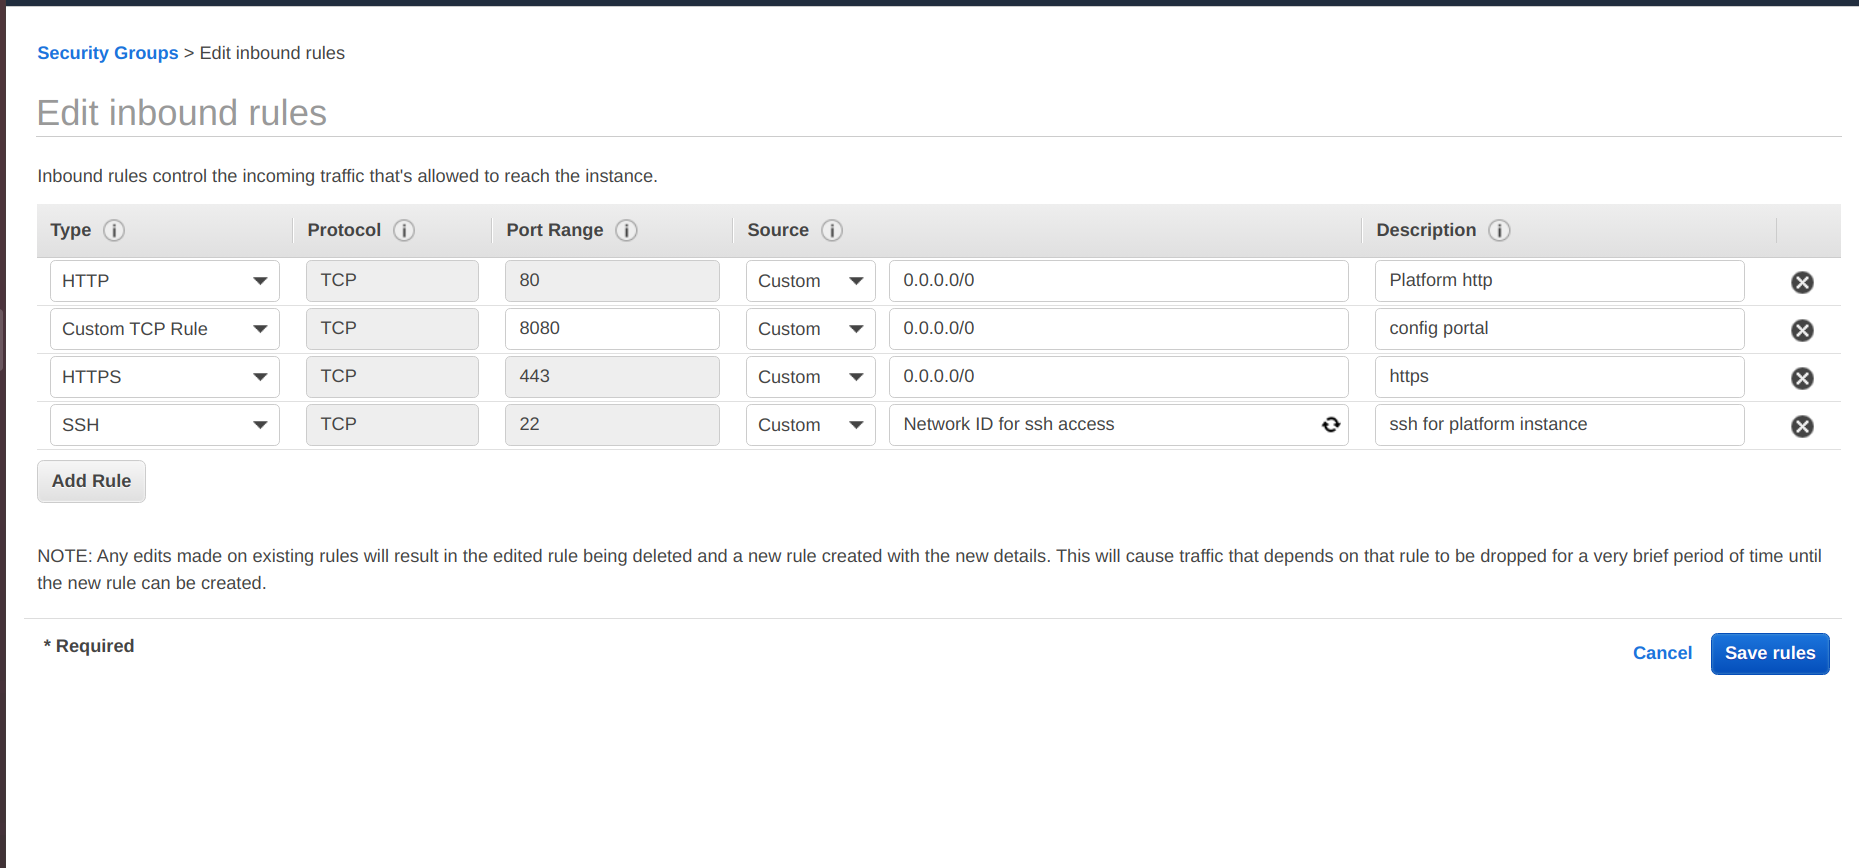
Creation of WME-SG-Platform-Public Security Group
- Provide necessary details for creating the security group and select your desired VPC.
- Select inbound rules and edit rules for developer network access. You can specify your developer network range in the source.
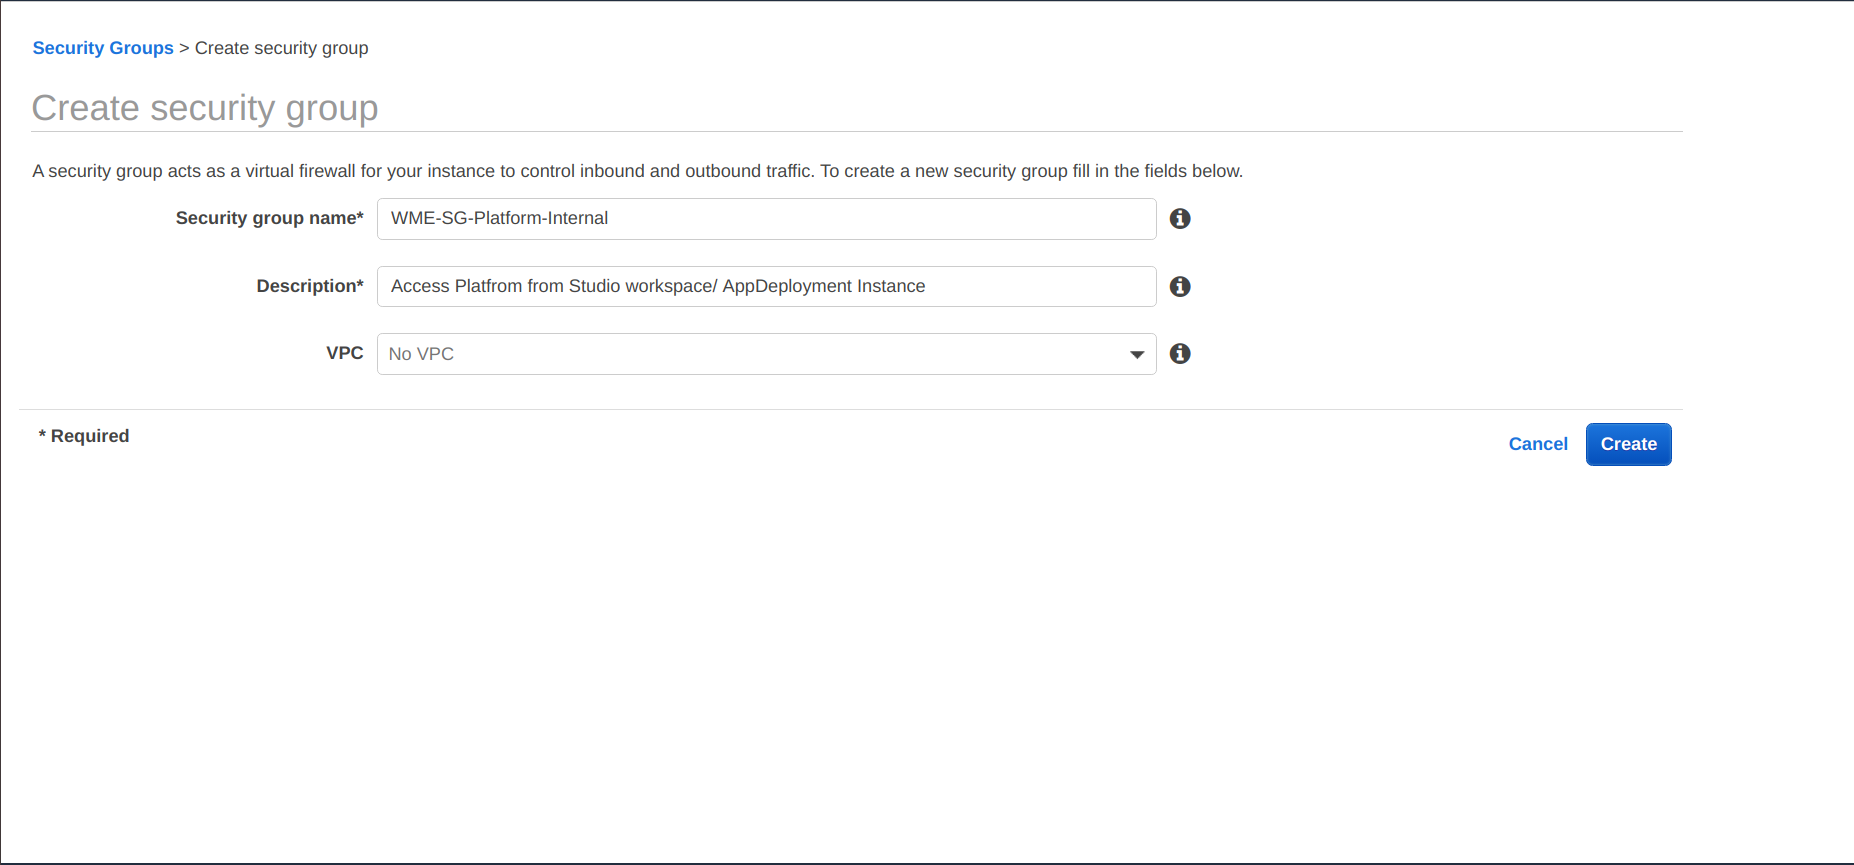
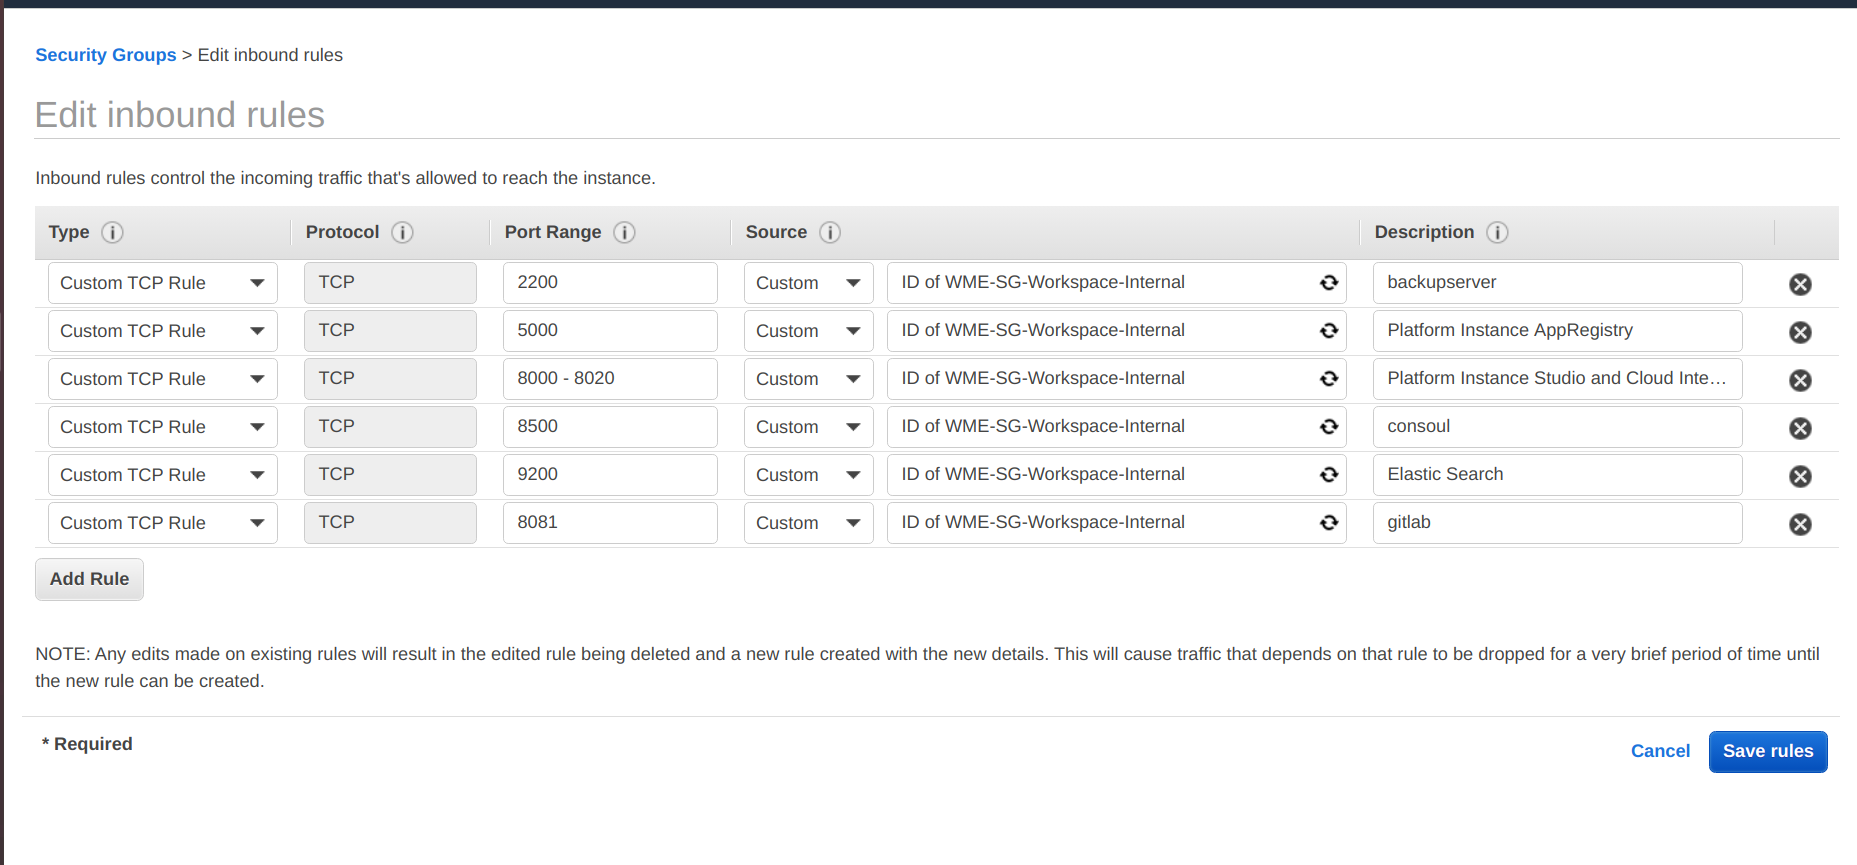
Creating WME-SG-Platform-Internal Security Group
- Provide essential details for creating the security group and select the previously selected VPC.
- Select inbound rules and edit rules to access from the StudioWorkspace Instance / AppDeployment Instance. At the source field, provide WME-SG-Workspace-Internal security group ID.
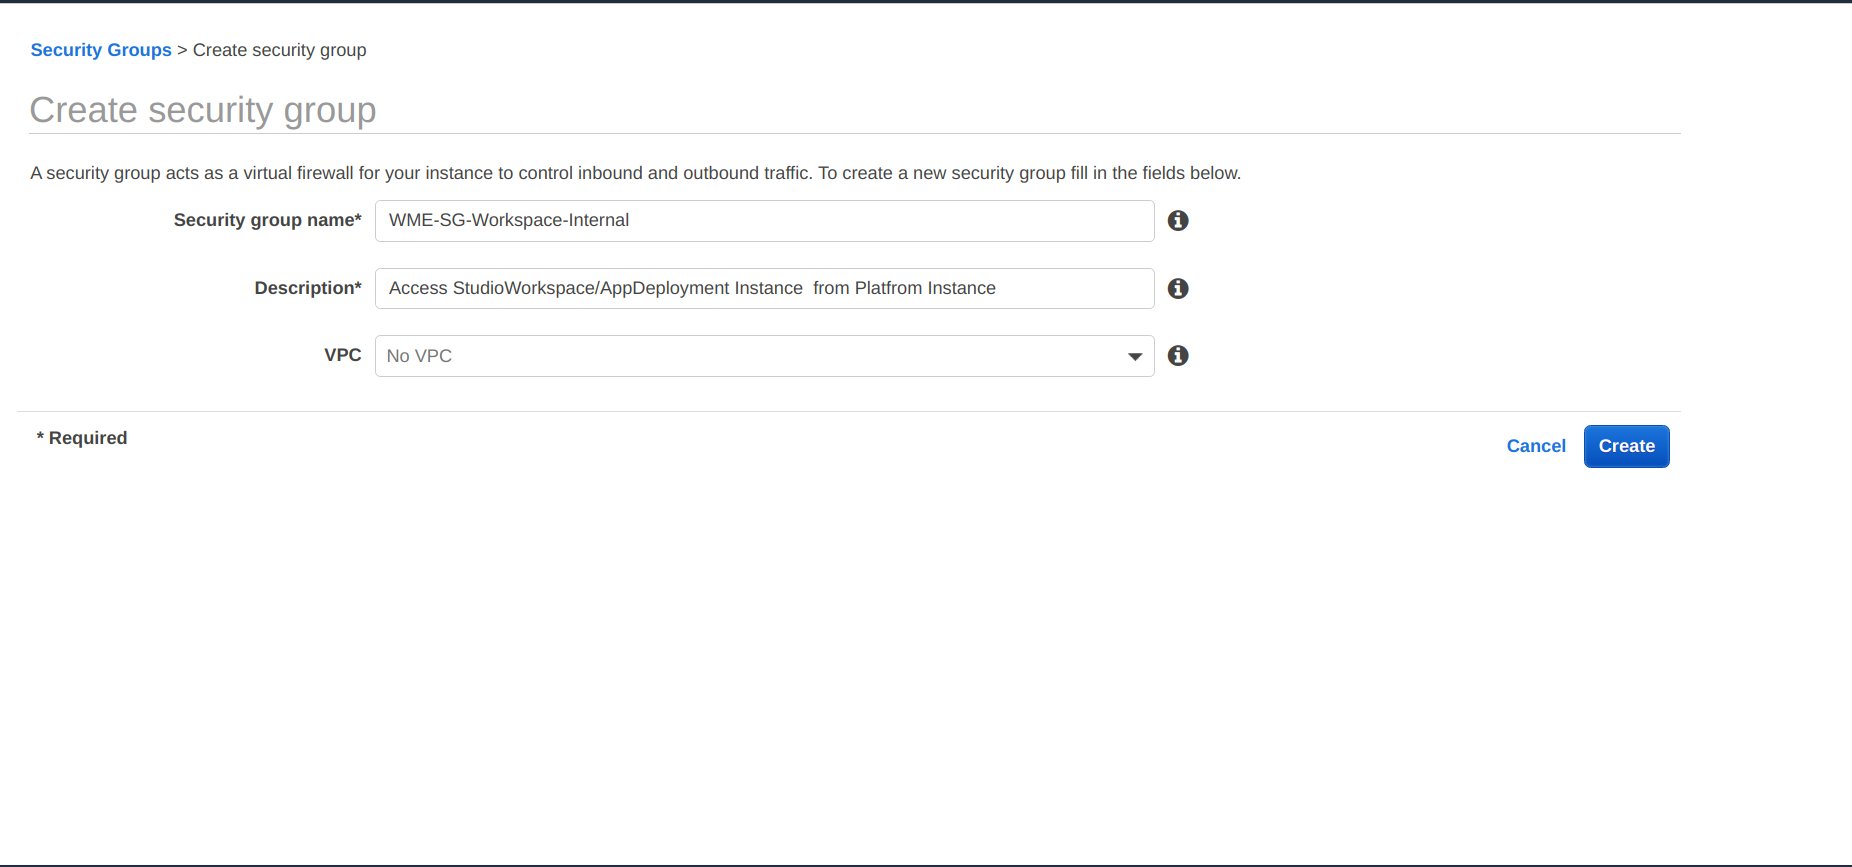
Creating WME-SG-Workspace-Internal Security Group
- Provide essential details for creating the security group and select the previously selected VPC.
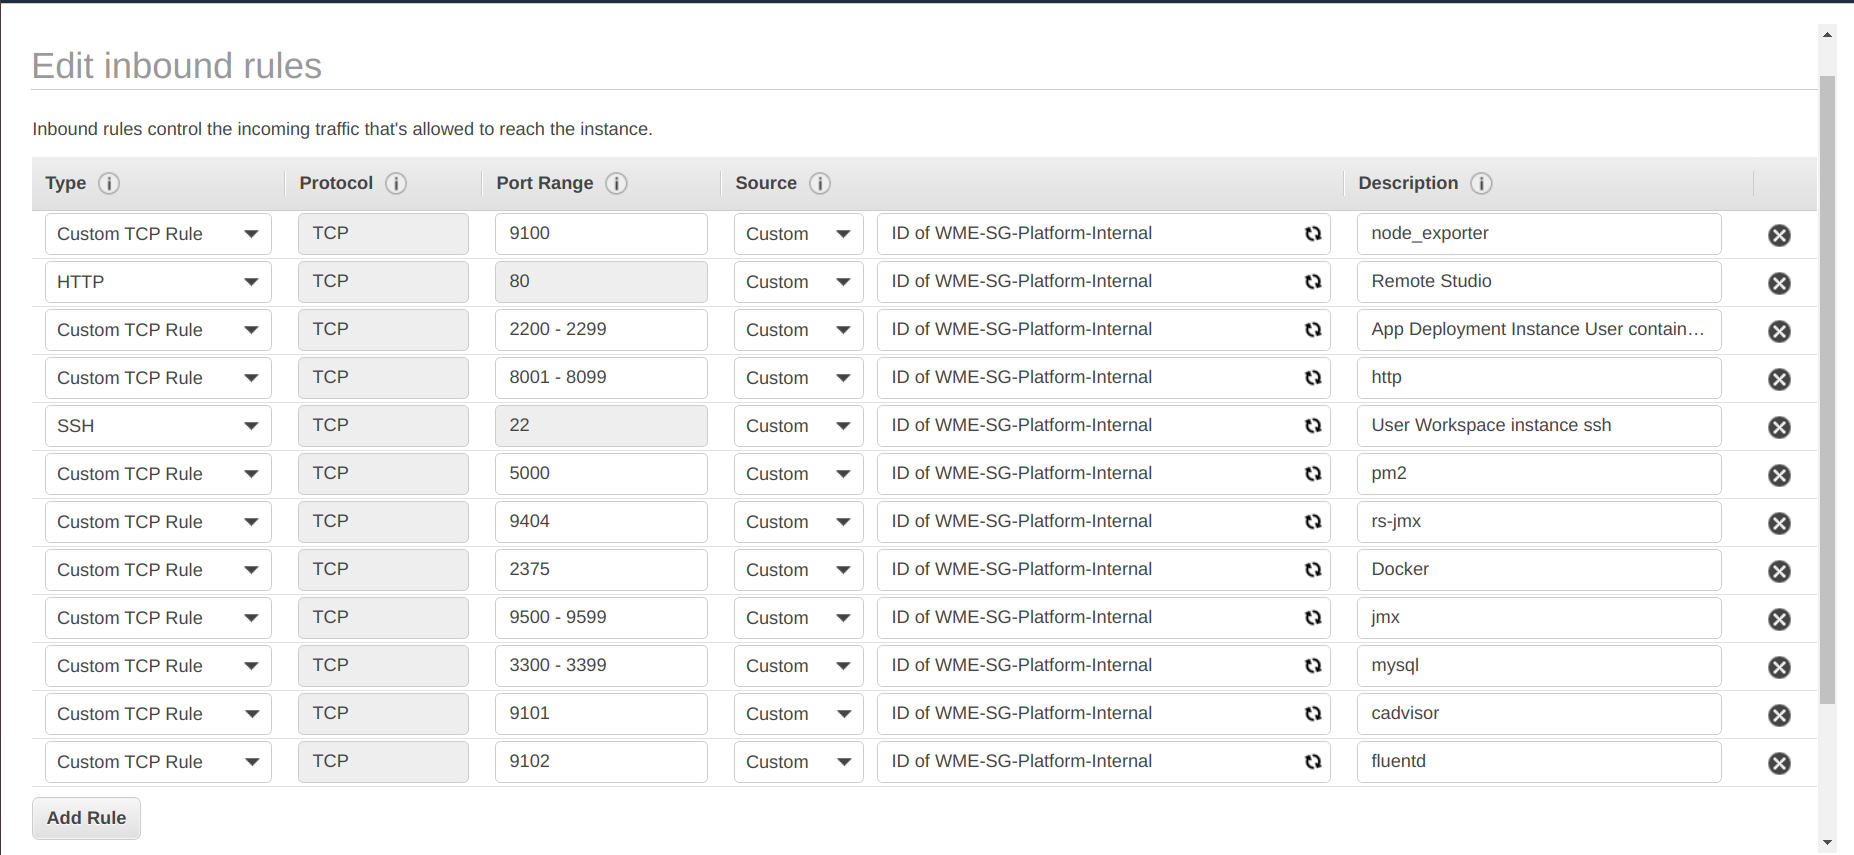
- Select inbound rules and edit rules to access from the Platform Instance. At the source field, provide WME-SG-Platform-Internal security group ID.
Launch Platform Instance
- Open the Amazon EC2 console at https://console.aws.amazon.com/ec2/.
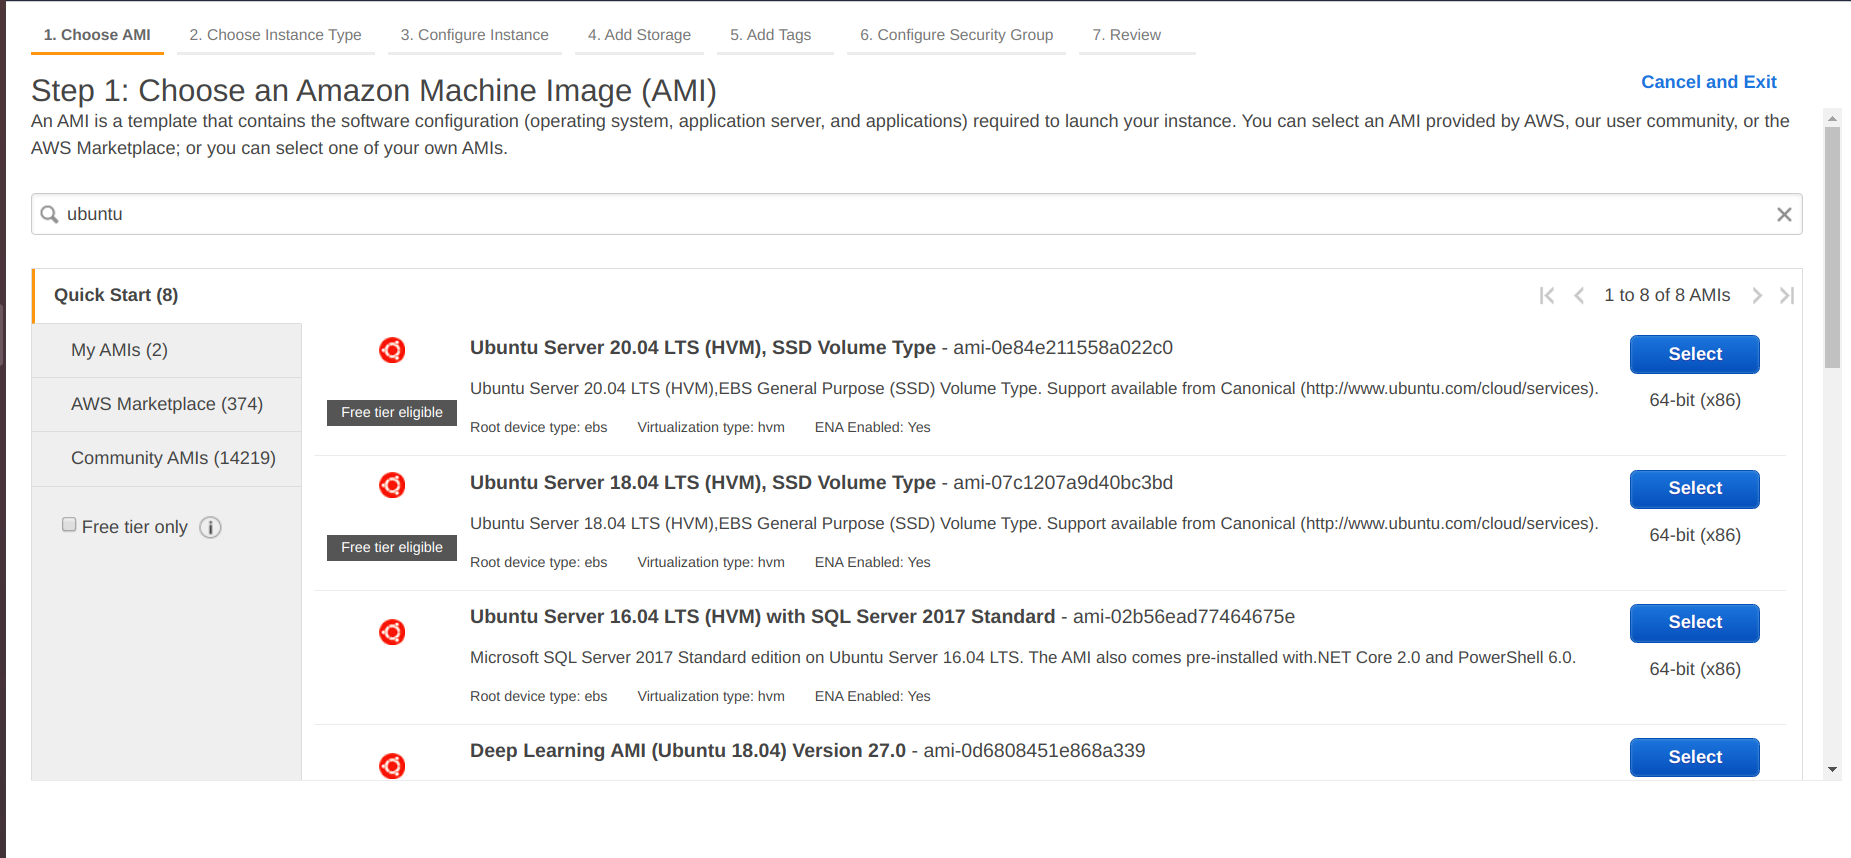
- Choose Launch Instance, choose an ubuntu 16.04 Amazon Machine Image (AMI), or if you have any ubuntu 16.04 AMI, select it.
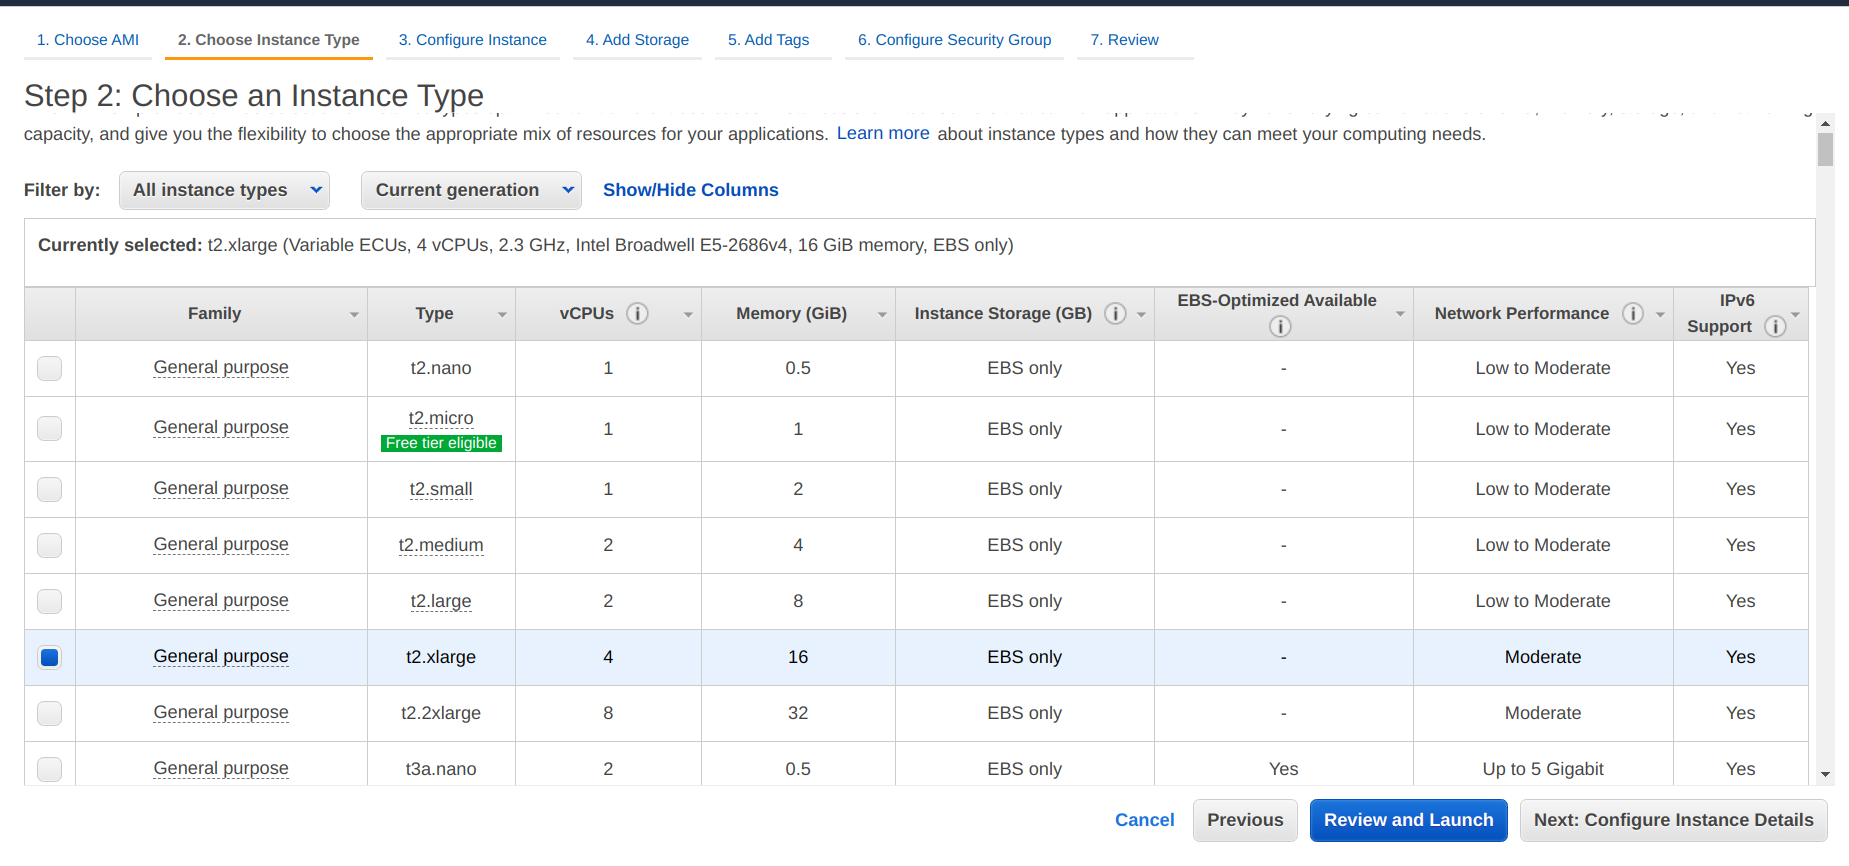
- Choose 16 GiB memory instance types from desired family and type.
- Choose Next:
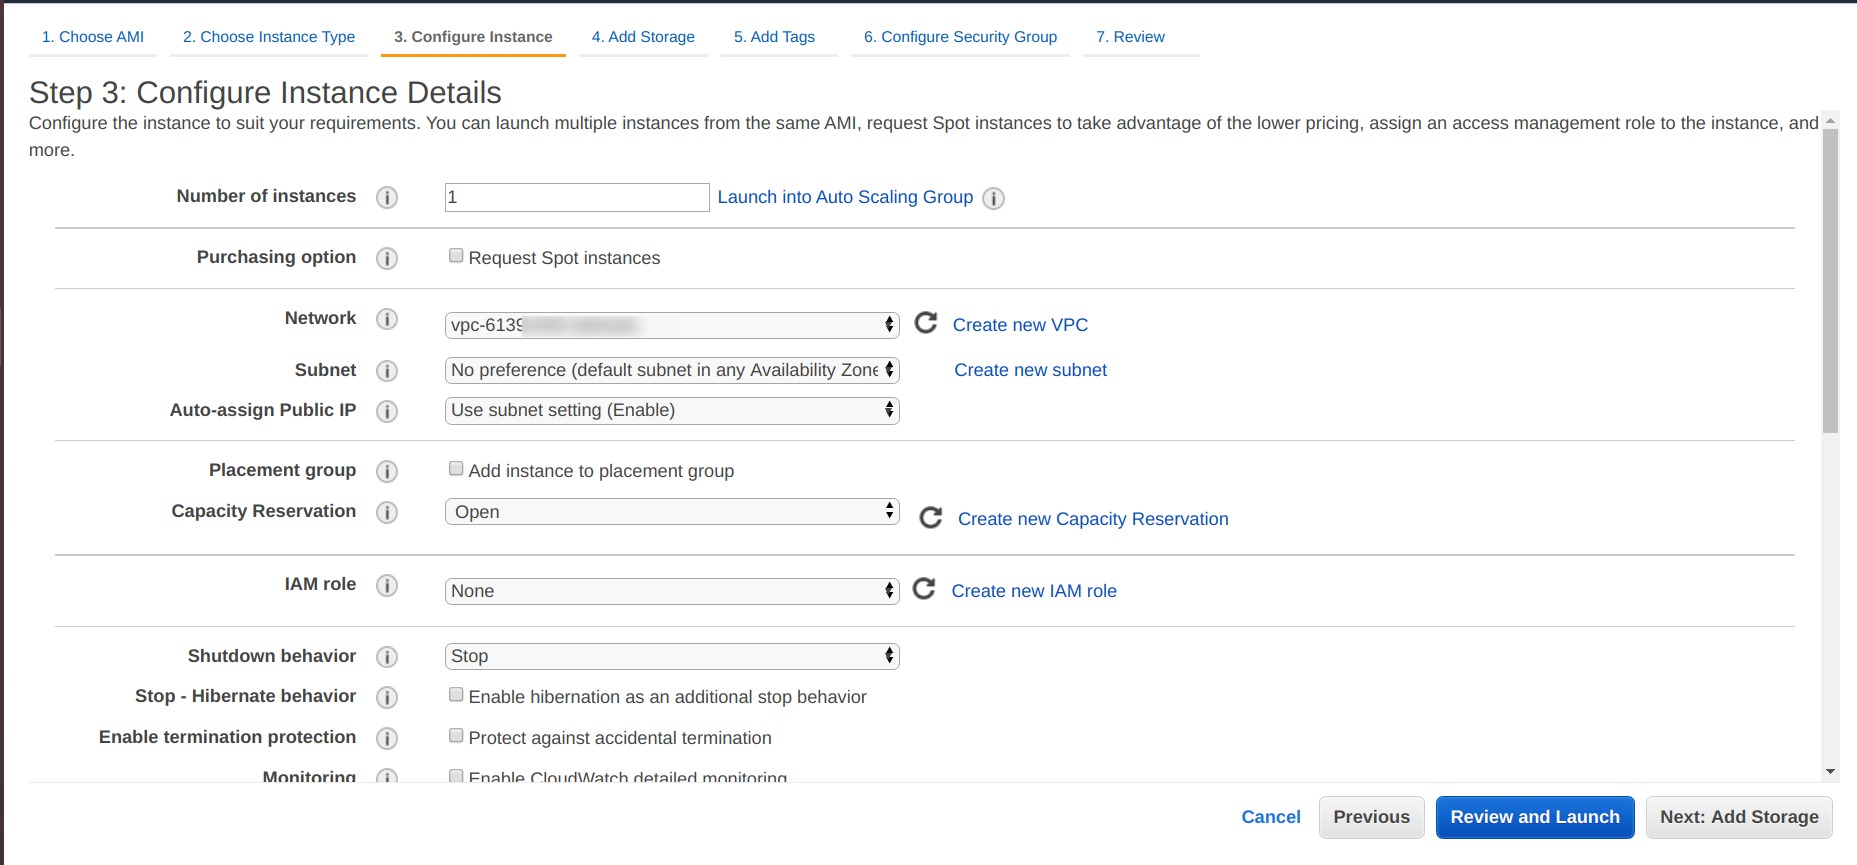
- Configure Instance Details.
- For Network, choose the same VPC that you created for security groups.
- For Subnet, select the desired Subnet in any Availability Zone.
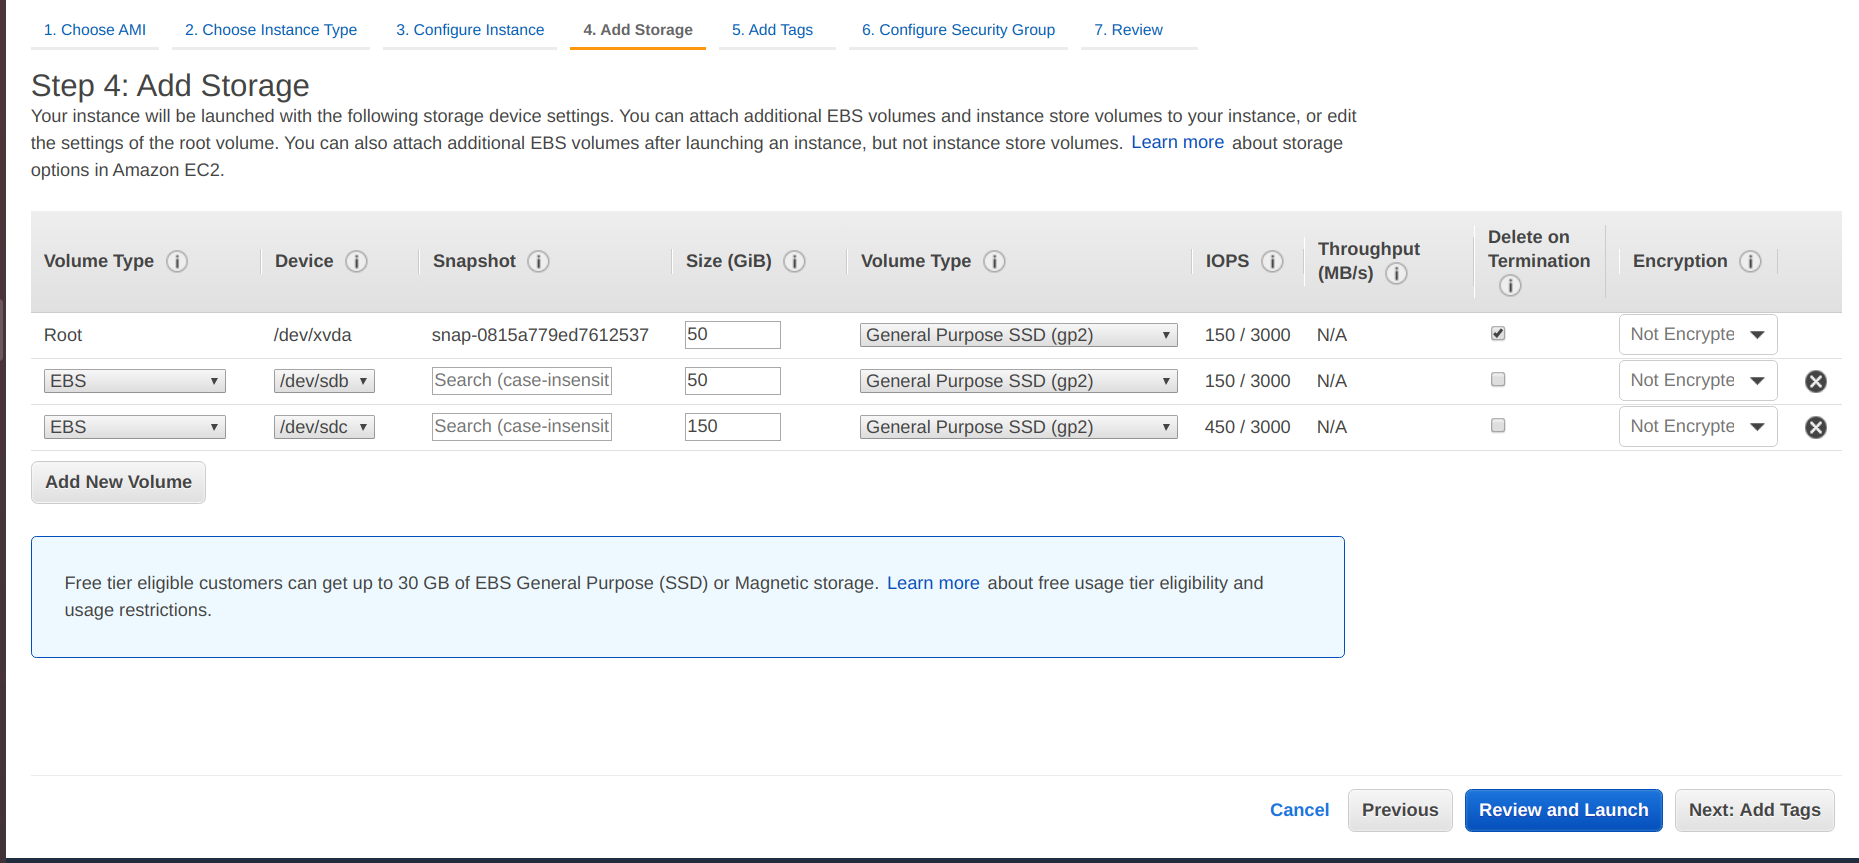
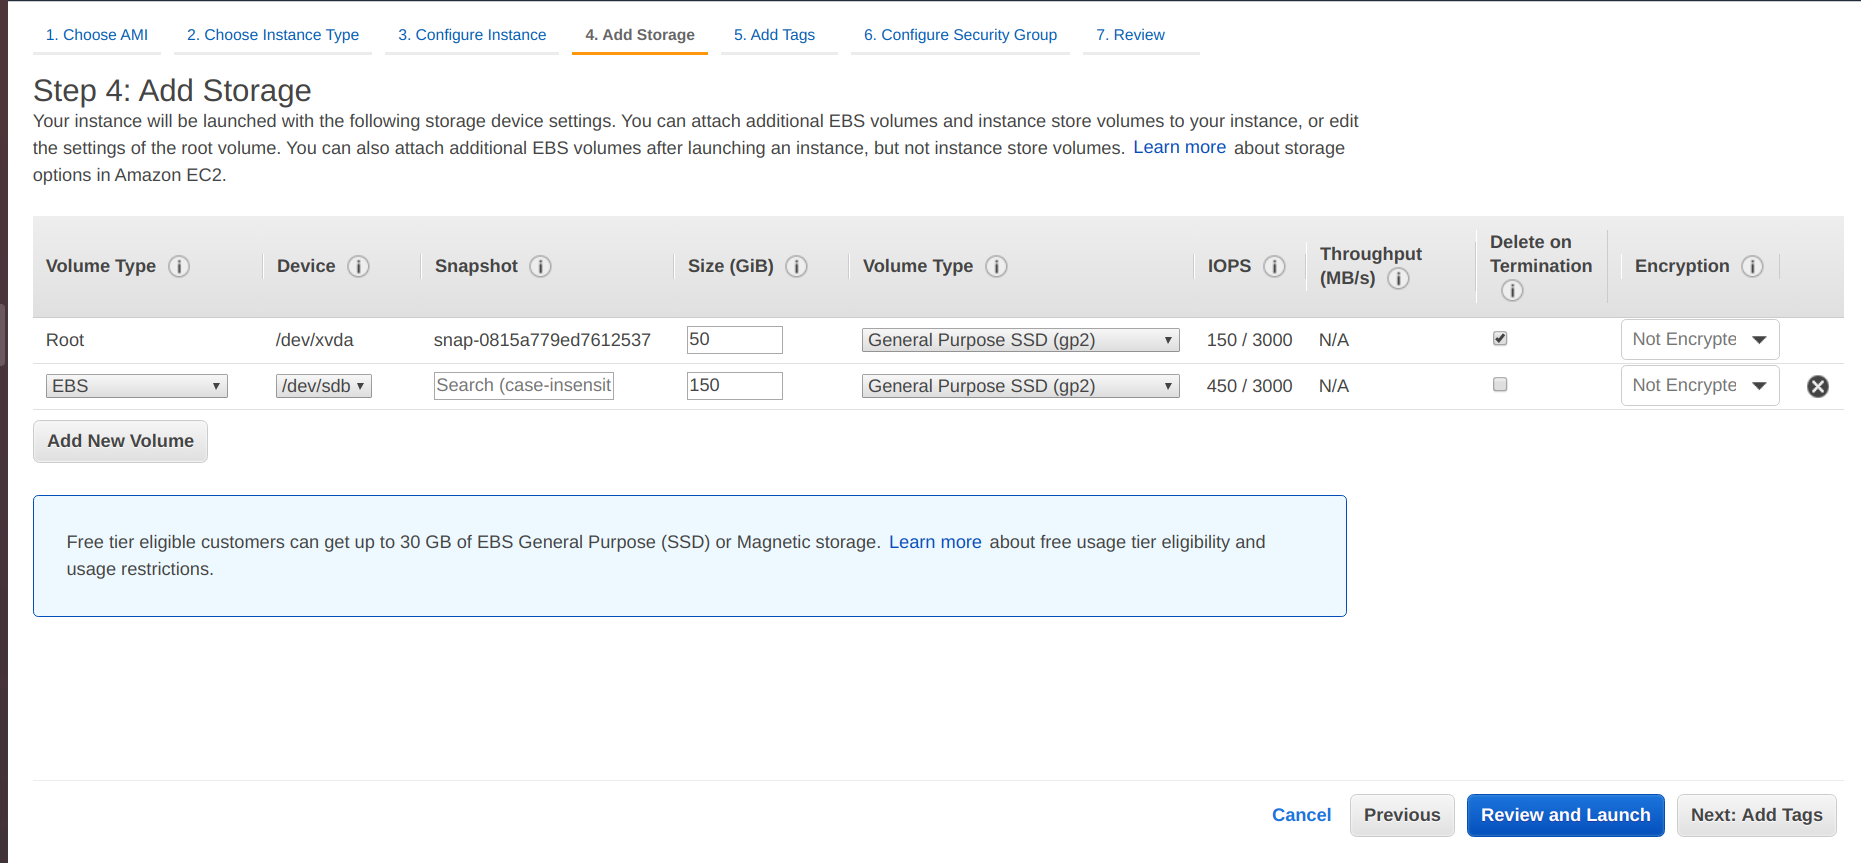
- Add storage 50 GiB for the root volume.
- 50 GiB for wm-runtime
- 150 GiB for wm-data.
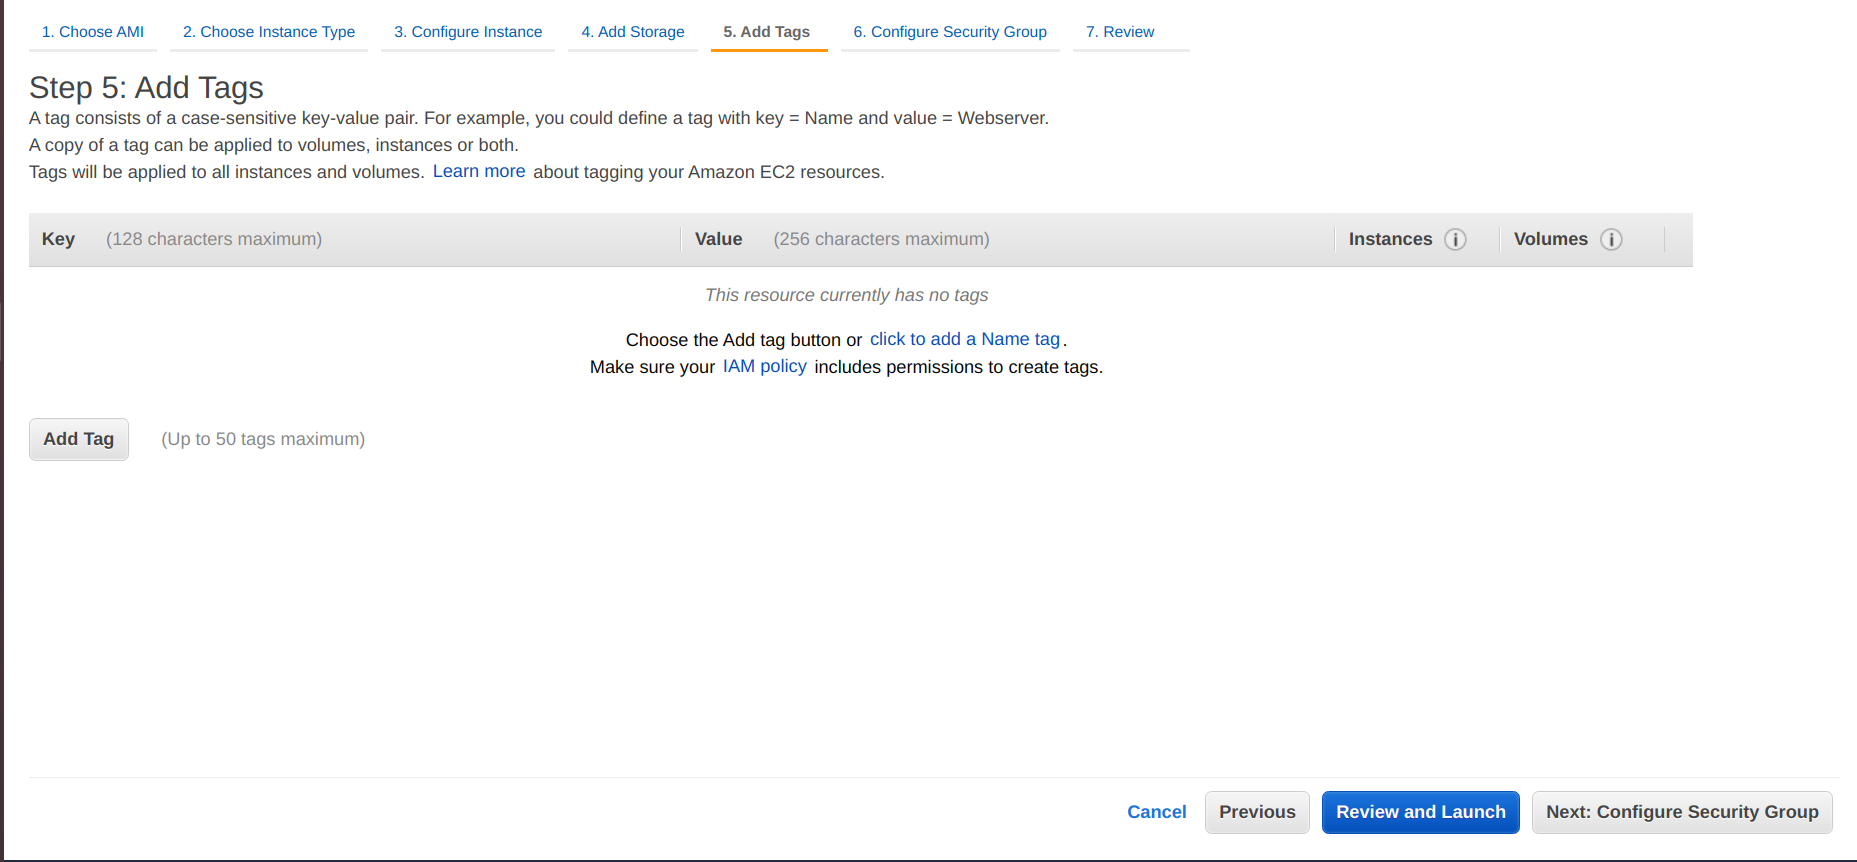
- If you want to add any tags, add tags to the instance.
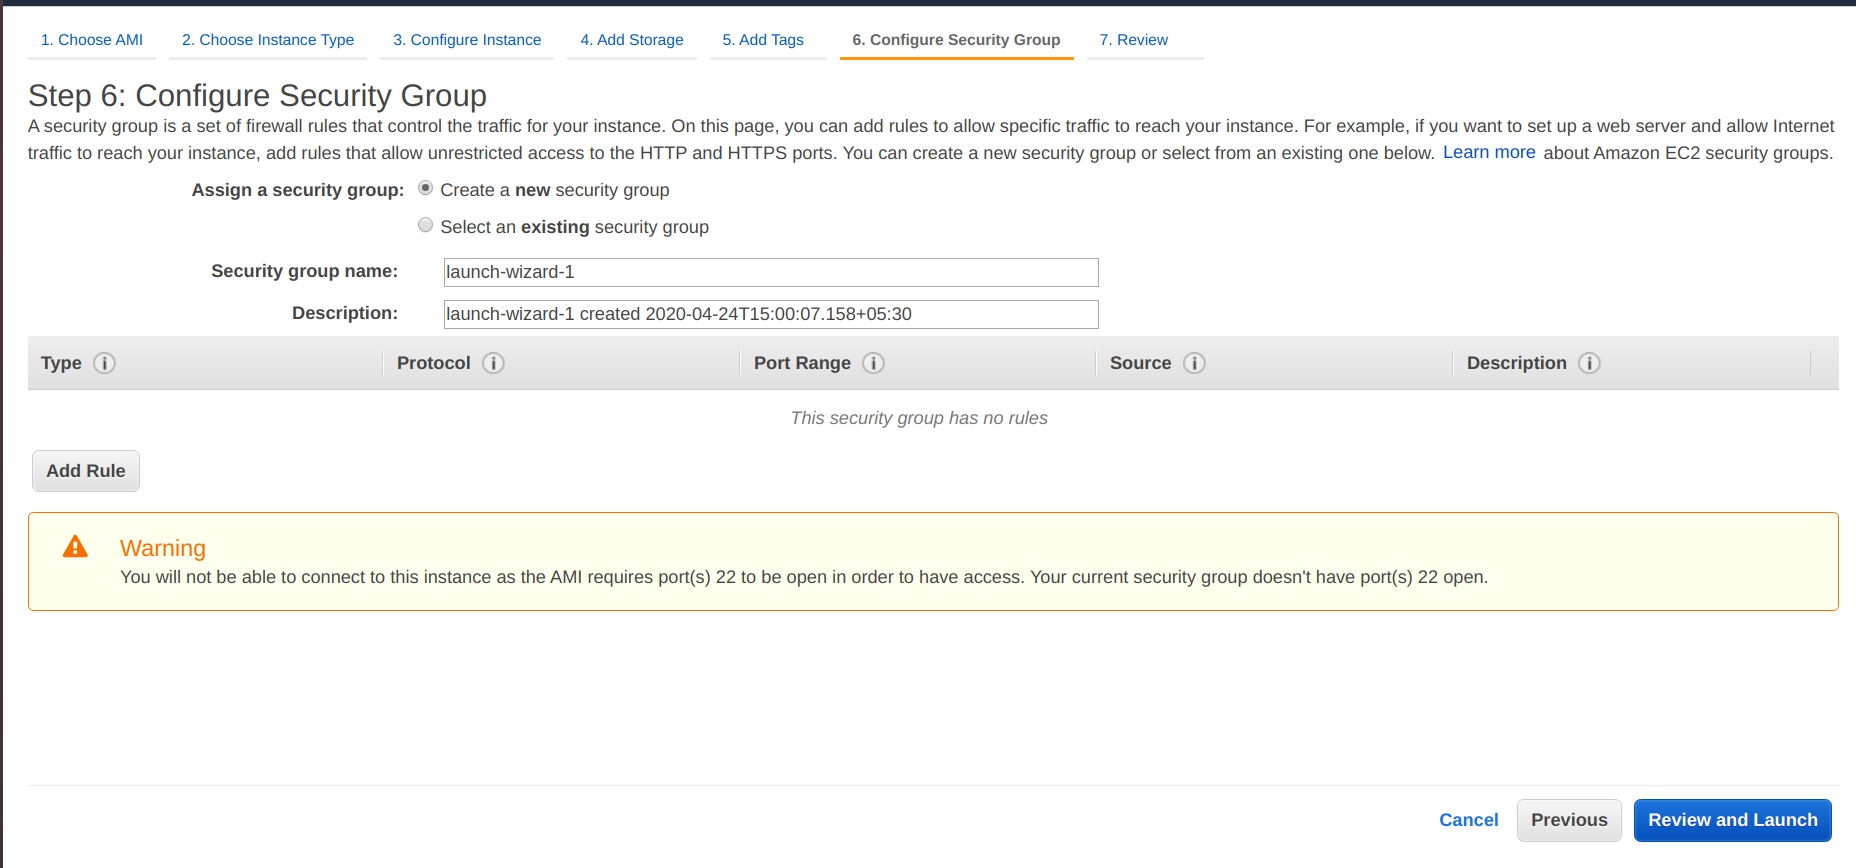
- To Configure Security Group:
- Select an existing security group.
- Select WME-SG-Platform-Internal.
- After creating the instance, select instance.
- At actions, the open networking section.
- Choose change security groups.
- Add security group WME-SG-Platform-Public.
- Next, review your instance details and launch the instance.
Launch Studio Workspace Instance / AppDeployment Instance
- Open the Amazon EC2 console at https://console.aws.amazon.com/ec2/.
- Choose Launch Instance, choose an ubuntu 16.04 Amazon Machine Image (AMI), or if you have any ubuntu 16.04 AMI, select it.
- Choose 16 GiB memory instance types from desired family and type.
- Choose Next:
- Configure Instance Details.
- For Network, choose the same VPC that you created for security groups.
- For Subnet, select the desired Subnet in any Availability Zone.
- Add storage 150 GiB for data.
- Next, if you want to add any tags, add tags to the instance.
- Next, Configure the Security Group. Select the existing security group, and select the WME-SG-Workspace-Internal security group.
- Next, review your instance details and launch the instance.
Mounting storage volumes in EC2 Instances
Mounting storage in Platform Instance
- Login into the EC2 instance. For logging into the EC2 instance, open the terminal, use the below example command.
note
Accesskey will generate during the creation of the instance. You have to select an existing .pem file or create a new .pem file for accessing the EC2 instance.
For mounting the storage, refer mounting storage volumes in AWS.
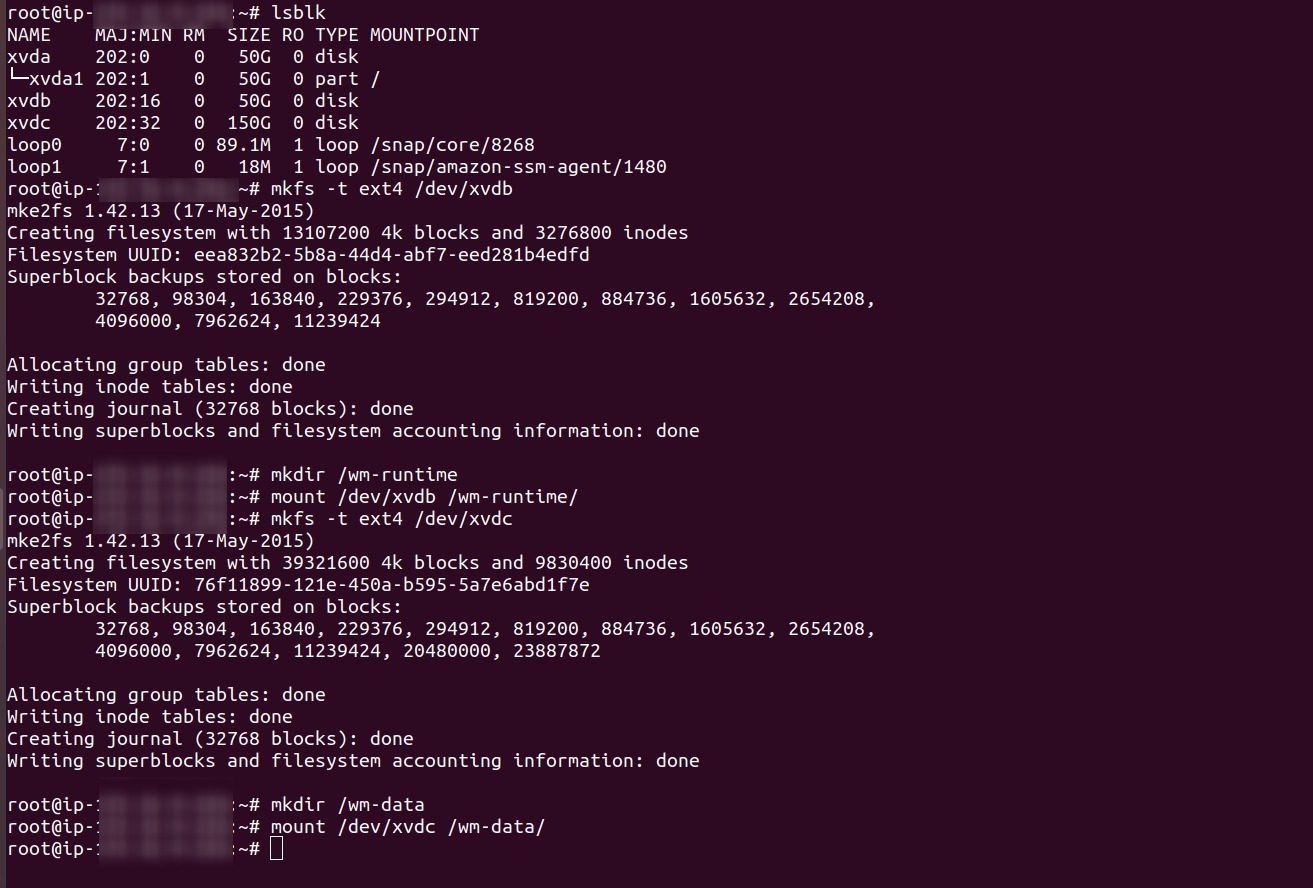
Check your list of block devices available by using the following command.
- New volumes are raw block devices, and you must create a file system on them before you can mount and use them. For creating file systems, use the following command.
- Use the
mkdircommand to create a mount point directory for the volume. The mount point is where the volume is located in the file system tree and where you read and write files after you mount the volume. For WME-Setup, create two directories using the following commands.
- Use the following command to mount the volume at the directory.
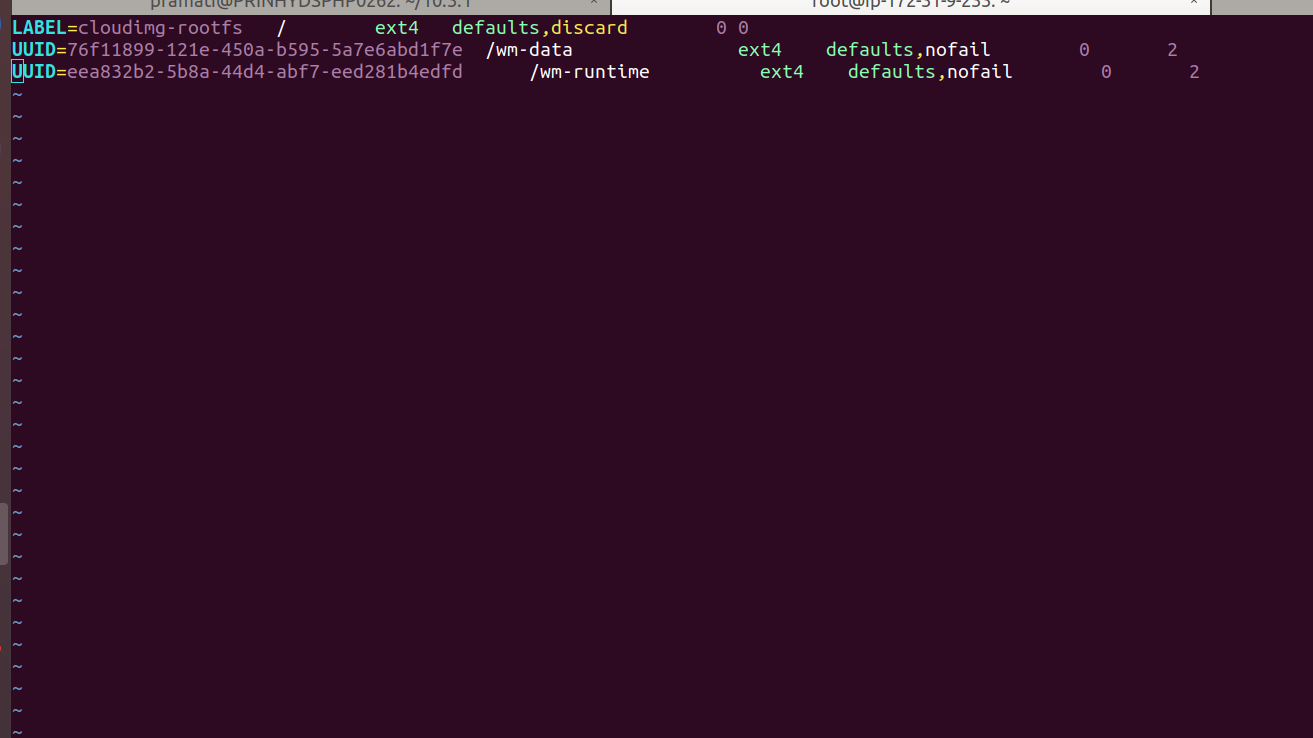
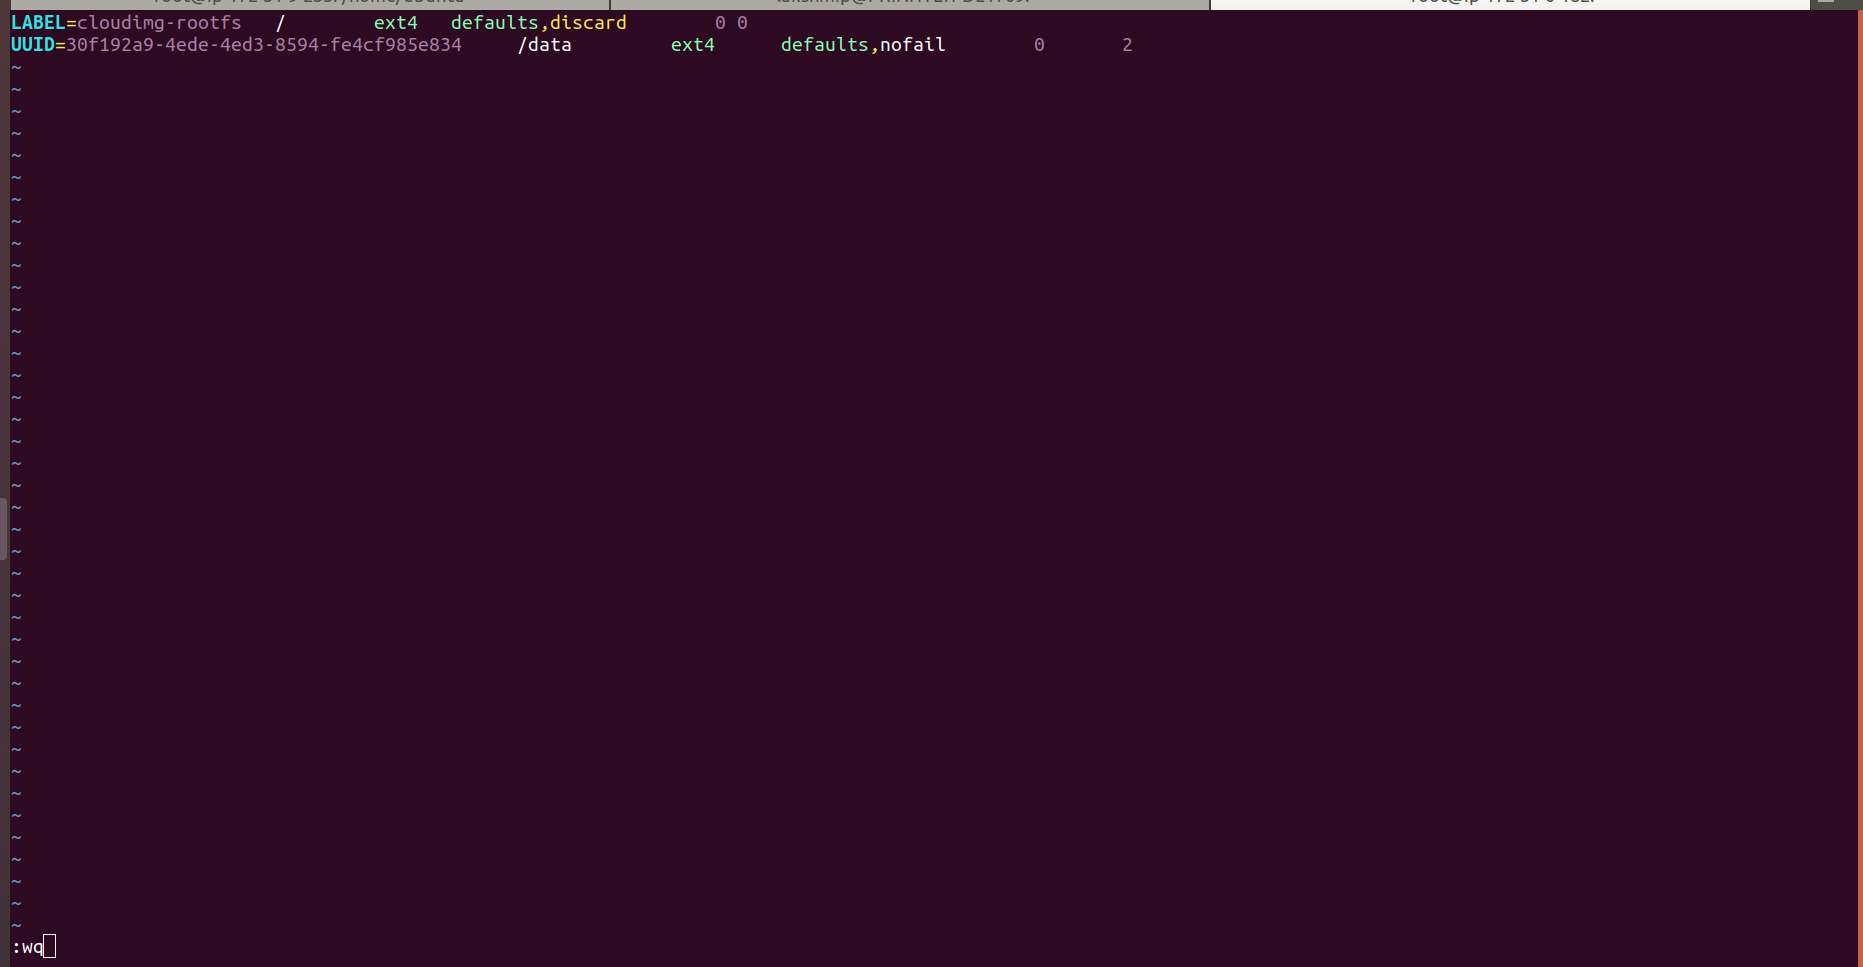
- To mount an attached EBS (Elastic Block Store) volume on every system reboot, add an entry for the device to the /etc/fstab file.
- Take UUID of disks for identification by using the following command.
- To entry the UUID of the disks in .fstab, use the following format.
Mounting storage StudioWorkspace Instance / AppDeployment Instance
note
Applies for StudioWorkspace Instance/AppDeployment Instance
- Login into EC2 instance. For logging into EC2 instance, open the terminal, use the below example command.
note
Accesskey will generate during the creation of the instance. You have to select an existing pem file or create a new pem file for accessing the ec2 instance.
For mounting the storage, refer mounting storage volumes in AWS.
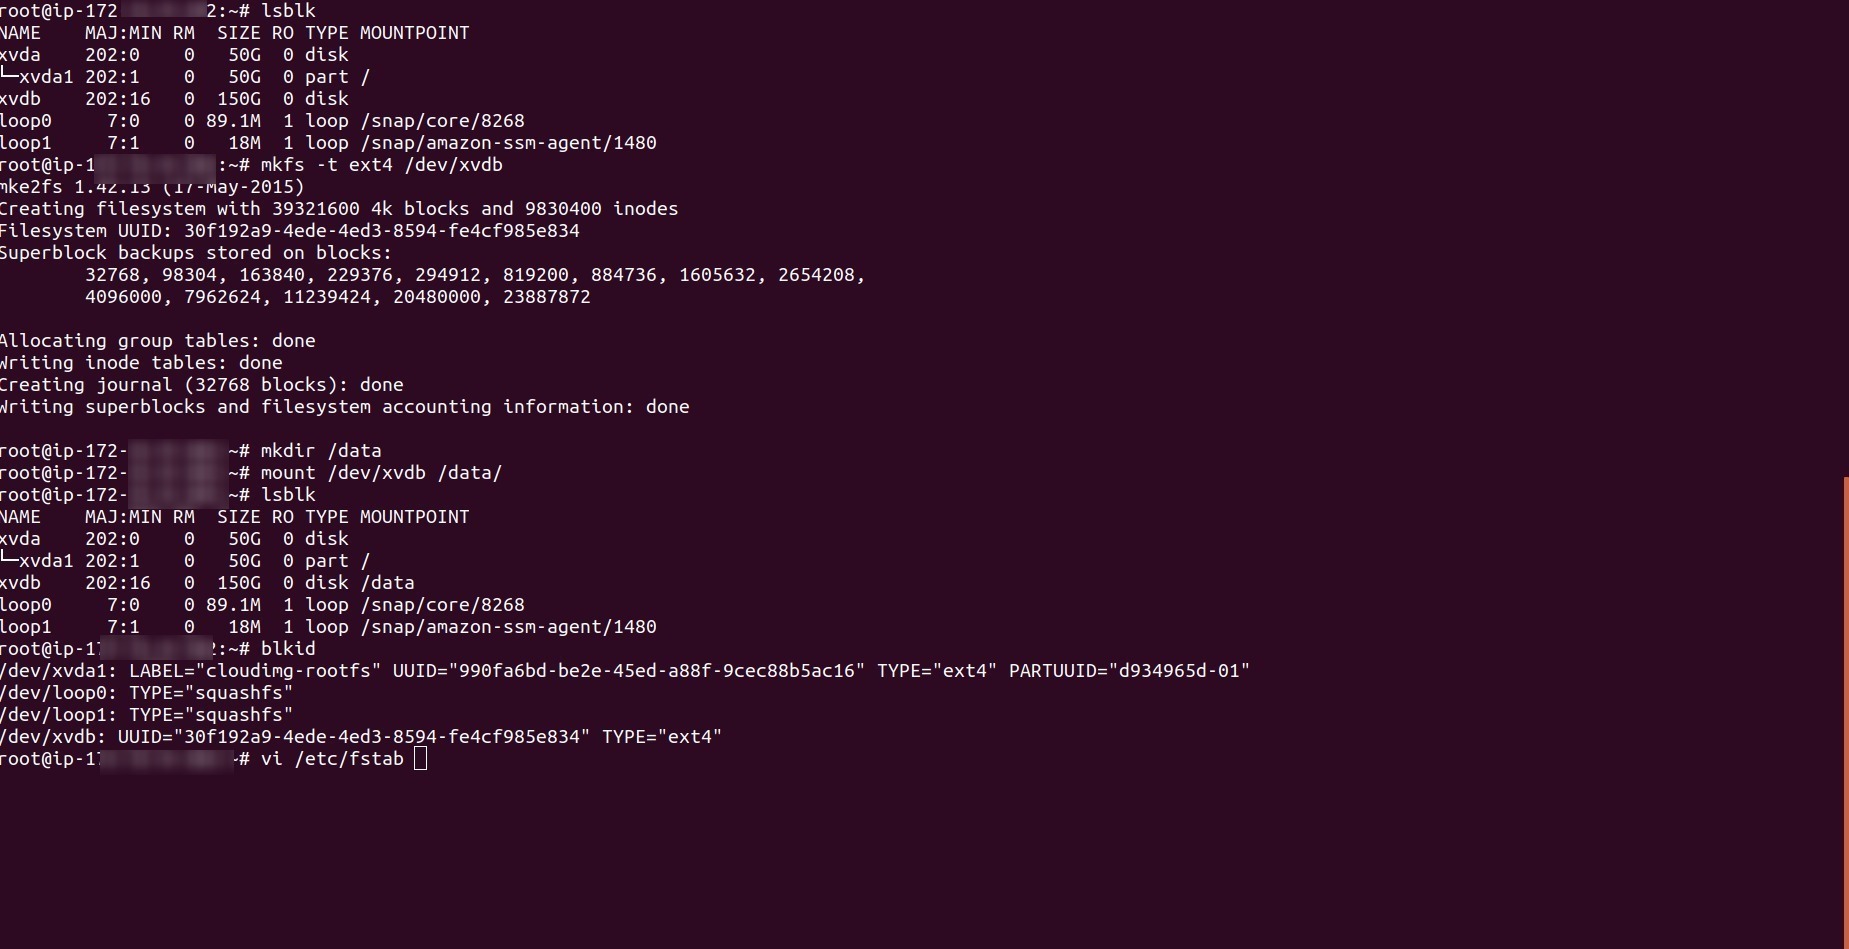
Check your list of block devices available by using the following command.
- New volumes are raw block devices, and you must create a file system on them before you can mount and use them. For creating file systems, use following command.
- Use the
mkdircommand to create a mount point directory for the volume. The mount point is where the volume is located in the file system tree and where you read and write files after you mount the volume. For WME-Setup, create two directories using the following commands.
- Use the following command to mount the volume at the directory.
- To mount an attached EBS volume on every system reboot, add an entry for the device to the /etc/fstab file.
- Take UUID of disks for identification by using the following command.
- To enter the UUID of the disks in .fstab, use the following format.
What's next
- Install prerequisites softwares based on OS.
- Start WME Installation process.
