Configuring for Google Cloud Deployment
WaveMaker allows you to deploy your app to your Google Cloud account for Live (and Stage for WME users) phase. Know more about App Phases from here.
To deploy your app to Google Cloud account, you need to configure the Live (Stage) phase.
This document covers the Live Phase configuration for your AWS account and is a part of the Manage Deployed Apps.
Prerequisites
You are expected to have a Google Cloud Account.
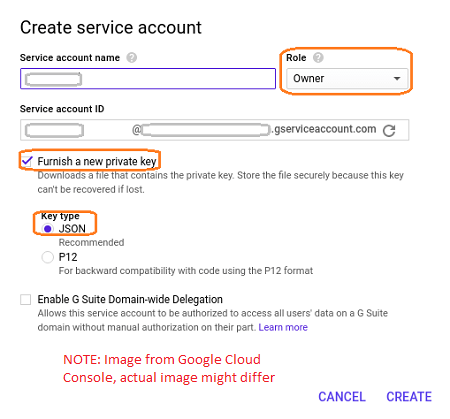
You need to create a Service Account with the following settings:
Role set to Project Owner i.e. full access to all resources,
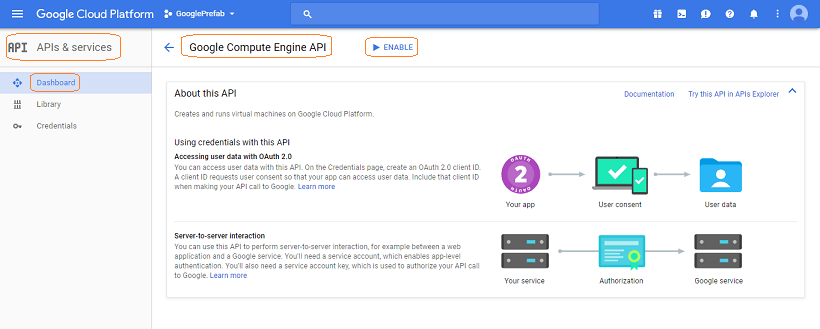
From the API Dashboard ensure that the following APIs are Enabled:
Google Compute Engine API and
Google Cloud Resource Manager API
(following shows the screen from the Google Developer Console dialog. This dialog might differ from the actual one)

A downloaded file containing Private Key in JSON format (following shows the setting from the Google Create Service Account dialog. This dialog might differ from the actual one)

Steps in Configuring Google Cloud
- From Apps Portal, select the project.
- Click Configure on the Live Phase option.
- While configuring the Live phase choose to host your app on Google Cloud
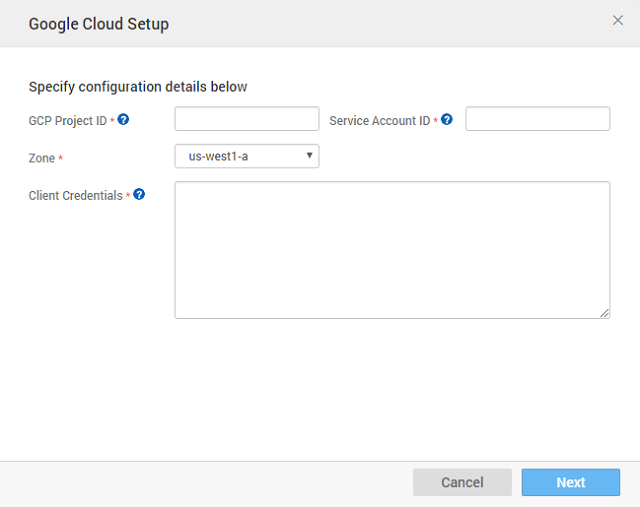
- Enter your Google Cloud account credentials to proceed with the configuration.
 You need to enter
- Google Project Id: It is the project created by you on Google Cloud Platform. All resources are referenced with this project. (see here for details)
- Service Account Id: You will get this when creating a Service account. This account should have Role set to Owner and Key Type as JSON (see here on how to obtain it)
- The region/zone in which you wish to provision the instance.
- Client Credentials: This is a private key in a JSON file to authenticate the service account. You need to copy the entire content of the JSON file including the braces - {}.(see here on how to obtain it)
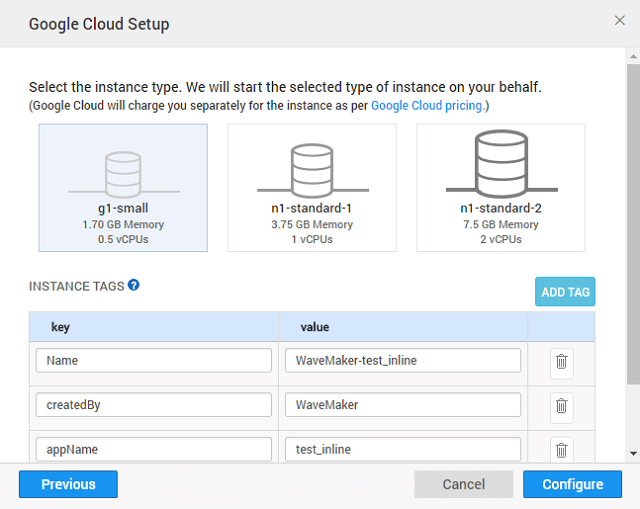
- Select the appropriate instance size based upon the resources and database utilized by your app (see here for pricing details)
- and enter the key-value instance tags (see here for best practices for instance tagging)

- Once the setup is done, you can push the app from Demo to Live. (Continue from here)