REST Services using OAuth 2.0
OAuth 2 is an authorization framework that enables applications to obtain limited access to user accounts on an HTTP service, such as Facebook, GitHub, etc.. OAuth 2 focuses on client developer simplicity by providing secured delegated access for web and desktop applications. It works by delegating user authentication to the service that hosts the user account and authorizing third-party applications to access the user account.
Device Flow
The device flow is illustrated in the below image.

Device Flow Steps Explained
- The client requests the authorization server to give the access. The request includes the client identifier in it.
- The authorization server provides a verification code, an end- user code, and the end-user verification URI.
- The client instructs the end-user to use its user-agent (elsewhere) and visit the provided end-user verification URI. The client provides the end-user with the end-user code that is necessary to enter, in order to gain access.
- The authorization server authenticates the end-user (via the user-agent) and prompts the end-user to grant the client's access request. If the end-user accepts the client's request, then the end-user enters the end-user code provided by the client. The authorization server validates this end-user code.
- While the end-user authorizes (or denies) the client's request (D), the client continuously polls the authorization server to verify if the end-user authorization step is successfully accomplished. The client's request includes the verification code and its client identifier.
- Assuming that the end-user has granted access, the authorization server validates the verification code provided by the client and eventually responds with the access token.
API Integration
Configuring an app to use these Web Services can be an uphill task. WaveMaker abstracts OAuth and offers API integration without the need for writing code.
WaveMaker integrates the OAuth 2.0 configuration while importing a REST Service by:
- providing the URL of the API to be invoked within the app,
- setting HTTP Authentication to OAuth 2.0,
- providing OAuth Provider, and
- completing the Provider Configuration.
WaveMaker Implementation
You can add a REST service to your app from the Web Services Resource Explorer. In the Web Service dialog
- Enter the URL that you want to invoke.
- Select OAuth ProviderSet HTTP Authentication to OAuth 2.0

OAuth Configuration
For OAuth configuration, you can do the following.
WaveMaker provides support for most OAuth providers. Select a provider from the list and add a provider.
OAuth Provider Configuration
When you select an OAuth Provider, fill in the prompted details in the OAuth Provider Configuration dialog.
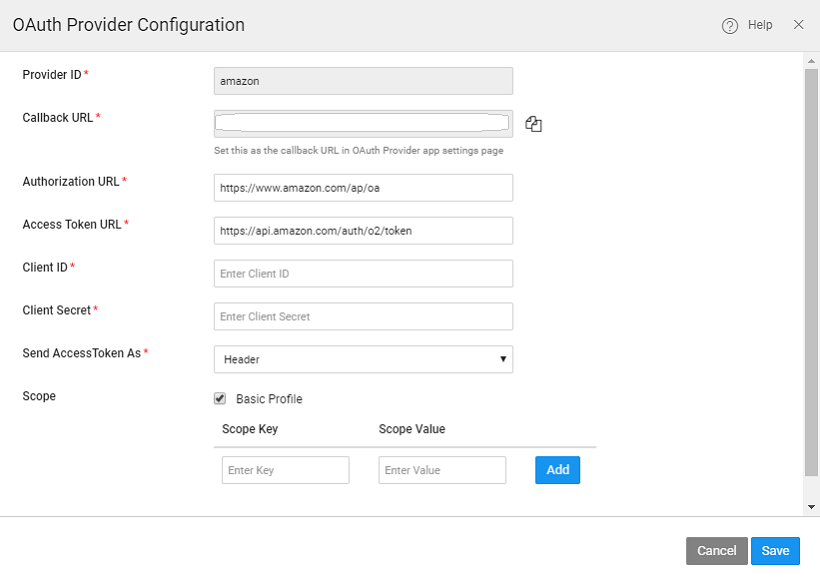
- Provider ID is the OAuth 2.0 Service Provider, selected from the list or enter the name if you are adding your own.
- Callback URL is pre populated by WaveMaker and is not editable. You can copy this link and use it to as the callback URL in OAuth Provider app settings page.
- Authorization URL and Access Token URL of the OAuth service provider for obtaining the authorization and access to the service. These fields are auto-populated in case of the selected providers, else you need to enter them manually.
- Client Credentials issued once your app is registered with the Provider. It will be in the form of Client ID and Client Secret.
- Send Access Token As Header or Query. Usually, the OAuth providers need the access token to be sent as a part of Header, few might require it as a Query parameter. Check with your OAuth provider and select the appropriate option. It is set to Header by default.
- Scope defines what the access token can do and what resources it can access. For the listed Providers the popular Scopes are listed for you to select. Check with the selected OAuth 2 service provider to understand how to further configure this field.
Testing Configuration
When you have configured the OAuth 2 Provider, Test the configuration to complete the Import process. While testing, you will be prompted to enter the login credentials. This is to obtain the Access Token details and to set the various configuration settings.
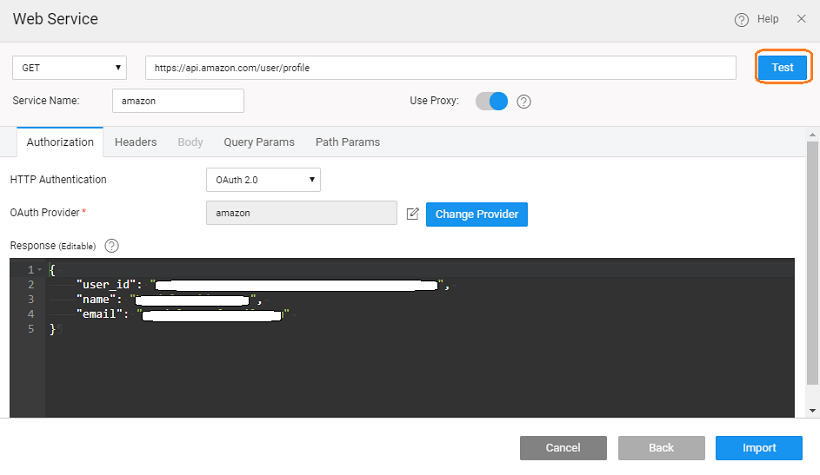
- Set the Headers, Query Params and Path Parameters, as needed.
- You have the option to change the provider details and provider itself.
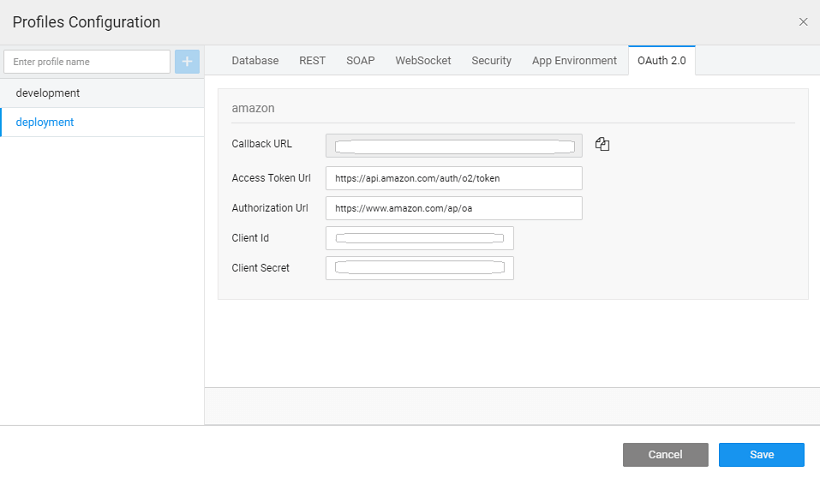
- From the Project Settings under Profile Configuration you can modify OAuth 2.0 configurations. These can be configured seperately for Deployment profile to be used while deploying the app. Remember to register the call back url provided therein with the oauth server.
Runtime Behavior
- Just like any REST Service, you need to create a variable to access the OAuth APIs. See, Variable Creation.
- When the service is invoked through the variable, the user will be prompted to enter their credentials.
Supported OAuth 2.0 Providers
WaveMaker provides few OAuth 2 service providers out of the box. When selected the provider details are pre-populated and need to be further configured. These providers include:
| Developer Link | |
| Developer Link | |
| Developer Link | |
| Developer Link | |
| Developer Link | |
| Developer Link | |
| Developer Link | |
| Developer Link | |
| Developer Link | |
| Developer Link |