Build a New Connector
This document explains how to build a Connector, and it explains about a Connector project and how it is structured.
A Connector project is basically a multi-module spring-based maven project which can be developed and build outside of WaveMaker Studio.
Prerequisites
- Java 1.8 or above
- Maven 3.1.0 or above
- Any java editor such as Eclipse, Intelij..etc
- Internet connection
Connector Archetype
WaveMaker introduced a maven based Connector Archetype to create a new Connector. Connector project can be built as explained in the following steps.
Adding Profile
Open maven setting xml file, you can find at $M2_HOME/conf/settings.xml. Adding the following profile in the profiles section
Activate Profile
Activate the above profile by adding the following lines outside of the profiles.
Commands used
You can create a Connector project by using any of the following commands. Go to your terminal and execute the following command
In either of the above approach, you should provide the following values.
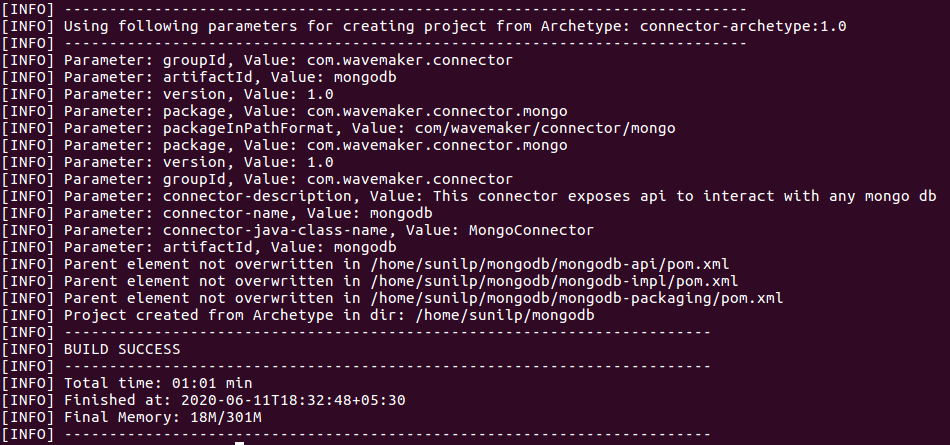
For example, in the following example, we are going to create a MongoDB Connector using wavemaker-connector-archetype.
Define Value Properties
Above archetype will execute interactively. As a result it will ask the end-user to provide values for few properties and note these properties have default values if the user does not provide any value then default value will be considered.
- Define value for property 'package' <<groupId>>: :
- Define value for property 'connector-name' <<artifactId>>: :
- Define value for property 'connector-description': A simple Connector <<connector-name>> that can be used in WaveMaker application: :
- Define value for property 'connector-java-class-name' WaveMaker<<connector-name>>Connector: :
For the above properties will have default values such as
package: default value is groupId given in mvn command connector-name: default value is artifactId given in the mvn command connector-java-class-name: default value is WaveMaker <<connectorName>>Connector
Example-1
After providing the above values, it will ask for your confirmation to create a Connector. After confirming, the Connector project will be created. You can open the Connector project in any java editor such as Eclipse, IntelliJ, and more.
Example-2
About Connector Project
A Connector project contains three modules.
- API module: this module contains a Connector interface and skeleton of Connector APIs.
- Implementation module: this module contains an actual implementation of the Connector API.
- Packaging module: this module will take care of packaging the Connector and the Connector developers don't need to do any changes in this module.
API Module
In this module, users are expected to write Connector interfaces and this module contains
- Connector interface: A Connector is identified by an annotation “WMConnector”. Any interface which does have WMConnector annotation is considered a Connector interface. In a Connector project, you can have multiple interfaces with WMConnector annotations, however, the name value in the annotation should be the same.
- Connector metadata: Metadata of a Connector such as version, name, description, and Connector configuration class.
Version
This is the Connector version, for every build, it increases the version. WaveMaker allows upgrade of the Connector only when the version is same, or higher than the existing version.
Connector configuration class
Connector configuration class is the spring configuration class available in the implementation module, if you have any changes either class name or package name change, then you must update in this file.
Impl Module
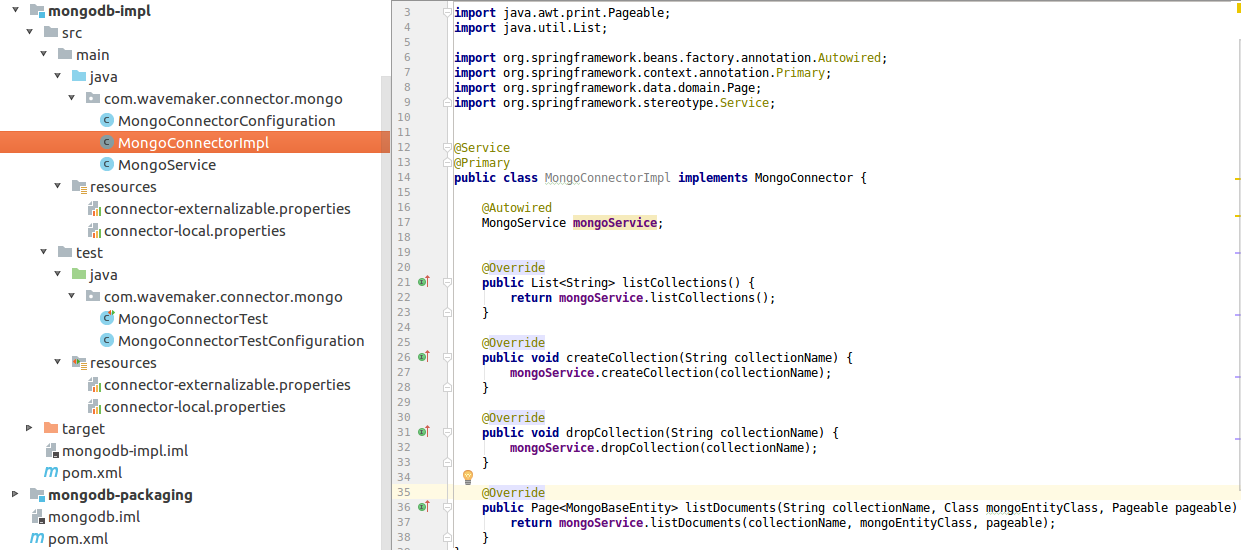
In this module, users are expected to write their implementation of Connector interfaces and this module contains the following.
- Implementation to connector Interface: Actual implantation of Connector interfaces.
- Spring configuration class: A Connector application is a spring-based project and there will be the spring configuration class where users can add their beans, component scans, properties loading, and more.
- Properties files: There are two properties files in each Connector project.
- connector-externalizable.properties: These are the properties that are externalized to the WaveMaker application when the Connector is imported. As a result, values can be managed in the WaveMaker application.
- connector-local.properties: These properties will not be externalized to the WaveMaker application and they are used only internally inside the Connector project.
- Custom properties files: Connector Developer can have any number of properties files, however, the developer should add these properties file spring configuration class.
These custom property files are not externalized to the WaveMaker application.
- POM.xml: User can add any maven dependencies based on the Connector project requirement. However, you have wavemaker-app-runtime as a bom dependency in Connector parent pom, most of the artifacts are available as transitive dependencies in a bom, so add a transitive dependency in your API or IMPL module without declaring the version.
To see all the dependencies which are already available in wavemaker-app-runtime, you can either open wavemaker-app-runtime pom.xml by clicking on the dependency artifact or you can run following maven command to see all dependencies
- Test cases: There will be a test case for each Connector interface, where users can add test cases, in addition, the test cases will have its own properties file, and spring configuration class.
Packaging Module
This module is used for packaging the Connector. There will be a plugin in the packaging module of the pom xml file, which is responsible for the packaging of the Connector as a ZIP artifact. The user is not supposed to do any changes in this module.
After Connector development is done, then it is time to build the Connector. Use the following command to build the Connector.
mvn clean install
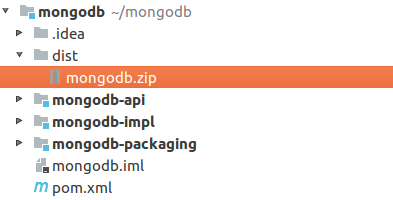
On successful build, under the Connector project dist directory, a zip artifact will be available.


