Import Connectors
Import a Connector into WaveMaker Studio
We need a Connector zip to import it to the WaveMaker application.
There are two ways to get the zip.
- Go to the Releases section in the WaveMaker Connectors' Github account, and get the latest released version.
- After building the Connector, you will have a zip artifact in
/dist/Connector-name-version.zip.
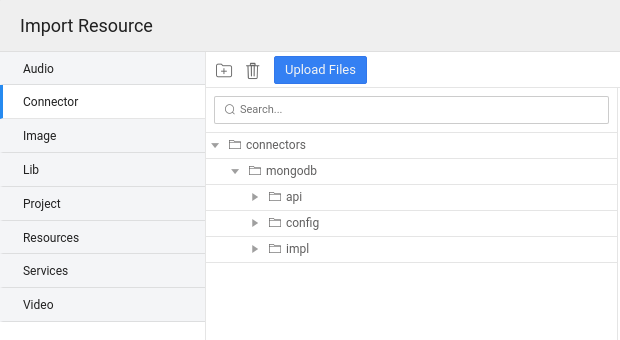
In WaveMaker studio, import the Connector zip in the import resource dialog. Import resource allows you to import the Connector zip artifact.
Externalizing Connector Properties
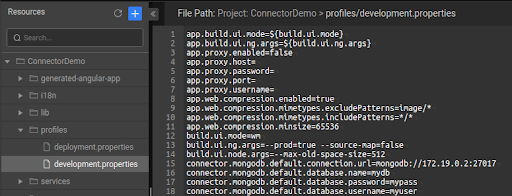
On successful import of Connector into a WaveMaker application, Connector externalizable properties are automatically profiled in the WaveMaker application profiles. The format of the Connector-profiled property is as shown below.
Connector.<<connectorId>>.<<configurationId>>.property=value
connectorId: name of the ConnectorconfigurationId: you can import the Connector once and can create multiple instances from it. While creating multiple instances, you have to provideconfigurationIdfor each instance. By default,configurationIdis “default”.
Use Connector in Java Service
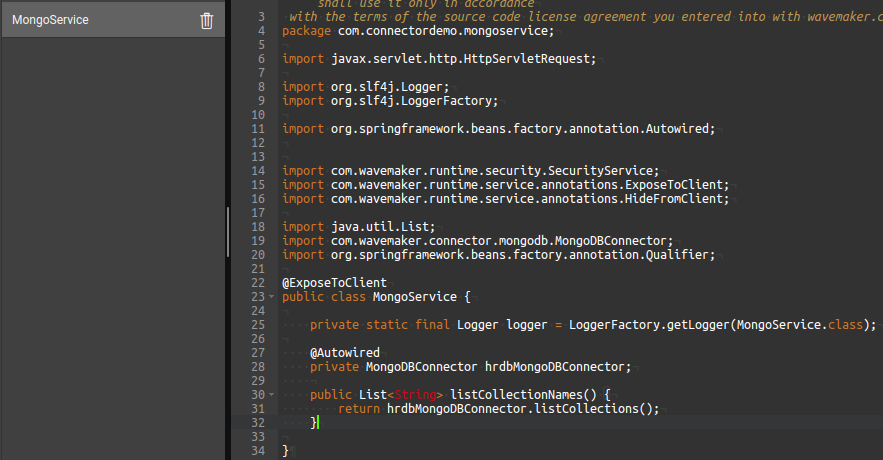
Using Connector in java service is the same as using any spring bean. You can autowire the Connector in any java service, and it can be used in your APIs.
Multiple Instance of Connector
You can import Connector into the WaveMaker project once and create as many instances you need. Such as, you can import the MongoDB Connector once, and it can be used for various MongoDB databases by creating multiple instances of the Connector.
The following are the steps to create multiple instances of a Connector.
Step-1
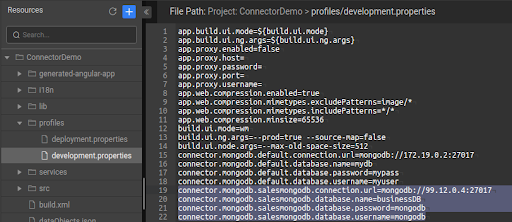
Since each instance of the Connector will have its own properties. So the end-users should add profile properties for new instances of Connectors. In the following profile property, <<configurationname>> is the name of the new instance of the Connector.
Connector.<<connectorname>>.<<configurationId>>.property=value
Add all profile properties in the above format. Such as adding new instance “salesmongodb” properties in the following screen
Step-2
Add placeholders of the above new properties in app.properties.
Step-3
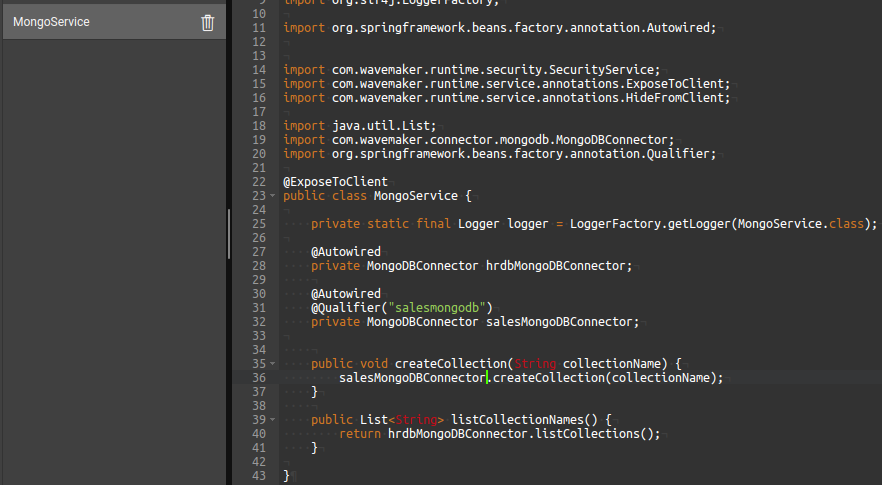
Using a new instance of the Connector in the Java Service.
You can create variables on top of a Java Service to invoke a Java Service from the UI.
