How to use Push Notification in WaveMaker Mobile App
Scenario
An app is used to share tasks across the users in a team. A user is assigned a task that should be completed by 5:00 PM and it is 4:30 PM already and task is not completed yet. The app wants to send an auto-reminder to the user about the task. However, the app is not open on the user’s device. In this case, the app uses a third party service to send an sms or an email to the user.
In addition to using notification channels, a mobile operating system also provides a push notification service. Using this service, an app can send messages to the user even when the app is not in a foreground.
How it works
Operating system maintains an http service to which all notifications have to be posted. This service acts as a post office. Each mobile app has to register with this service and should obtain a registration id. If any notification addressed to the registration id is received, then service will simply forward them to respective mobile device. Registration id is unique for each app on device. In iOS, this service is called Apple Push Notification service (APNS). In Android, this service is called Firebase Messaging Service.
Architecture
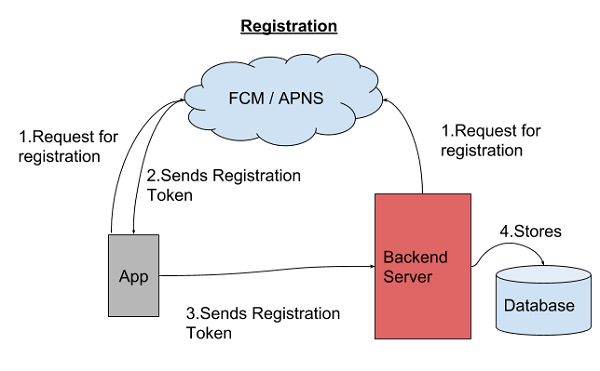
First, both mobile app and server should register with APNS / FCM.
- Mobile App registers for device notifications and gets registration token. This token functions as the address to send a push notification to.
- Backend server registers with APN server (iOS) and FCM server (Android) by submitting credentials.
- After receiving token, mobile app sends the token to backend server.
- Backend server stores it in the database for later use.
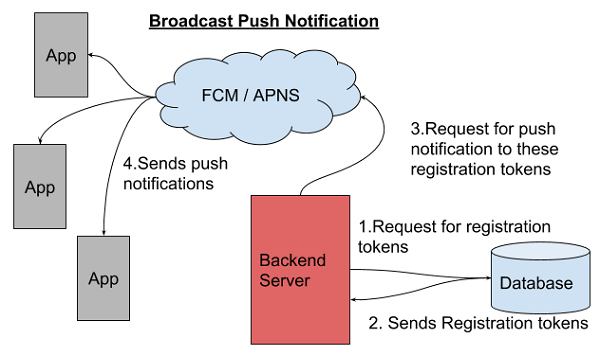
These are the steps for delivering a push notification:
- When Backend wants to send a push notification to users, Backend retrieves the stored registration tokens of devices of those users.
- Then, a push notification request is sent to the corresponding user devices (identified with registration tokens) via FCM / APNS.
- FCM/ APNS will send push notification to all the devices which have this app installed.
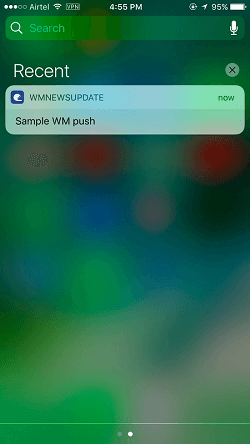
App Example
A Cordova plugin called phonegap-plugin-push can be used by the app to create a message to be broadcast to all logged-in users.
Prerequisites
For registration, app and backend server have to provide some information to push notification service so that they can be verified. These credentials have to be obtained first.
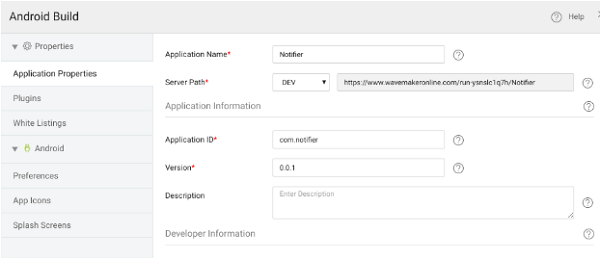
In a WaveMaker application, ‘Application Id’ in ‘Build for Android’ dialog is used as the App Id.
Follow below steps to achieve the Android prerequisites:
Android Prerequisites
Follow below steps to achieve the Android prerequisites.
google-services.json
An app for Android should have google-services.json that has all information required for registering with Firebase messaging service. Follow below steps to obtain it:
- Open Firebase console. Create a new project to register for notifications.
- Select the created project and click the setting icon at the top and choose Project Settings.
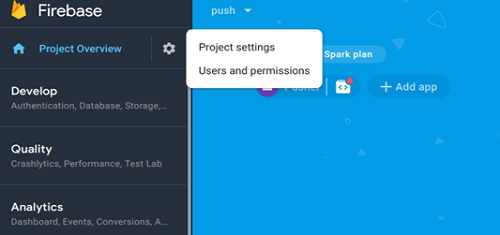
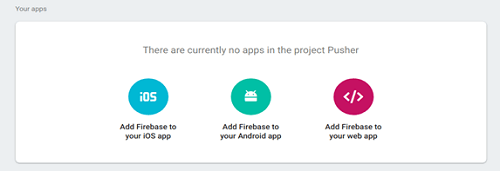
- From settings, go to the general app and click ‘Add Firebase to your Android App’.
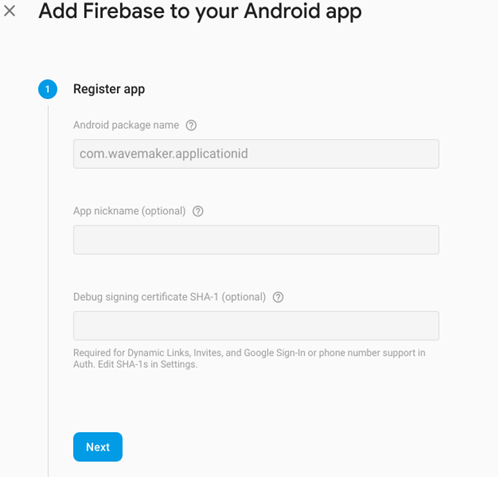
- A form appears to register your app. Application id that is mentioned in ‘export cordova dialog’ of your WaveMaker project has to be entered as Android package name in this form. Click Next.
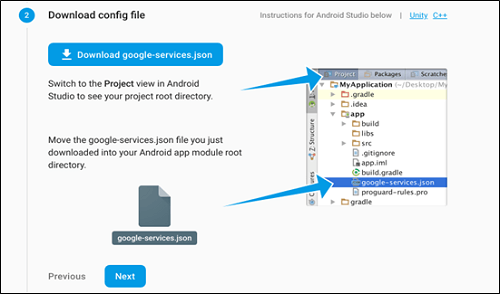
- Download
google-services.jsonand click next.
Service JSON
Firebase also provides another JSON file that is required by the backend to push messages. This JSON is called the service JSON.
- Open Firebase console. Open your app that was created above.
- Select your project and click the setting icon at the top and choose Project Settings.
- In Firebase Console, go to settings and open ‘Service Accounts’ tab.
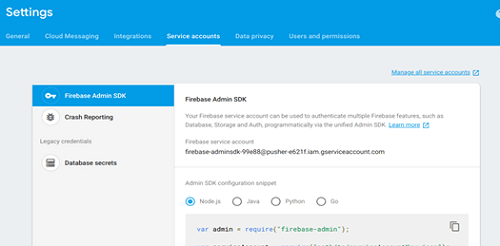
- A button with label Generate new private key is located the bottom of page. A JSON file is downloaded after clicking this button. Rename this file as
FCM-admin-service-key.json.

iOS Prerequisites
Steps to configure iOS app in developer portal
Configuring App ID
App ID configured for Push Notifications on Apple Developer Portal has to be created first.
- Log in on Apple’s Developer Center.
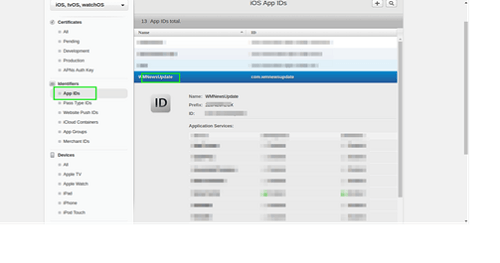
- Select the Account tab to go to Certificates, Identifiers & Profiles.
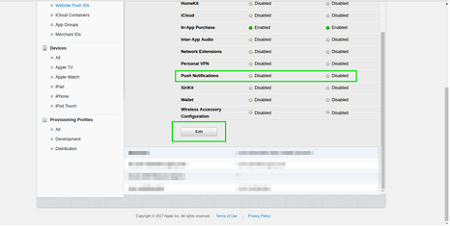
- If you have not already created an App ID, create it now and make sure push notifications is enabled. Or edit your existing App ID and enable them.
Wildcard (ending with an asterisk) app id is not allowed to use push notification service.
APNS Certificate
Backend server requires to provide an APNS certificate to connect APNS.
- Edit the app id created above and open push notification section.
- Click Create Certificate and follow the instructions.
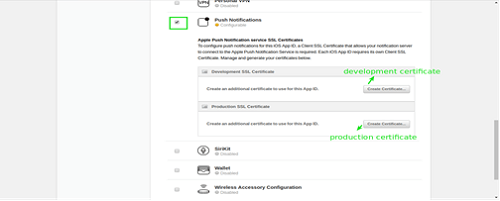
- When prompted upload the CSR file and continue. Download and install the certificates on your Mac. If the certificate is already created, a download option is shown.
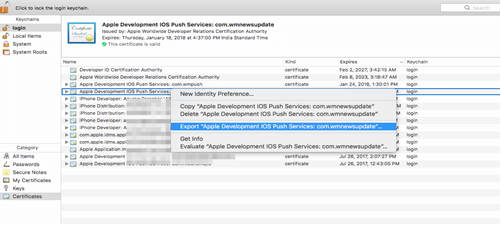
- In Mac, open Keychain Access, click login and drag-drop the downloaded certificate.
- Navigate to the certificate you want to use for your push notifications. Right-click and export it as a P12 certificate. Use as name
apns-dev-cert.p12(in case of the development certificate). In this demo app, this certificate is named asCertificates.p12. When prompted enter a password to protect the file and note it for future use.
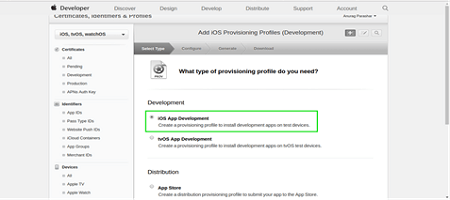
Provisioning profile
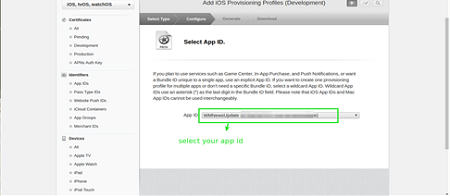
A provisioning profile has to be created for the app id created above:
- Create a provisioning profile for your app.
- Continue with the next steps
- Download the profile. Install the provisioning profile on your Mac by double-clicking it.
App Creation
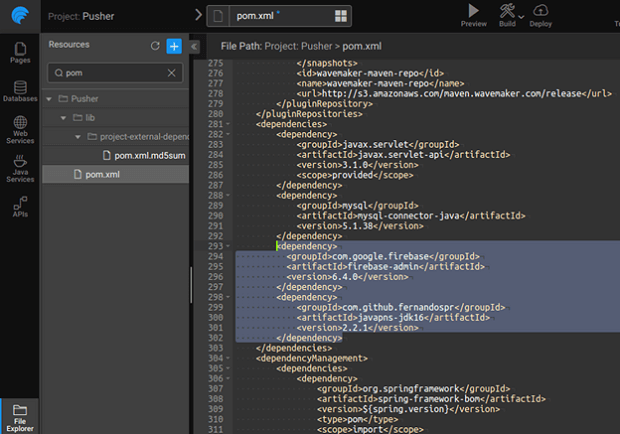
- From File Explorer open
pom.xmland addfirebase-adminandjavapns-jdk16as dependencies as shown below:
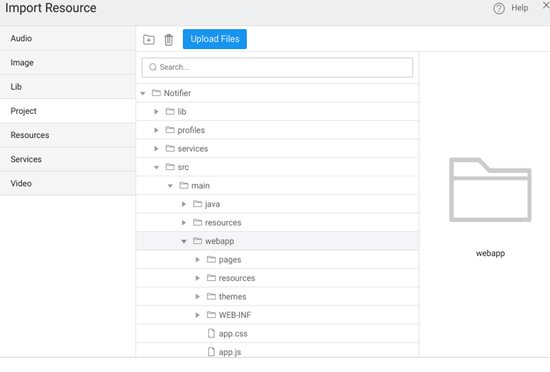
Import Resource. Import the following resources to the respective folders:
- Import
google-services.json(downloaded earlier) to thewebappfolder.

- Add the below script in project config.xml (i.e <project>/src/main/webapp/config.xml) file under
<platform name="android">.<resource-file src="www/google-services.json" target="/app/google-services.json"/> - Import ‘
FCM-admin-service-key.json’ (downloaded earlier) to/project/src/main/resources. - Import
.p12Certificate to/project/src/main/resources.
- Import
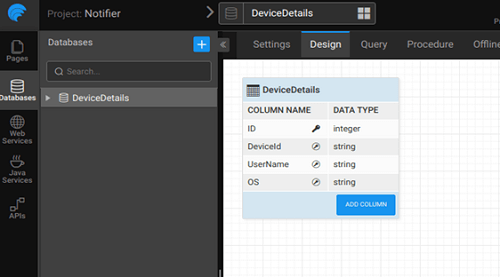
Create a db named
DeviceDetails, which will store all thedeviceIds,usernameand device type i.e. OS (Android or iOS). Mark these columns as unique.
- Turn on security. Here we are setting it to Demo.

Create a Java Service named
PushService. This service will containregisterDevice,unregisterDeviceandnotifymethods.RegisterDevicewill create a new record of the registered device details (deviceId, os, userName) in the db.UnregisterDevicewill delete the device details record in db.Notifywill request the GCM/APNS to broadcast the messages to the registered devices.
To obtain the above-specified functionality, download the Java code file and include the
Java codein this service file.
Replace packageName, imports specific to the app, senderId, apiKey, iosCertificateName, iosCertificateKey (password for iosCertificate) values in above code.
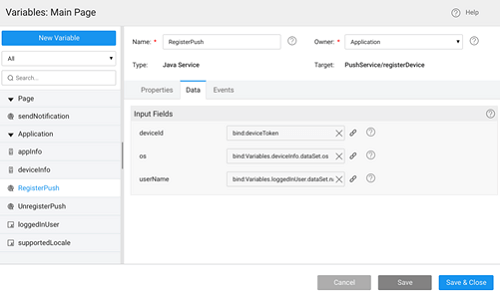
Create a service variable named
RegisterPushto register the device to receive push notifications.Bind input fields
deviceId to
bind:deviceTokenOS to
deviceInfo variableanduserName from
loggedInUservariable.
DeviceId will be bound on successful push registration which is written in
app.js.
- On every successful login, register the device for receiving the push notification. For this, open the Actions dialog and select the pre-defined loginAction.
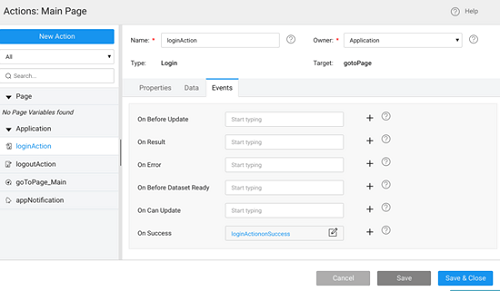
Go to Events tab and write the JavaScript function on loginVariable success.
- If user is already logged-in, then enable push.
- Initialize the plugin to get the deviceId, and start listening to all the events when notification is received. Store the device Id in DB that we receive on successful registration event.
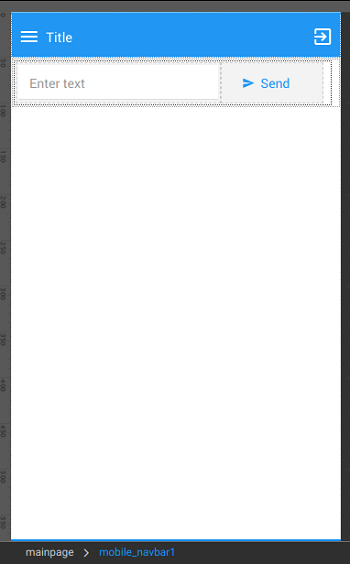
- On the Main page, drag and drop a text widget and button as shown below.
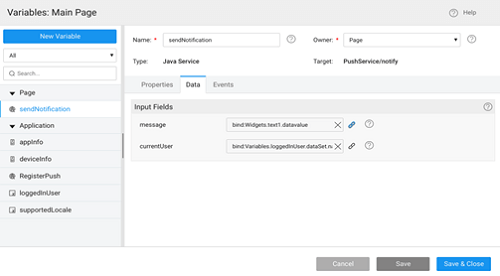
- Create a service variable named
sendNotificationwhich will call notify method ofPushService

- Bind input field message to the text widget datavalue and currentUser to the name field of loggedInUser variable
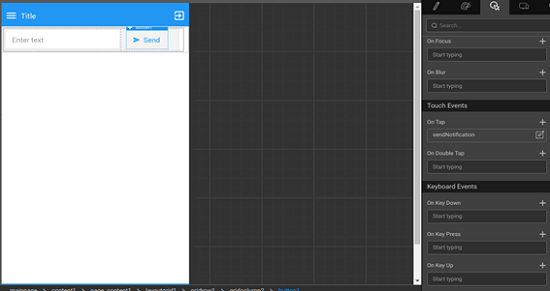
- On Send button tap, invoke the sendNotification service variable created above.Enter the text and click on button, push message will be delivered to the devices.
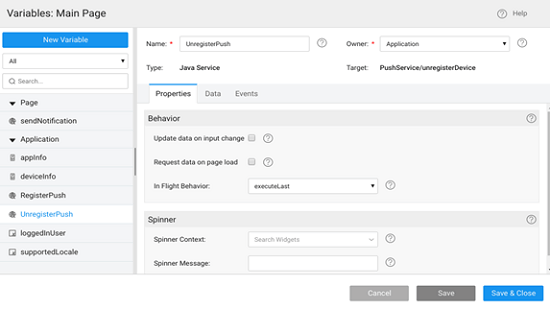
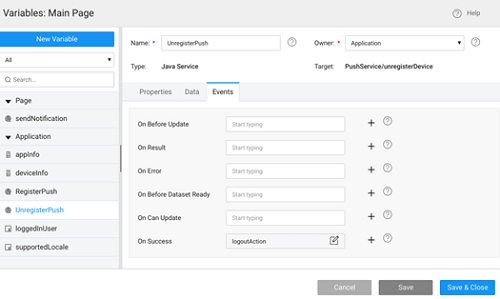
- Create a service variable named UnregisterPush which will call
unregisterDevicemethod ofPushService.
- Bind the input field
deviceIdtobind:deviceToken, which is inapp.js, os todeviceInfovariable anduserNametologgedInUserNamevariable as shown below.

- On success of
UnregisterPush, invoke Logout Action.
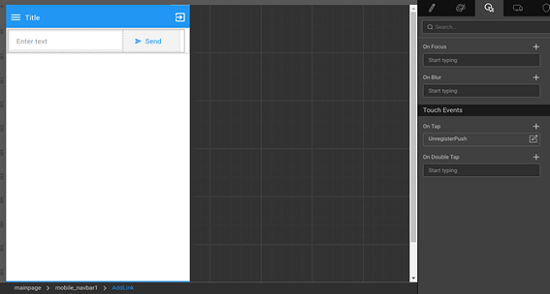
- Add an anchor in mobile navbar, on tap of this link invoke
UnregisterPushservice variable.
- Add a custom plugin in ‘Build for Android’ dialog
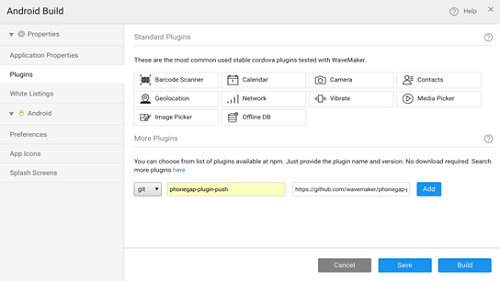
- Mention ‘git’ as source, ‘@havesource/cordova-plugin-push’ as plugin name and ‘https://github.com/wavemaker/phonegap-plugin-push.git#85bd7da’ as spec. Then, click
Addbutton andSavebutton.
App Usage
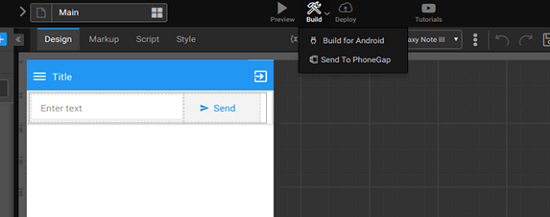
- The plugin that is mentioned above uses ‘hook’ concept of Cordova for Android build. But, Hooks are not supported in
build.phonegap.com. So, Android builds fail when this plugin is added inbuild.phonegap.com. But, Android app can be built using the using Build For Android menu option inside WaveMaker studio or through a manual build.
- iOS app can be created either through a manual build or through
build.phonegap.com. Please make sure that provision profile that is created above (with app id that has push notifications enabled) should be used - Build and test the app. Login in one device with
user/user credentials. Login to another device withadmin/admin credentials. If user sends a message, the other user should get a push notification.
Conclusion
Our aim is to show how this plugin can be integrated into WaveMaker and how to create push notifications. This integration logic can be used at various places as per your use-case. For complete features of the plugin, please visit the plugin site.