How Tos: Wizard
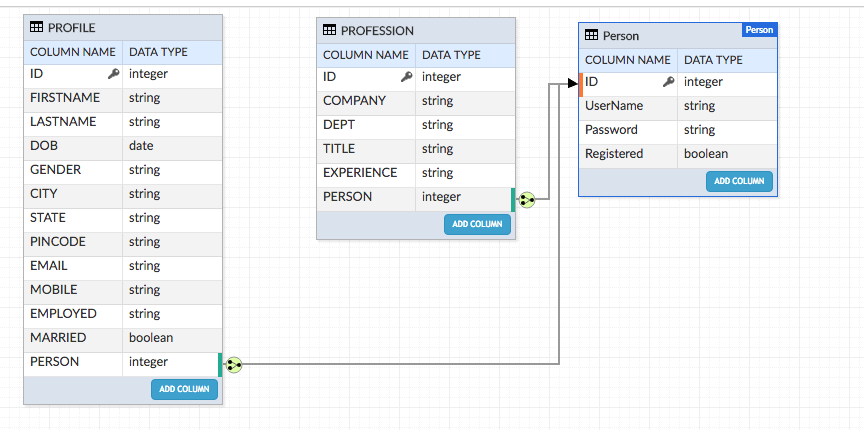
A basic usage scenario is used to go through the wizard interface step by step trying to build a Registration Form. A Generic Registration Form that can be used by any web sites to get their users registered to their sites for example accessing trial versions of products, or for buying goods online etc. In this scenario, the user is asked to register when they need to access some resources that needs registration. To register, user is provided a Registration form for creating username and password for that user. Once the user has given the inputs, the user navigates to a page where the user has to add personal information and if the user is employed the professional data also has to be supplied by the user. Once the required data is provided by the user the user is registered and is informed of the success of registration. The scenario assumes that you will be creating the required data model for taking the login data (Person Entity), profile (Profile Entity) and professional (Profession Entity) data inputs from the user.
This is the set-up of an existing page - Getting Basic Details from the User for Registration with a button to invoke the Wizard to add Profile and Professional data.
- Create a page named UserRegistration to take the basic user data for Person entity.
- UI Design for the Page: use datagrid to display/add/edit person details
- Add button to invoke wizard to add profile and profession data - Click event should navigate to the wizard page (WizardBasic) which will be designed in the next step
- Run the App and give the inputs as needed.
- Create a Page named WizardBasic in WaveMaker App
- Drag and Drop a wizard on the canvas
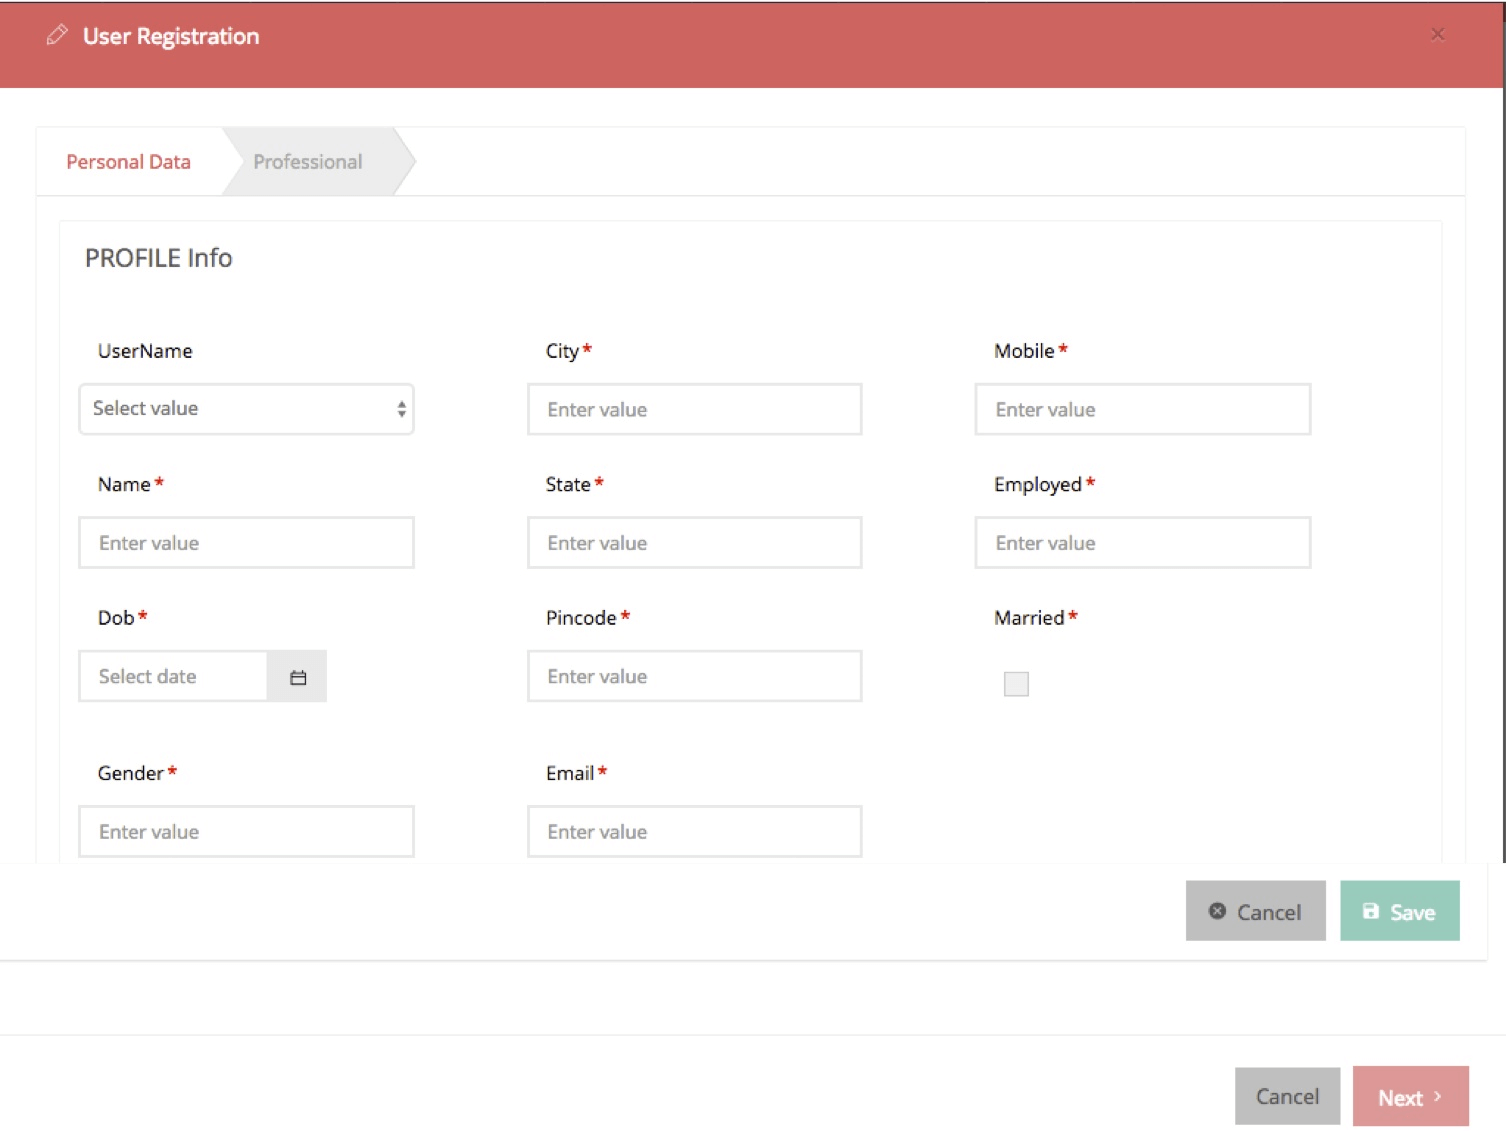
- Once the Wizard is dropped on to the canvas, you will see the UI as shown below. By default only one step with the Title as Step Title is created. Note there are two action buttons – Cancel and Done respectively
- Edit the Title of the Step: Click on the step and in the properties panel change the Title to Personal Data.
- Adding More Steps to the Wizard: Add one more step – click on the wizard canvas and click on Add Step. Change Step Title to Professional Data by using the Title property of the step.
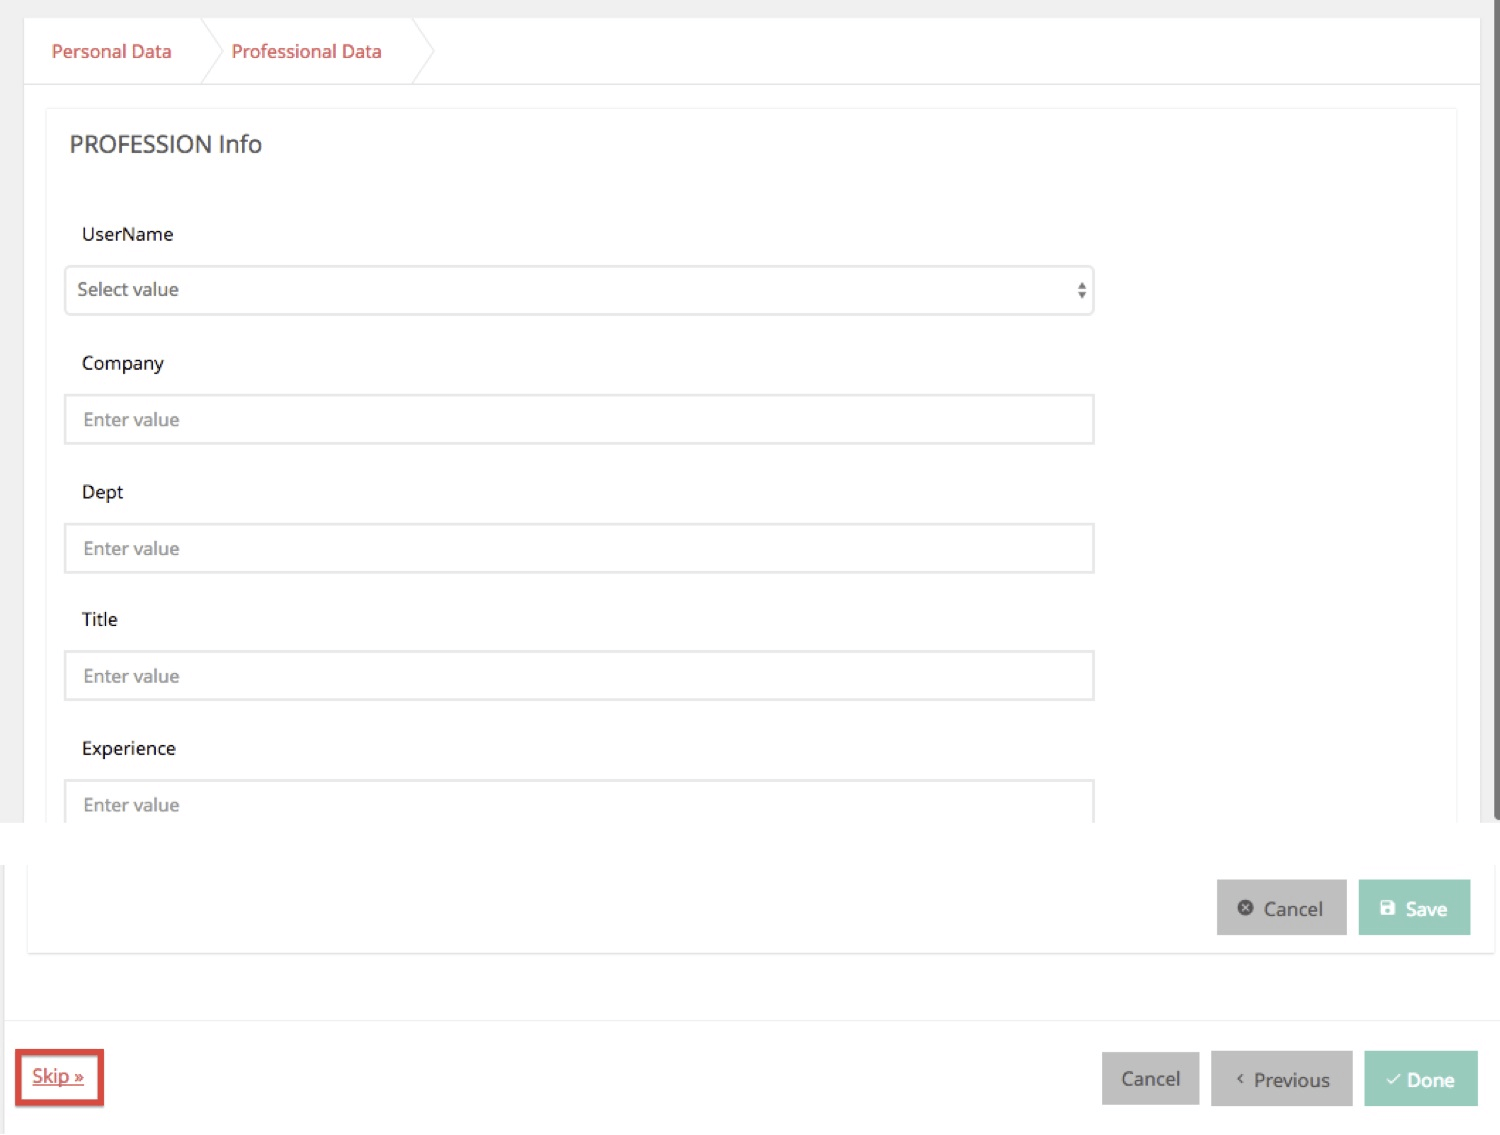
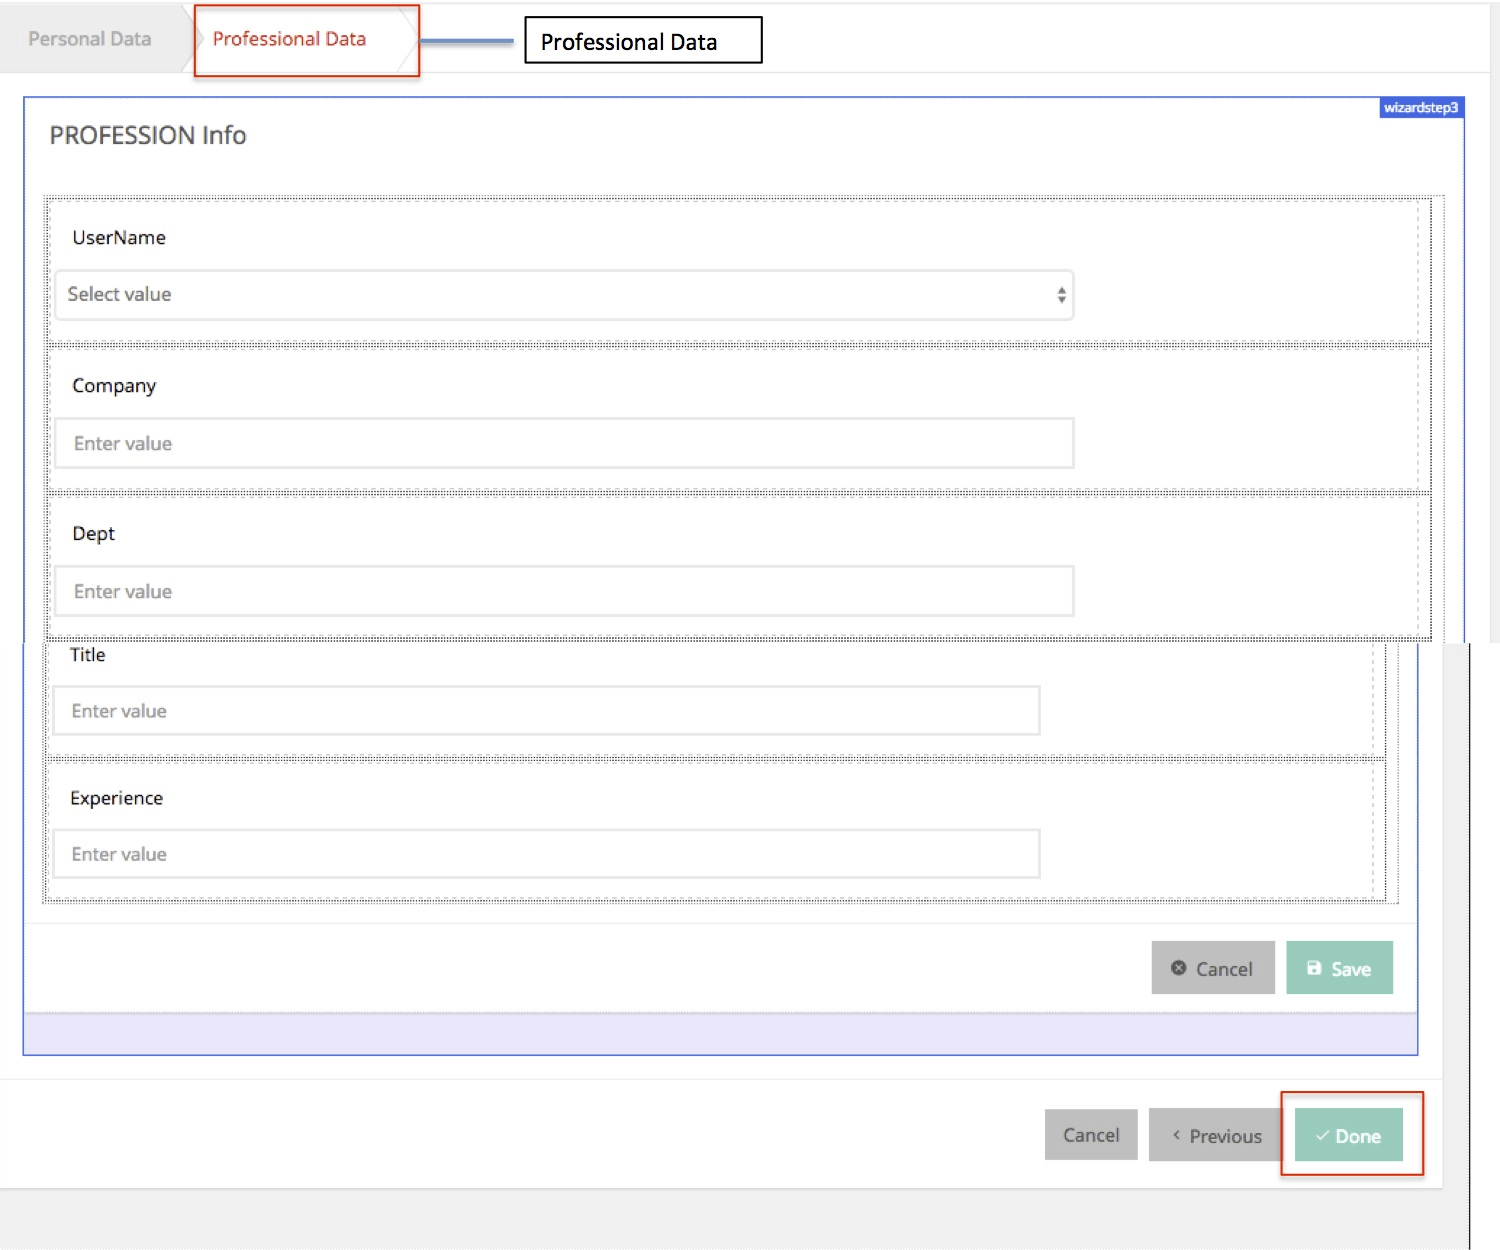
Design the UI for Personal Data Step: Live Form bound to the Personal entity, using 3-column layout. 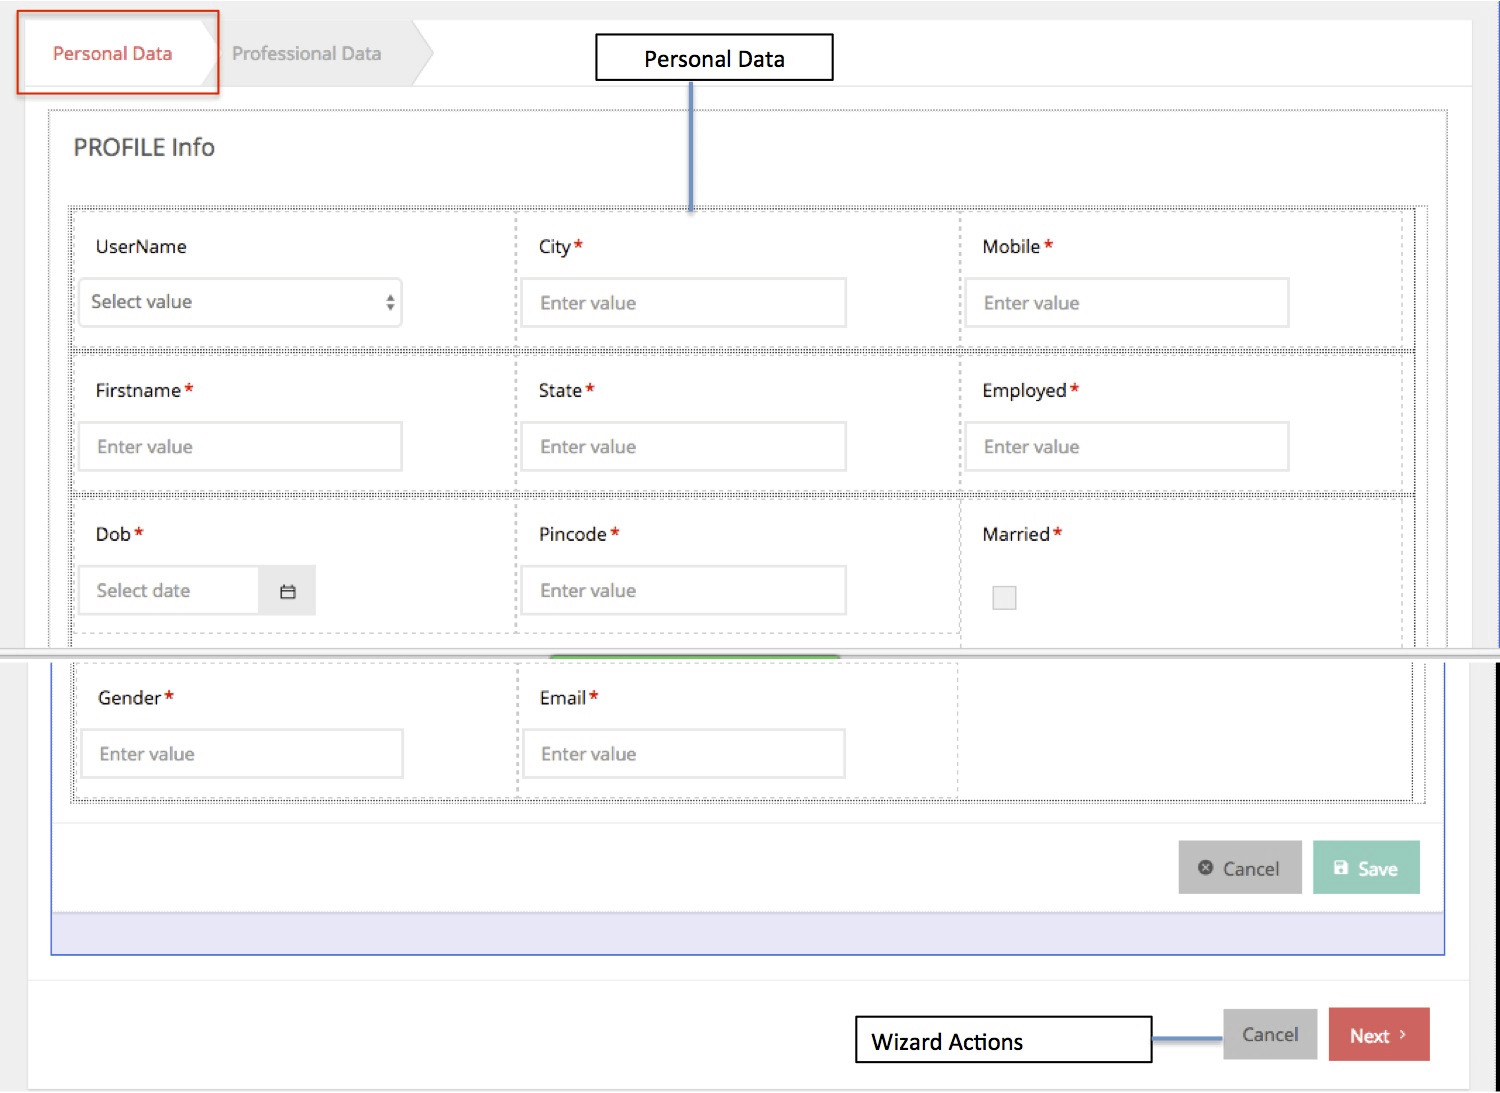 Design UI for Professional Data Step: Live Form bound to the Professional entity, using 1-column layout.
- Writing Event on the Wizard Step1 (Personal Data)
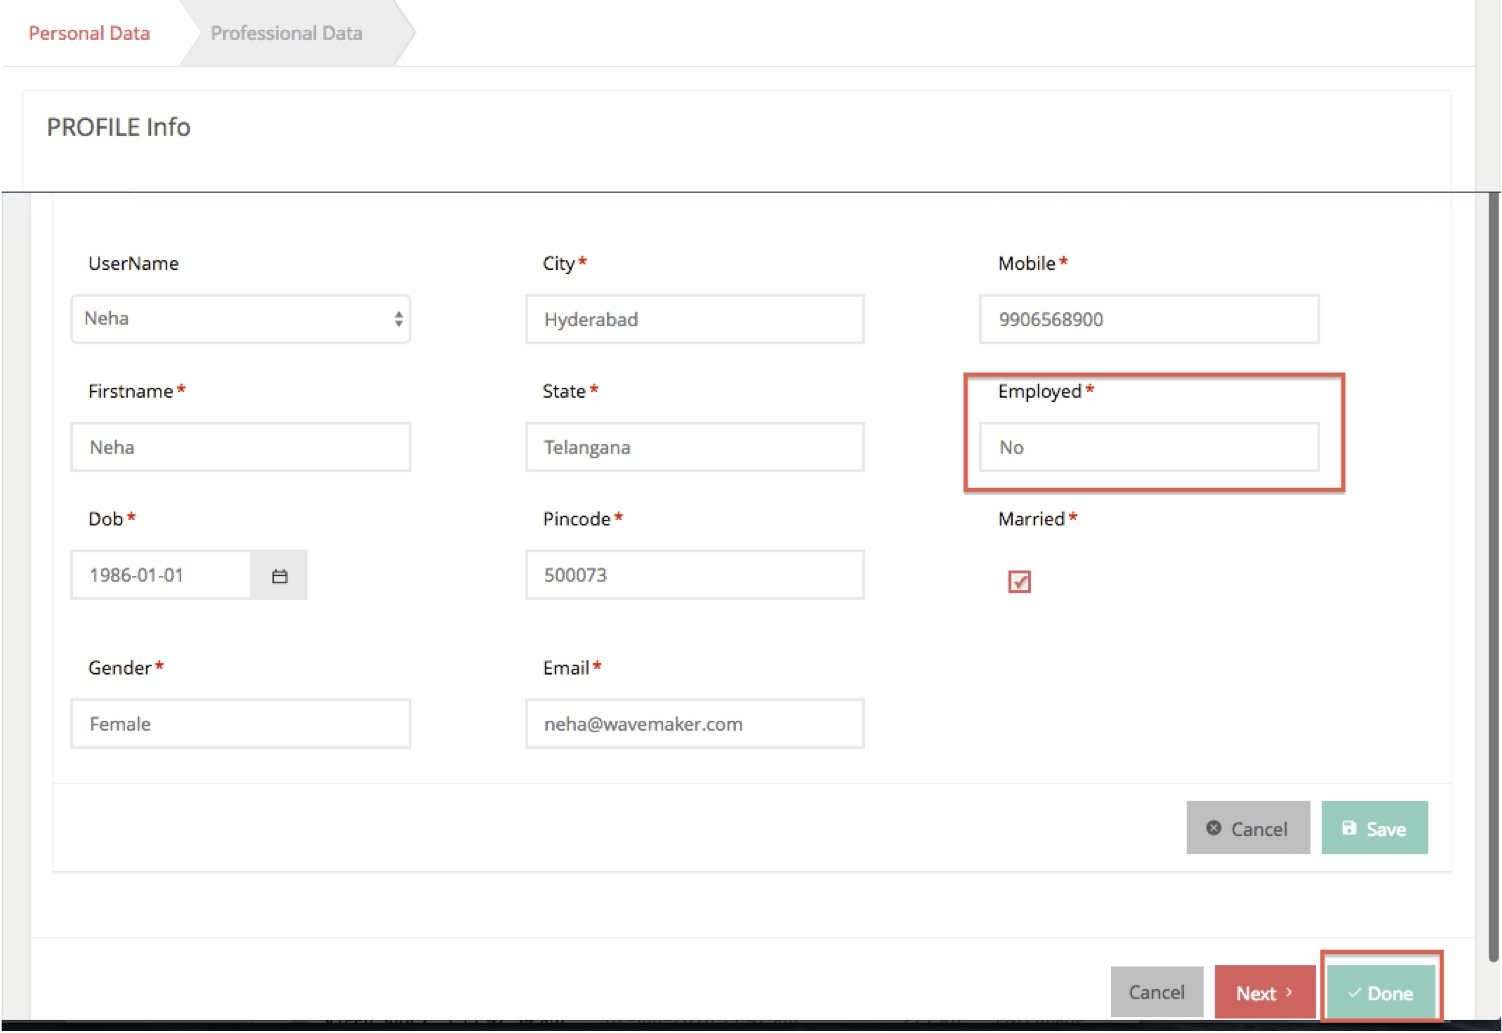
- On Next: Use Case – When the User is not Employed – On Blur Event of employed field In Personal Data Step when user tabs out after entering a value in employed form field of liveform On Blur event is fired. In the above use case mentioned the user would not want to go to next step to input Professional data as the user is not employed in which case the appropriate handler has to be plugged into the On Blur of the employed field. This example has a On Blur Javascript handler that does the following:
- Gets the datavalue of the employed widget and assigns it to employed variable.
- If the is employed datavalue is “No” it enables the Done button in this step itself as the user can complete the registration in step 1 itself without going to step 2.
- Writing Event on the Wizard Step 2 (Professional Data) – On Done:
- On Done: Use Case –When the User is Employed. In this case the user is allowed to move to the next step to enter professional data. Once entered and Done button is clicked, On Done event fires. A Javascript handler is added to On Done Event which does the following:
Gets the UserName from the Live Form Dataset
Sets the UserName Input for the Update Query on the Person Service Variable to set the Registered field to true.
Updates the service variable.
Shows the Alert Dialog with Successful Message – Registration Successful – To create Alert Dialog and show up in a page – Refer Dialog Documentation
Navigates to Registration Details Page
Run the app and click on Update Personal Data on User Registration page
- Enter the Personal Details and click on NEXT to enter Professional Data
- Run the app again and Enter the Personal Details with Employed set to NO, observe the DONE button with no navigation to Professional Data step
