Dehydration and Rehydration
This process is used to rotate instances periodically or for disaster recovery when WME data(/wm-data and /wm-runtime in directory/volumes Platform Instance and /data directory/volume in StudioWorkspace Instance / AppDeployment Instance) is available but machines are corrupted and make sure have to use the same WME version for the recovery process.
Data Storage in WME
- WaveMaker Platform Stores its state into the disk. WaveMaker Platform administrators can take backups of those disk/directories and can restore them to any previous state.
- WaveMaker uses separate dedicated directory
/wm-datain WaveMaker Platform Instance for storing data and/datain StudioWorkspace Instance / AppDeployment Instance.
What Data needs to be Backup in WME Instances
- The
/wm-datadirectory in Platform Instance. - The
/datadirectory in all the StudioWorkspace/AppDeployment Instances are required to be backup. - Take backup/snapshots above volume/directories periodically.
How to move all the data to a single location
- We can move all the data to Platform Instance(/wm-data dir or volume) so that backup will be easier. In that case, no need to take backups of any (volume/dir) in any of StudioWorkspace Instance / AppDeployment Instance.
- Before applying the backup process do Hibernation and passivation for user and application containers, this can be done in either by executing a command from the command line or launchpad.
Passivate Containers in StudioWorkspace/AppDeployment Instances
- To upgrade your operating system it is recommended to passivate the containers in StudioWorkspace/AppDeployment Instances
- It can be done in two different ways
Launchpad
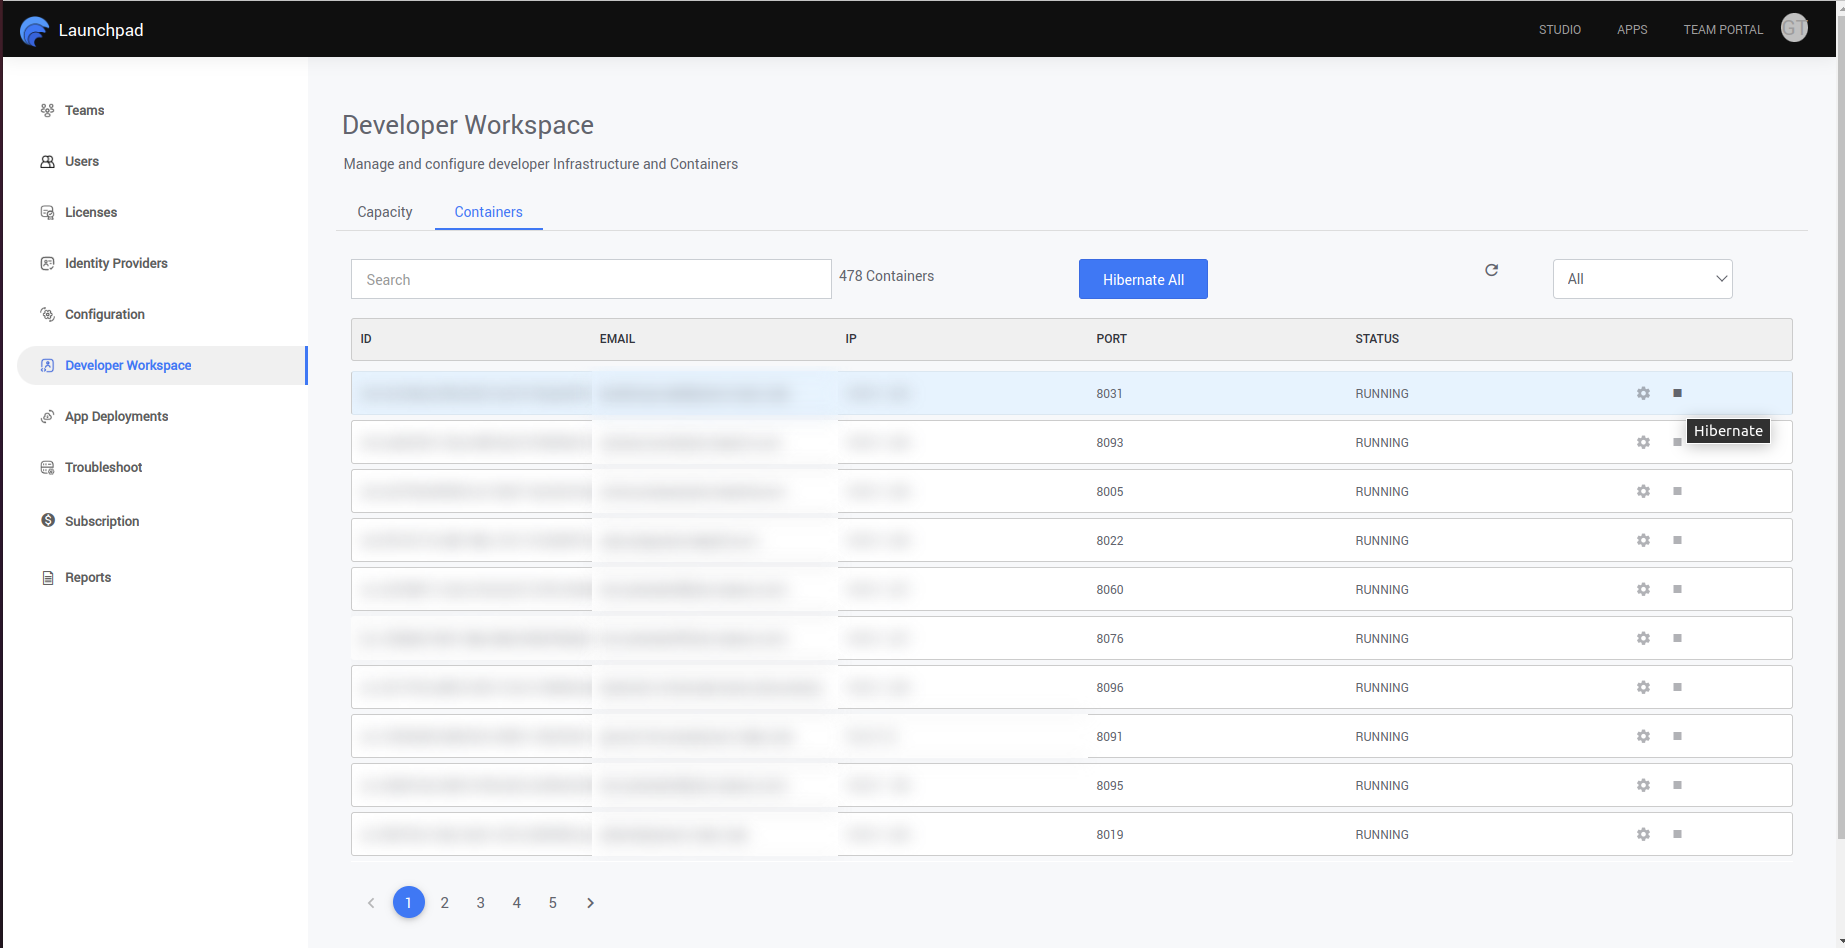
After logging into launchpad in WME setup go to Developer Workspace, and then go to the container as shown in the below image
Select the containers that are running, hibernate those containers one after the other by hitting the stop button as shown in the image below, and wait till the state is changed to stop.

After logging into launchpad in WME setup go to Developer Workspace, and then go to capacity as shown in the below image
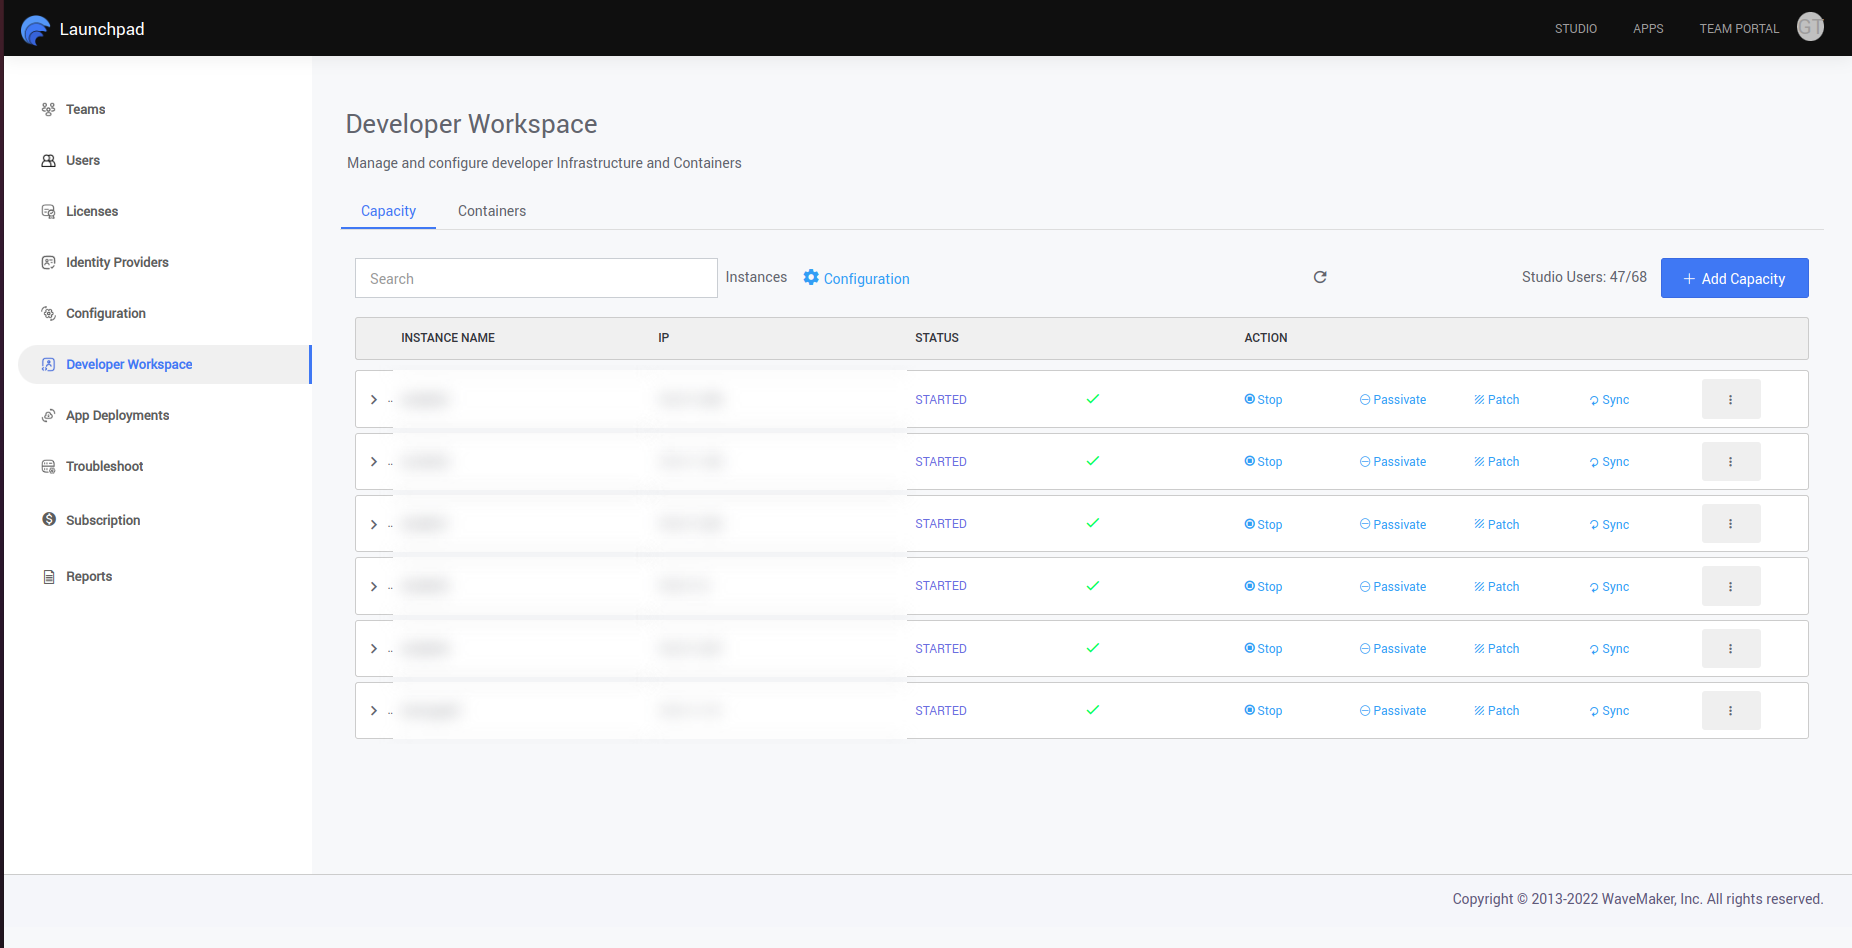
Here select all the StudioWorkspace instances one by one and do the below operations
First hit the stop button present there, it will stop the instances from taking new user containers, wait till the state of Instance is changed to STOPPED
Then you need to hit the passivate button, this will passivate all the stopped containers in the instance selected, wait till there are no stopped instances present in the instance
After this is done in all StudioWorkspace instances cross-check the running containers in the containers tab, all the containers should be in the passivated state
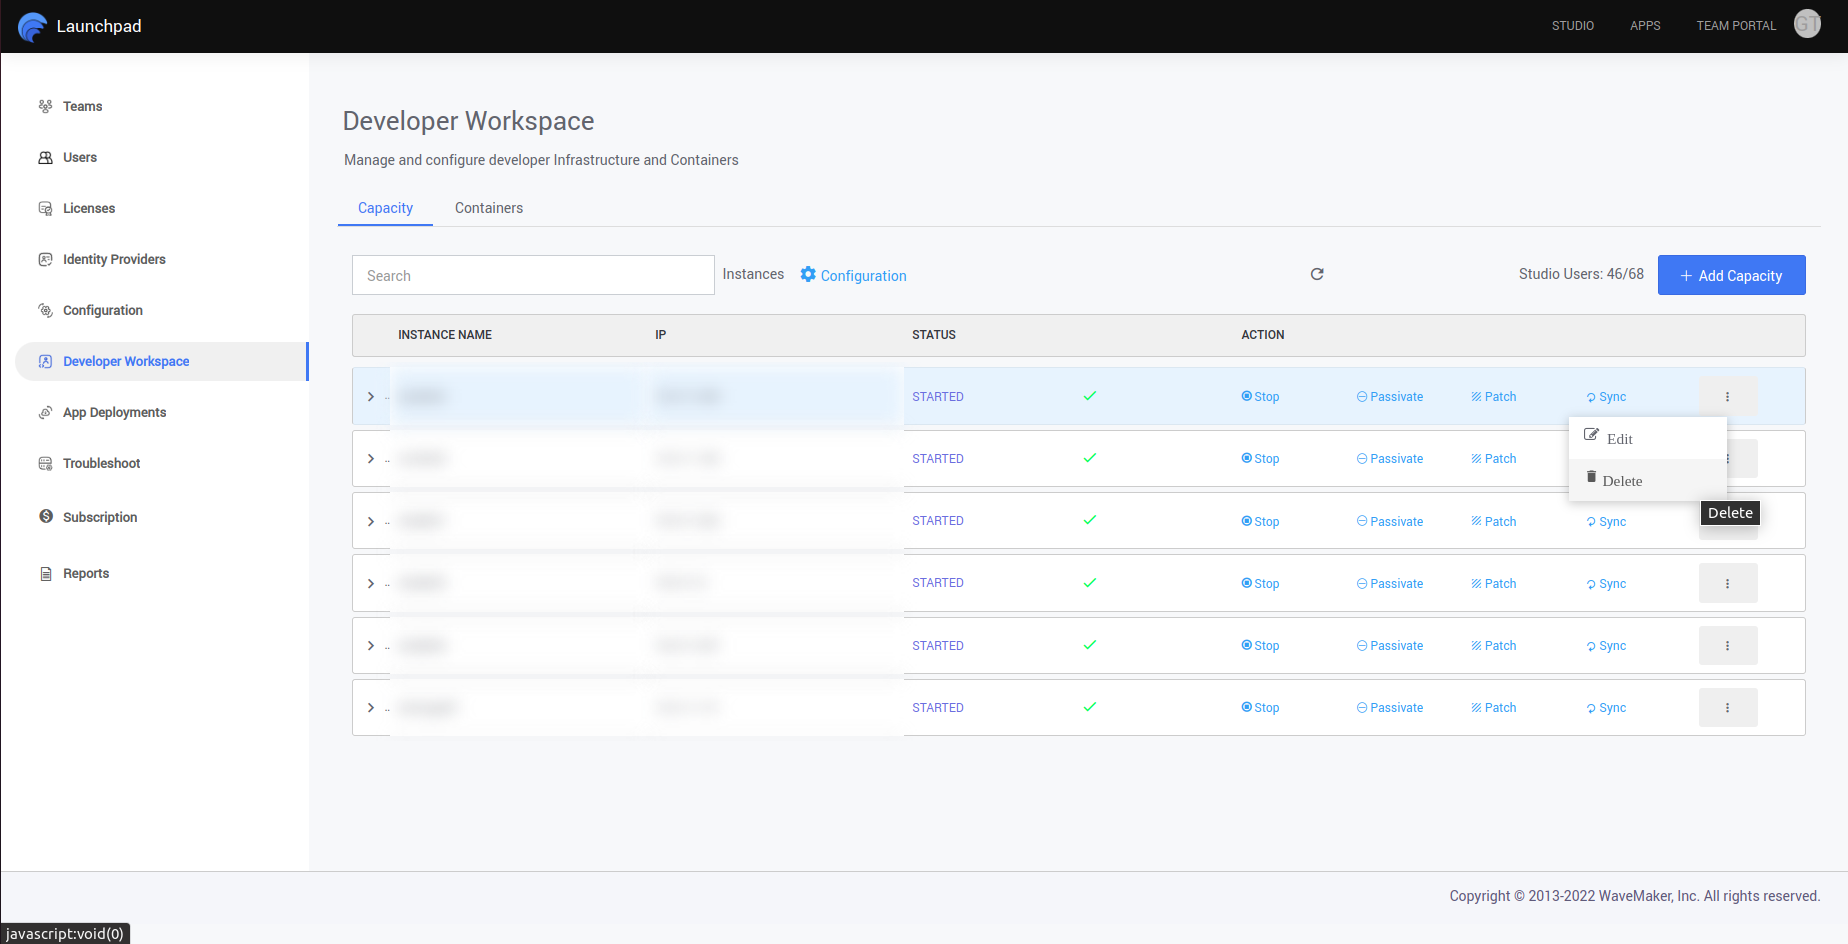
After making sure all containers are passivated come back to capacity and select one by one Instances and hit the delete icon as shown below, this will delete the instance from the setup
After completed the above process in Developer Workspace, go to AppDeployments, and perform the same operation mentioned above in all AppDeployment Instances(Demo, Stage, Live)


Command Line
You can execute the below command in Platform Instance, it will passivate all the container and will delete StudioWorkspace/AppDeployment instances in the setup
protocol represents what web protocol is used to connect to WaveMaker application (http/https)
domain represents the domain name in which WaveMaker application is running
adminUser and adminPasswd refer to the admin credentials which are used to access launchpad.
Refer below mentioned example command for passivation
Stop the WME Setup
We recommend you to stop the WME setup before proceeding for further steps
You can stop the WME setup operation either by executing commands at the command line or from the config wizard portal
Command Line
- Use the following command to stop the WME setup in Platform Instance. You need to ssh to the Instance and need to have root privileges to execute the below script.
CW Portal
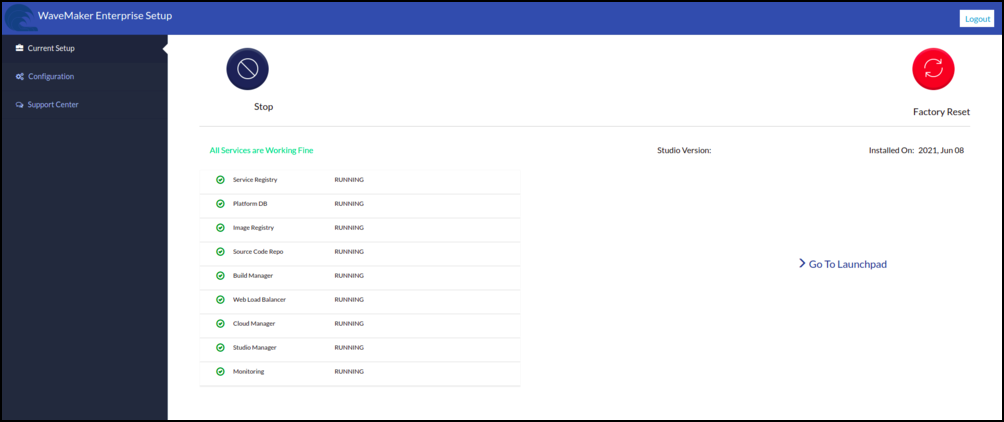
- Log in to the CW portal, after login in home page you can see the stop button as shown in the image below, hit the stop button to stop the WME setup

How to take a backup of the data
- Take a backup of the
/wm-datadirectory of Platform Instance by taking a snapshot of a volume. - For the disaster and recovery process take a backup of the
/datadirectory of StudioWorkspace Instance / AppDeployment Instance by taking snapshots.
AWS
- For taking a snapshot of volume in AWS cloud provider please refer volume snapshot in aws.
- Stop WME EC2 instance and detach eth1 network interface follow the steps given here, make a note of interface ID or ENI ID
Azure
- For taking a snapshot of volume in AZURE cloud provider please refer volume snapshot in azure.
- Stop WME VM and detach network interface follow the steps given here, make a note of interface ID.
GCP
- For taking a snapshot of volume in GCP cloud provider please refer volume snapshot in GCP.
- Stop WME VM aESXietach IP address follow the steps given here, make a note of interface ID.
VMWARE ESXi and Hyper-V
- Use the below steps for taking /wm-data backup in Platform Instance, it will create data.tar in /wm-data location.
- Copy the generated data.tar to secure location on new WME Platform Instance or to any cloud storage services.
Data restore
Platform Instance
- Launch the instance or VM with the same IP address with the latest AMI Image. To create WME Platform Instance in the different cloud and on-premise environments please follow the below steps attach the /wm-data volume to Platform Instance and Mount the volume to the platform Instance using the following command.
- Make sure have to attach backup /wm-data volume to Platform Instance.
AWS
- To launch WME Platform instance in AWS cloud environment please refer WME Platform instance Infrastructure in AWS.
AZURE
- To launch WME Platform virtual machines in AZURE cloud environment please refer WME Platform instance Infrastructure in AZURE.
GCP
- To launch WME Platform virtual machines in GCP cloud environment please refer WME Platform instance Infrastructure in GCP.
VMWARE ESXI
- To create WME Platform virtual machines in VMware Esxi please refer WME Platform instance Infrastructure in VMware Esxi.
Hyper-V
- To create WME Platform virtual machines in Hyper-V please refer WME Platform instance Infrastructure in Hyper-V.
Volumes Based Disks Restoring(AWS, GCP, Azure)
- Update the fstab entry for volume on every system reboot, add an entry for the device to the /etc/fstab file.
- Take the UUID of disks for identification by using the following command.
- To entry, the UUID of the disks in fstab, use the following format.
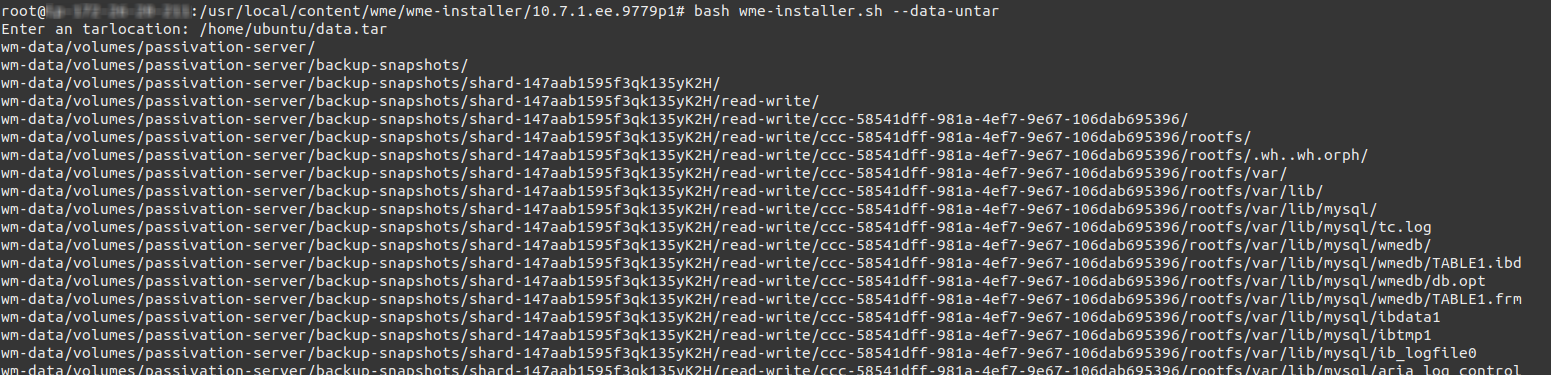
Directory based Disks Restoring(VMWARE ESXi and Hyper-V)
- Copy tar which was archived in the previous steps
- Use the below steps for restore /wm-data using data.tar which was archived in previous steps in Platform Instance,
StudioWorkspace Instance / AppDeployment Instance
- Launch StudioWorkspace Instance/AppDeployment Instance in different Infra providers from Link WaveMaker Launch Instances.
Installing WME on New Instance
- For Download WaveMaker installation package please refer WaveMaker package Installation.
- Extract Package please refer WaveMaker package extraction. Initializing the setup please refer WaveMaker Initialization. Make sure to provide the same CIDR Range which is used in the previous setup.
- Setup using config wizard please refer WaveMaker configwizard setup and use same WaveMaker studio and built apps Domain names.