Central Authentication System
The Central Authentication Service (CAS) is a single sign-on protocol for the web. Its purpose is to permit a user to access multiple applications using the same underlying authentication service. For example, a company has HRIS system which authenticates using LDAP. Now we want to build a Leave application using WaveMaker. If we need to provide a single login to Leave App & HRIS, then CAS is the solution to enable single sign-on.
CAS also allows web applications to authenticate users without gaining access to a user's security credentials, such as a password. The CAS protocol involves at least three parties: a client web browser, the web application requesting authentication, and the CAS server. It may also involve a back-end service, such as a database server, that does not have its own HTTP interface but communicates with a web application.
When the client visits an application desiring to authenticate to it, the application redirects it to CAS. CAS validates the client's authenticity, usually by checking a username and password against a database (such as Kerberos, LDAP or Active Directory). If the authentication succeeds, CAS returns the client to the application, passing along a security ticket. The application then validates the ticket by contacting CAS over a secure connection and providing its own service identifier and the ticket. CAS then gives the application trusted information about whether a particular user has successfully authenticated.
To set up authentication using a Central Authentication Service in WaveMaker apps, enable from the security dialog, choose CAS as the Security Provider.

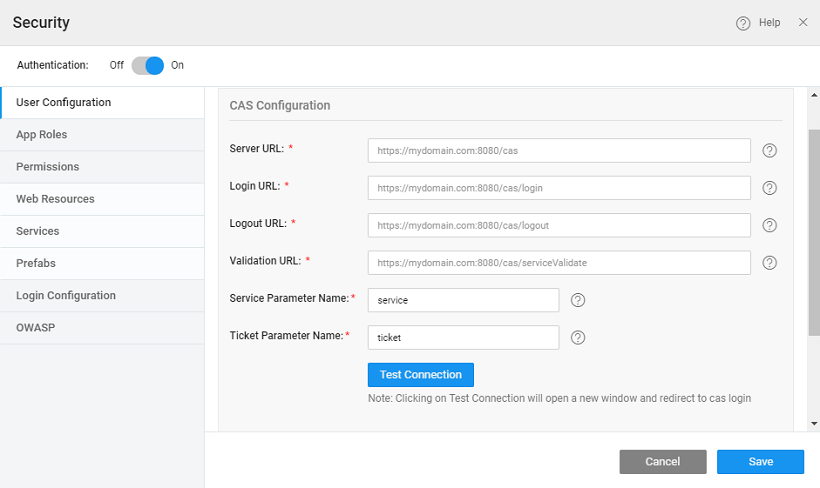
When you choose CAS as the Security Provider, you can perform the following configurations on the Users tab:
Server URL
This field specifies the context path of the CAS server. Example: http://mydomain.com:8080/cas
Login URL
This fields specifies the login path relative to the server URL where login page will be shown. Example: http://mydomain.com:8080/login.
This field will be auto-populated based upon the Server URL and it can be edited as per requirement.
Validation URL
This fields specifies the URL where service ticket validation will happen. Example: http://mydomain.com:8080/serviceValidate.
This field will be auto-populated based upon the Server URL and it can be edited as per requirement.
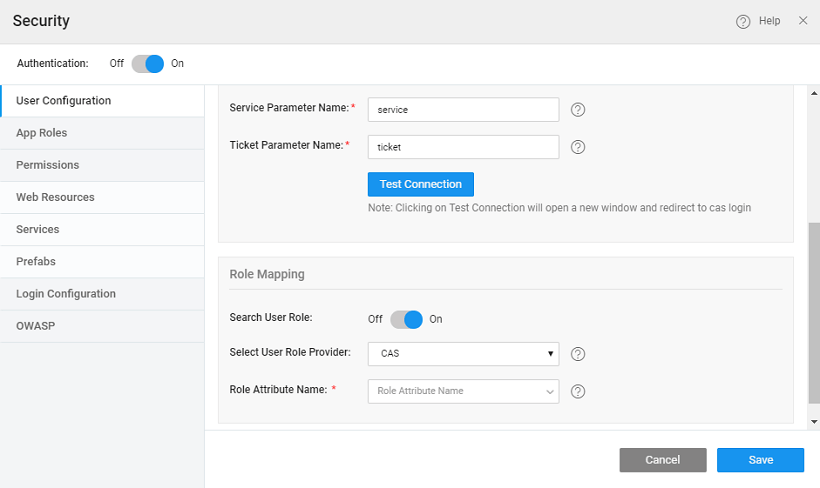
Service Parameter Name
This fields helps configure the callback URL for CAS login. The default value is 'service'. For example, cas-server-webapp/login? service=https%3A%2F%2Flocalhost%3A8443%2Fcassample-1.0%2Flogin%2Fcas
Ticket Parameter Name
This fields helps configures the Request Parameter to look for when attempting to see if a CAS ticket was sent from the server. The default value is 'ticket'. For example, /cassample-1.0/login/cas?ticket=ST-1-lCYeRuXfmhKid1auqdy2-cas01.example.org.
Test Connection
Clicking on Test Connection will open a new window that redirects to CAS login page . After login, sample response will be shown in tabular format. The possible attributes for the role attribute name, in case of CAS authorization, will be extracted from here.
Role Mapping
This section can be used to define roles for the purpose of authorization. Your app might need authentication but no authorization, in such cases un-check the Search User Role option.
Select User Role Provider
Choose the user role provider.
- If you select CAS, mention the attribute name returned by the CAS that contains the User Role values. The Role Attribute Name will be populated from the CAS authentication response, after successful Test Connection, you can choose from the list. In case you know the attribute name, you can enter it without testing the connection.
- If you select Database then authentication is performed using CAS and authorization (roles) content is retrieved from the database. This allows you to use username and password credentials from CAS while retrieving role content from a separate database.
Database Authentication
- Data Model: The Data Model (database) that contains the tables for the username and password fields. Choose the Data Model from the pull-down menu. (You have to import the database first. If you have imported the database and it does not appear in this list, try closing and reopening the project).
- Entity: Select the table that contains the columns for the usernames and passwords.
- Username Field: Select the column for the user (login) name.
Ensure that the username values that are returned by the CAS authentication exist in the database, these will not be added automatically.
- Userid Field: The primary key for the table selected in Entity
- Password Field: Select the column for the password.
- Role Field: Select the column for the user's role.