Session Persistence - Scaling Application
Session persistence is a configuration where you can store sessions. You should configure session persistence to enable Horizontal Scaling.
Horizontal Scaling replicates the application with multiple nodes and servers. With this approach, the load is distributed among these nodes. Typically, Horizontal scaling can serve more users and requests and there is no limit on the number of nodes that can serve the same application.
How to Configure Session Persistence
- Connect to the Database.
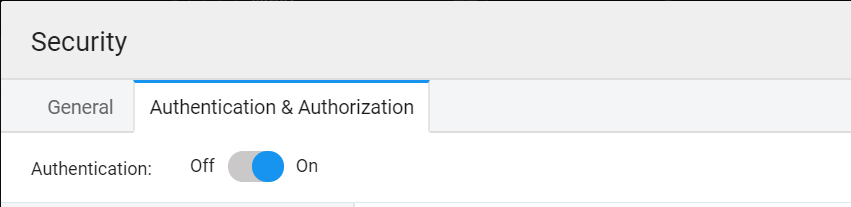
- Go to the Security menu.

- Navigate to the Authentication and Authorization tab and enable Authentication.
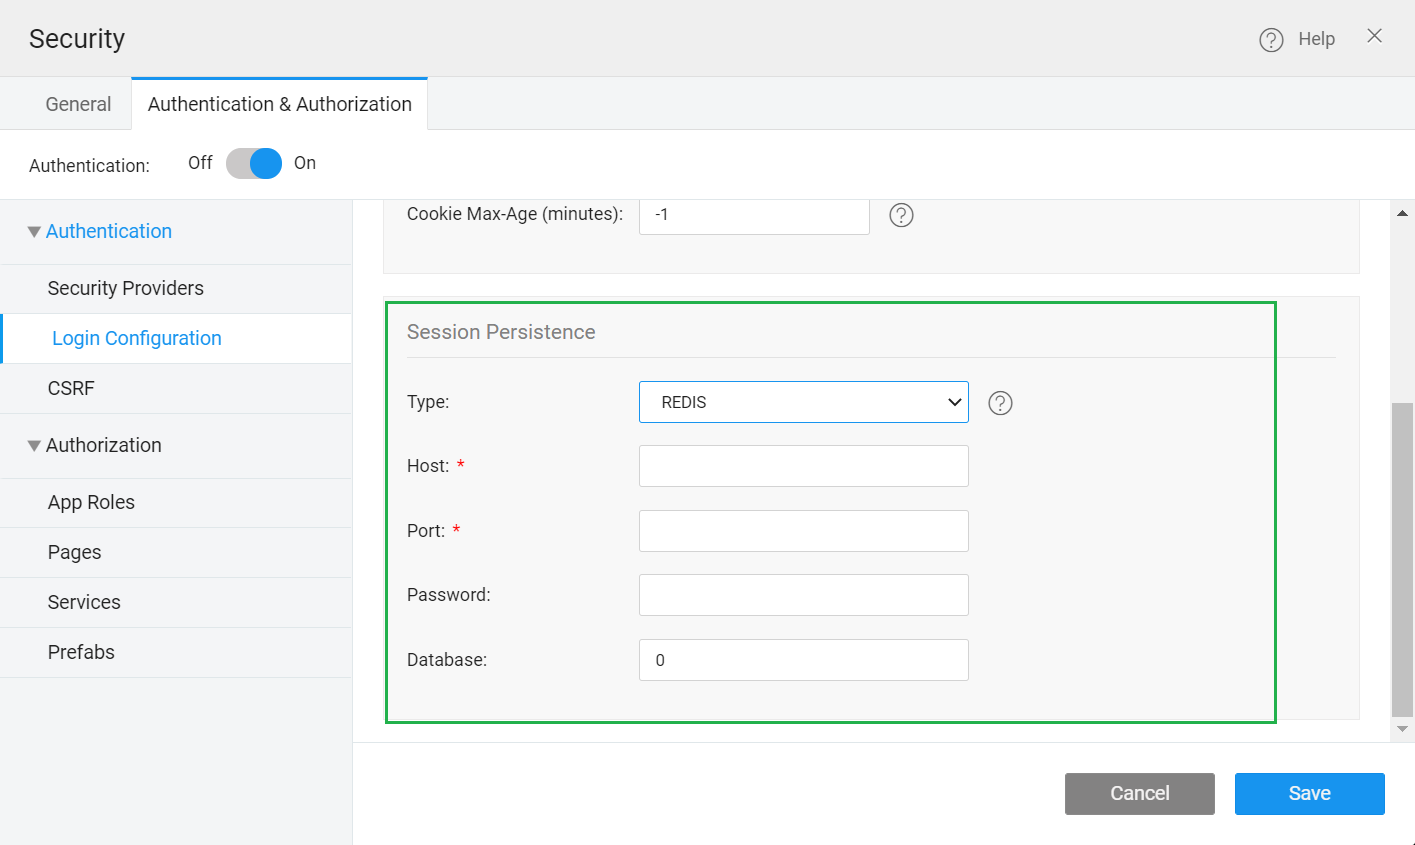
Go to Login configuration from the left navigation.
Scroll down to Session Persistence.
Select Type from the following:
- In-Memory
- REDIS
- JDBC
- MONGODB
In-Memory
In-Memory is the default selected option; this will work fine for a single node application.
REDIS
When you select REDIS, you have to provide the following information:
- Host
- Port
- Password
- Database
For more information, see Host, port, password and database. The Database is 0 by default. You can configure this according to the REDIS setup.
JDBC
For JDBC, it displays a dropdown of all the imported databases in the project. The application typically has multiple logins and it stores multiple login sessions, and those sessions and their timeout information is stored in the table.
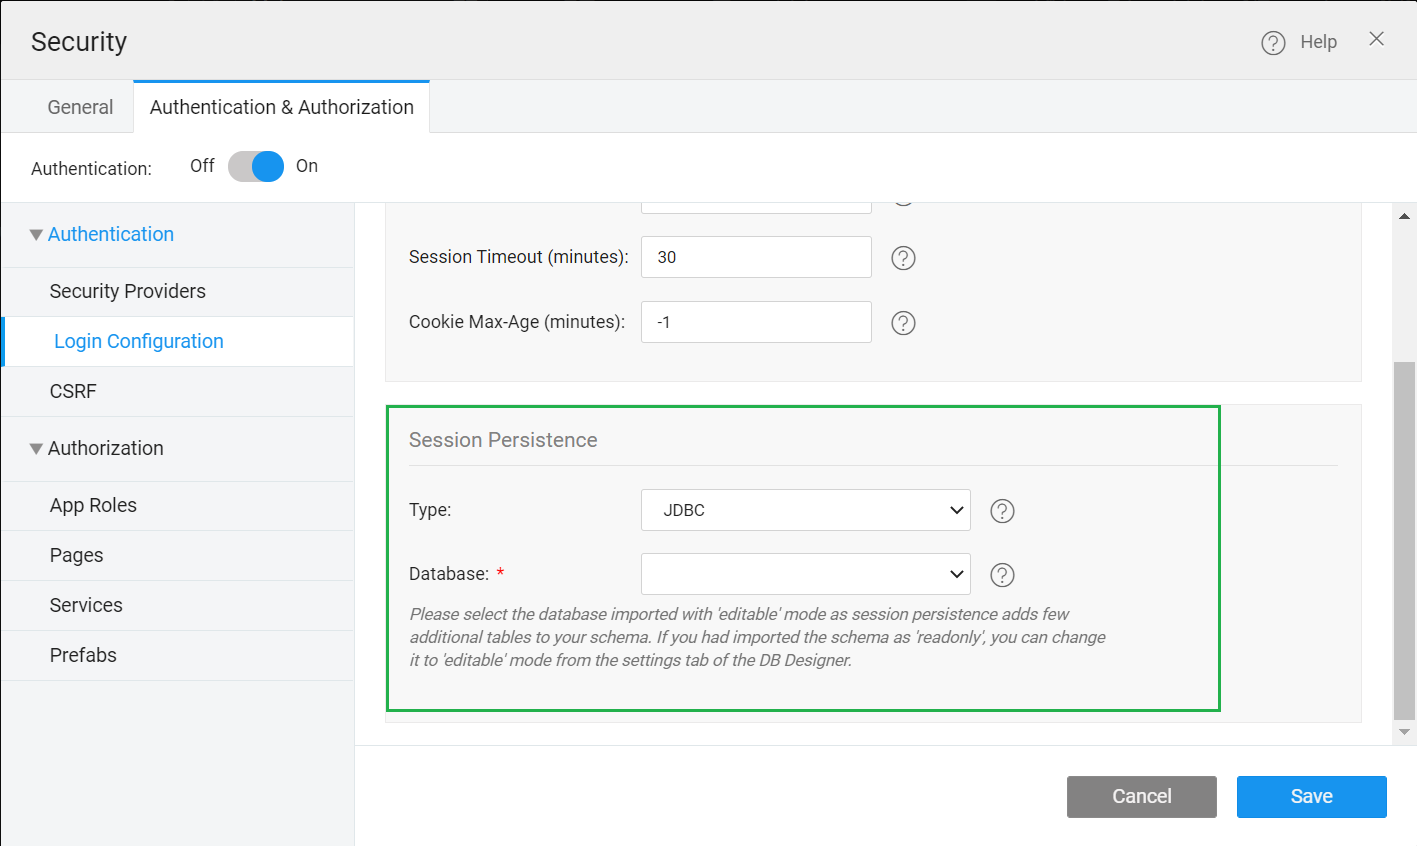
- Select the Database from the dropdown to configure session persistence.
Ensure the selected database should be in editable mode and not read-only.
- Save the settings.
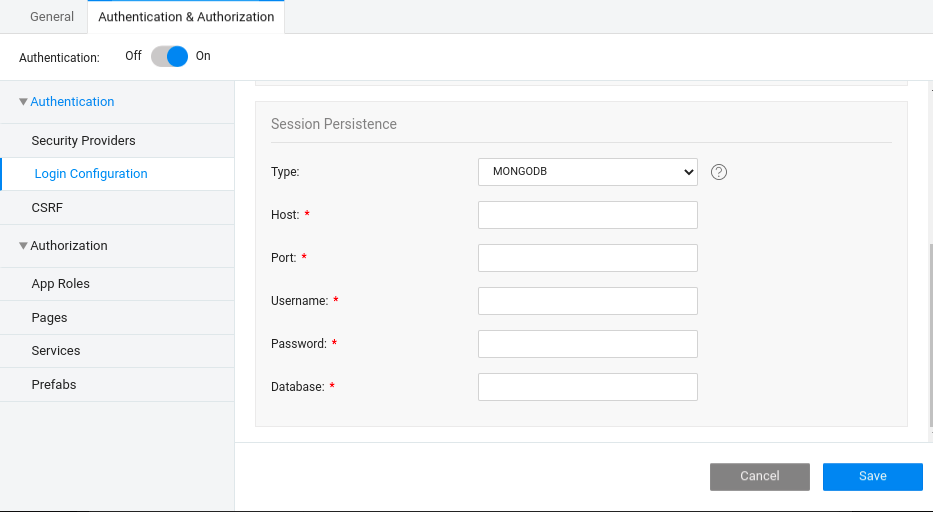
Mongo DB
You can configure a MongoDB database for storing sessions.
- From the Security window, choose Session Persistence
- Choose the Type
MONGODBfrom the dropdown. - Provide all the required details, such as Database name, Port, Host, Username, and Password.
- Click Save.
The required driver and the configuration files gets automatically imported into the project, and the application can connect to MongoDB.