Creating Prefabs
Prefabs are reusable application parts that interact with APIs and data on the web. Prefabs can be embedded and integrated into your applications with ease. You can create your own Prefabs using WaveMaker.
To learn more, see Prefabs Overview.
Build your own Prefabs
Prefabs are reusable application parts that interact with APIs and data on the web. Prefabs can be embedded and integrated into your applications with ease. You can create your own Prefabs using WaveMaker.
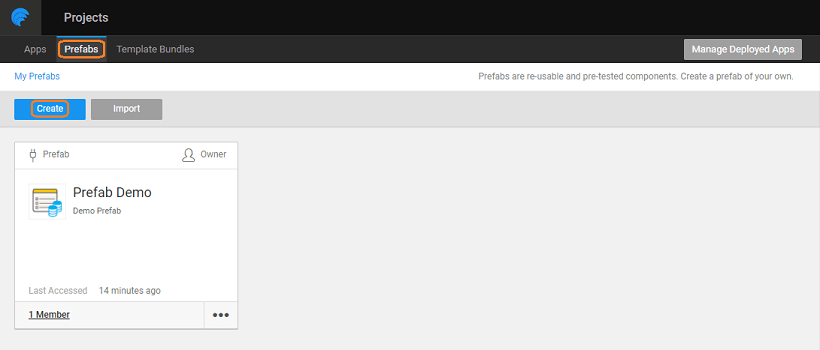
- From the Project Dashboard, select Prefab tab and click Create
- Enter a Name, set an Icon for the Provatar and enter Description
- Review the Package and Copyright information and Save to continue. Make changes if needed.
Prefab Configuration
To Configure Prefab, from Project Configurations click Settings to select Config Prefab option. The various configurations are grouped under various headings for developer convenience
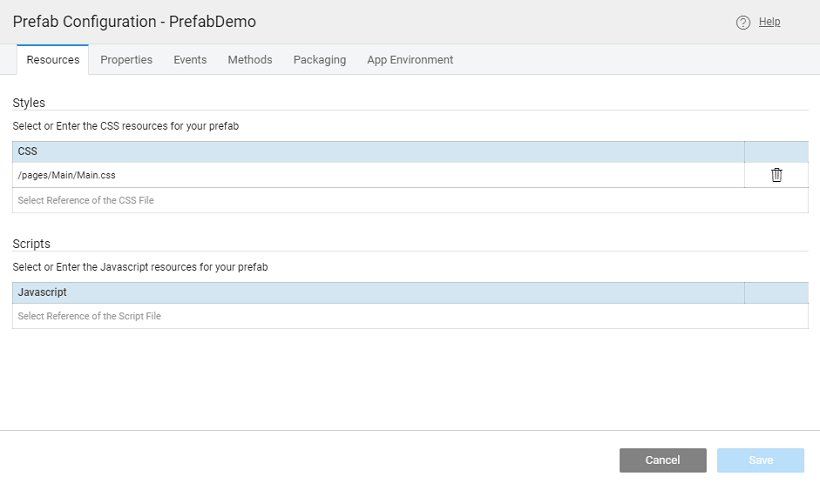
Resources
Under this tab, you can set the following resource references as needed by your Prefab. Before setting the details, you will need to Import Resource into your Prefab project.
Style: The CSS style associated with the project will be applied to this prefab. You can add your own style file.Script: Any scripts that need prior execution can be added here.
Properties
Users can add Prefab properties, which are exposed to the developers using the Prefab. These properties can take some input from the app(inbound) or give some output to the app(outbound) or both. These properties are defined in the Prefab scope. These properties will be displayed in the properties panel when the user uses the Prefab. The properties are further classified into UI and Server properties.
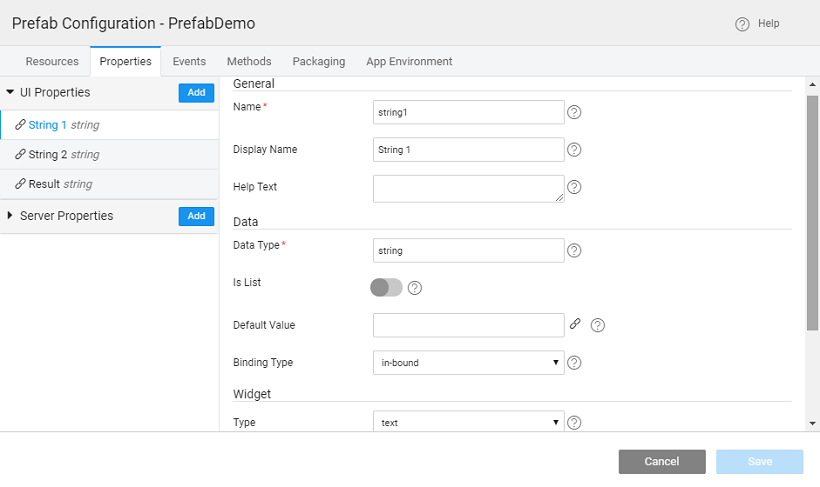
UI Properties
These are the properties that can be set from the front-end by the app developer using the Prefab.
General
Name: a meaningful name in small characters,Display Name: property for setting the display name of the property in the properties panel,Description: This property can be used to set the help text for the property in the properties panel. This will also be used when generating Documentation for the Prefab while publishing the same
Data
Data Type: of the value that can be entered for this property,Default Value: value given to the property, in case the user does not enter any value,Binding Type: specifies the binding behavior of the property:
Binding Type
in-boundallows binding for input value for the property by giving a bind icon next to it,out-boundallows for the value of this property to be bound to another widget by exposing it in the binding dialog,in-out-bound: allows both input and output binding.
Widget
Widgets to be displayed in the properties panel - only for inbound properties
Type: of widget for display;Data Options: list of values for user selection.Show At: If a prefab is used in another app or prefab, all UI properties of the prefab are shown when the prefab element is selected in studio design canvas (by default). If a widget is selected in 'Show At' list, then this UI property is shown only if that widget is selected.
Data Options
Available only for the select, checkbox set, radioset widget type and can be bound to a variable.
This can be set to the following:
Custom- Dataset property can be populated with comma-separated values or bound to a variable.Depends on UI property- Property Name can be set to the already declared in-bound property. If the selected property has an object structure the same will be retained.
Show: whether the property is visible or not, can be conditional if bound to a variable returning a boolean value;Disabled: whether the property is disabled or not, can be conditional if bound to a variable returning a boolean value.
Server Properties
These are the properties that need to be set from the back-end (using Java service) by the app developer using the Prefab. These would typically include the token for authorization, and more.
Name: of the propertyDefault Value: for the property
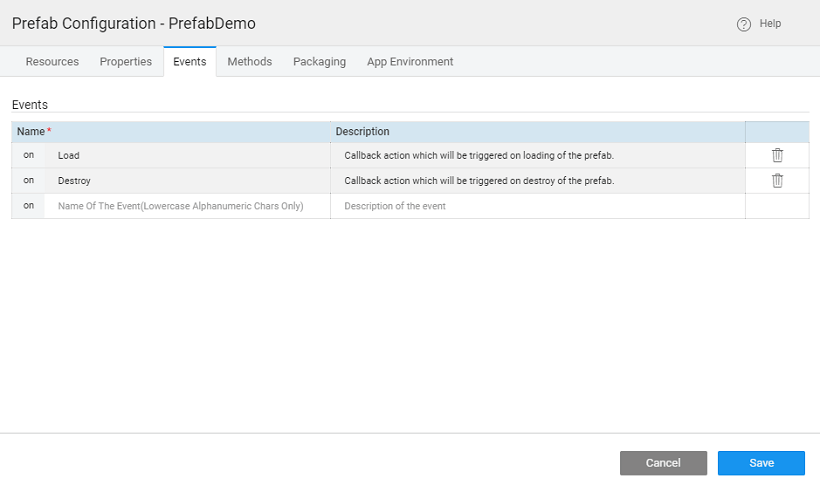
Events
You can define events that can be handled by the developers using the Prefab. These events will be exposed under the events tab when the developer uses the Prefab, the developer can handle these events as per their requirements. By default, two events are defined - onLoad and onDestroy which will be triggered when the Prefab is loaded and deleted, respectively, from the app. Each Event will have the following properties that can be set:
Nameof the event. It should be lower case and without any special characters. The event name gets prefixed withonand the first alphabet will get capitalized. For example, if you name an eventtestthe event variable created would beonTestDescriptionof the event. This will be used in the generatation of the documentation for the Prefab while publishing.
Events Flow
Following are the pre-defined events for every Prefab.
- on Load: this event is triggered whenever the page containing the Prefab loads or when the Prefab is dragged and dropped onto a page. This event is exposed to the Prefab user and can be further customized. It is displayed in the Events tab of the Prefab properties panel, after drag and drop in the project page.
- on Property Change: is triggered when any Prefab property is changed. This event is available only to the Prefab developer and is not exposed to the Prefab user.
- on Destroy: is triggered when the page containing the Prefab is closed or the Prefab is deleted from the page. This event is exposed to the Prefab user and can be further customized. It is displayed in the Events tab of the Prefab properties panel, after drag and drop in the project page.
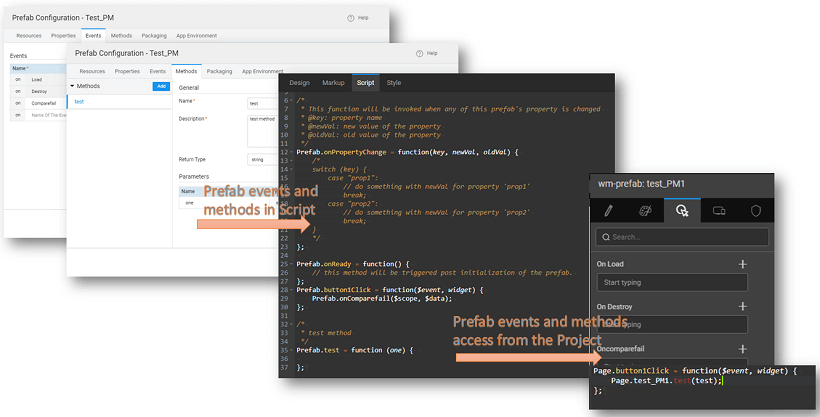
Apart from these, Prefab developer can define custom events, as mentioned in the previous section. These events are displayed in the Events tab of the Prefab properties panel, after drag and drop in the project page. Note that these custom events need to be triggered from within the Prefab. Actions assigned to these events from the project containing the Prefab will be performed only when the event is triggered. Events can be triggered using the following code (parameters $event and $data are optional):
Methods
You can define functionality in JavaScript which can be used by the developer. The developer can choose to invoke these methods in any way within the application using the Prefab as follows:
Nameof the method;Descriptionof the method. This will be used in the generation of the documentation for the Prefab while publishing;Return Typeof the method;Parametersrequired by the method.
If the method does not exist, a function definition for the method will be generated in the JavaScript which can be accessed from the Script tab of the Prefab. 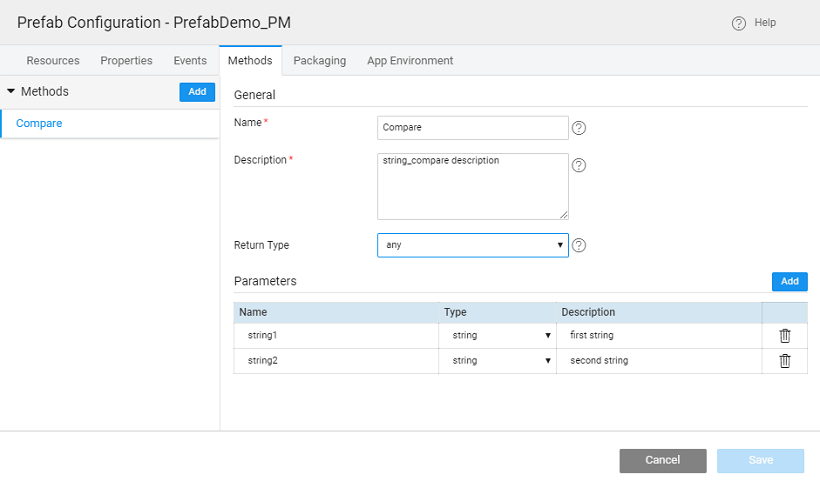 Click here to see the creation of a Prefab using Events and Methods
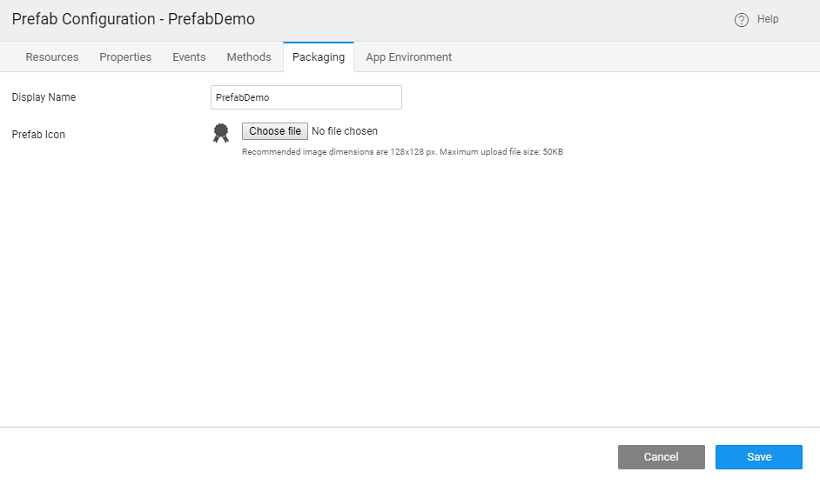
Packaging
These define how the Prefab appears in the Widget Toolbox in the apps
Name:display name for the Prefab.Icon: The icon displayed on the project dashboard for this Prefab can be changed by uploading it.
Testing Prefab
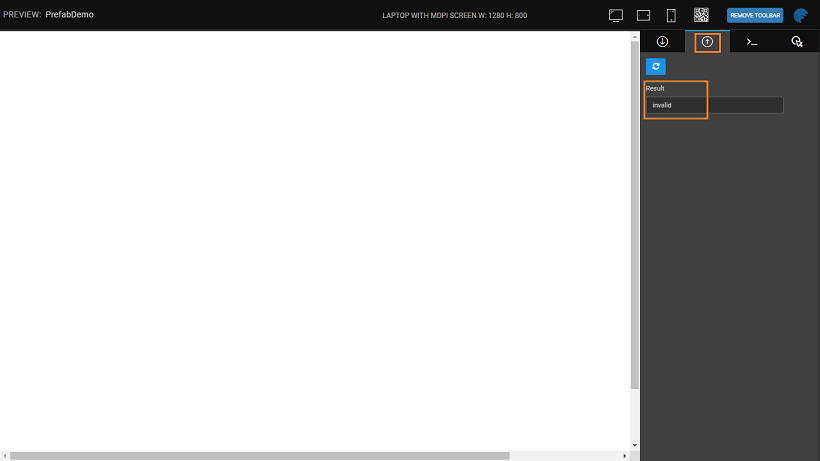
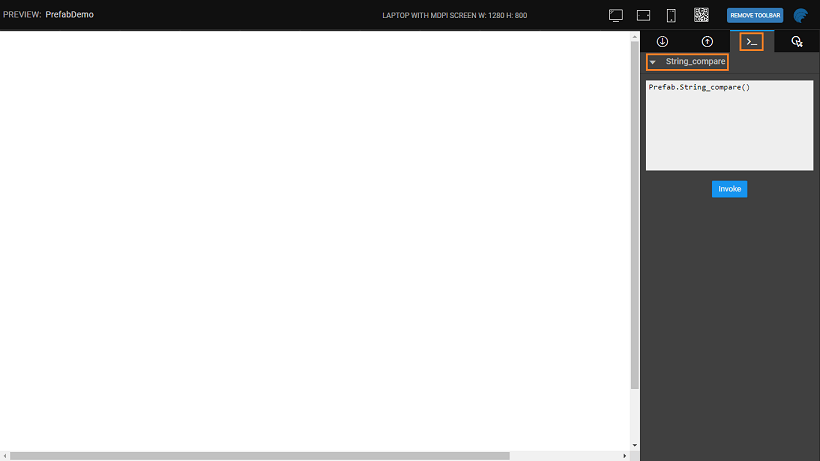
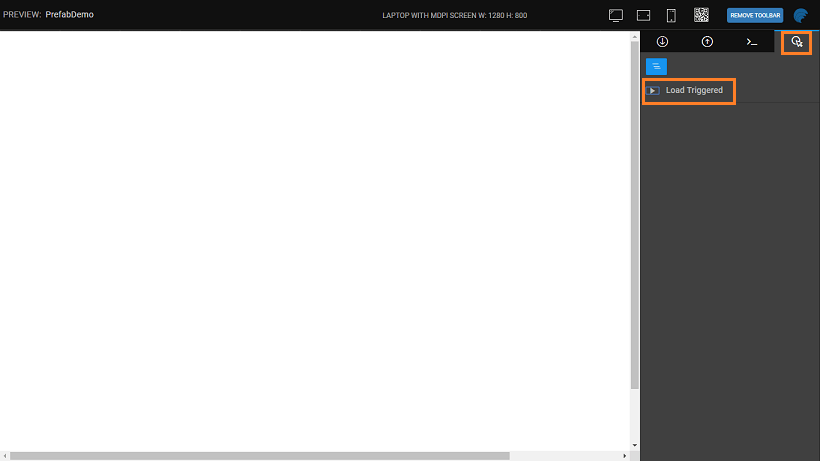
The preview option on Prefab allows you to test your Prefab. The following options are available from the Preview screen:
- The In-bound Properties are listed and you can enter the test values.

- The result is displayed from the Out-bound Properties tab.

- The various methods included in the Prefab can be viewed and invoked from the Methods tab.

- The various events invoked can be viewed from the Events Tab.


Publish Prefab
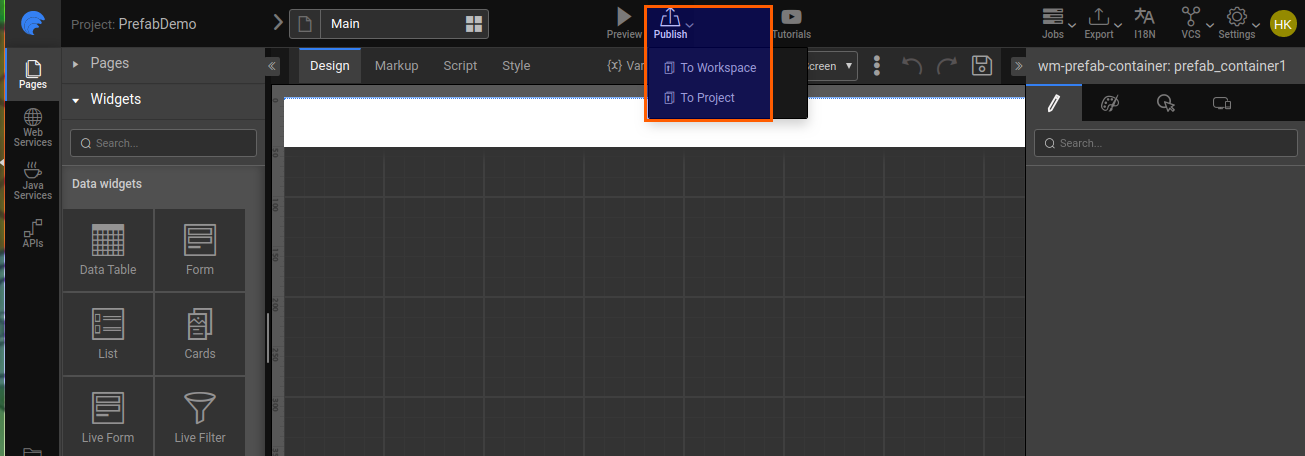
Publishing a Prefab has the following options:
Publish to Project: Prefab can be made available to a specific project in your project workspace or network for testing purposes only.
The Prefab will only appear in the specified project's widgets panel for use
The Project which is using a test Prefab cannot be pushed to VCS. In order to push changes to VCS, the test prefab needs to be either published to Teams or published to EDN (for Enterprise Version).
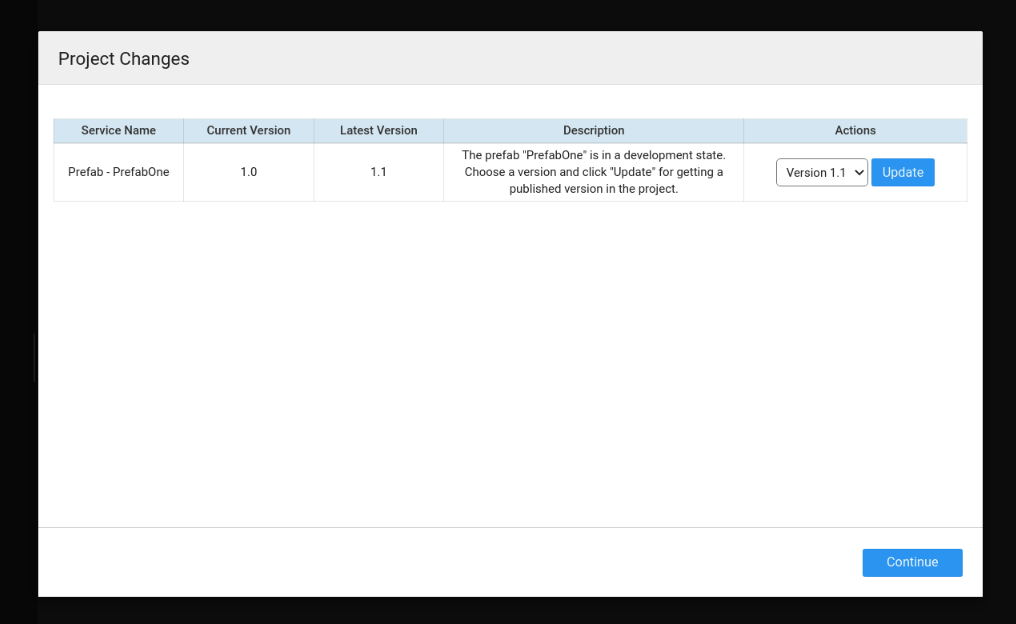
When a published test Prefab releases a newer version, which is already published to Team or EDN earlier, opening that project will be prompt you with the following dialog. You can choose a version and click update/revert for using a published version in the project or continue with the modified, unpublished version.
If the test prefab is not published to Team or EDN, it should be imported into the selected project from Prefabs dialog. Go to Artifacts dropdown and click Prefabs. Once imported, refresh the project.


- Publish to Workspace (non-enterprise version):
- The Prefab will appear in the Widget Panel for all projects within your workspace

- The Prefab will appear in the Widget Panel for all projects within your workspace
- Publish to EDN (enterprise version): Approval needed by EDN Admin
- You can publish the Prefab to EDN, and make it available to the entire enterprise
- After Admin approval, the Prefab will be listed in the artifact repository listing
- Import the Prefab to see it in the Widget Panel for drag and drop usage.

Once the published Prefab is imported it will be available in the Widget Toolbox for drag and drop usage. You can use the refresh icon to check for any modification/updates in the Prefab. 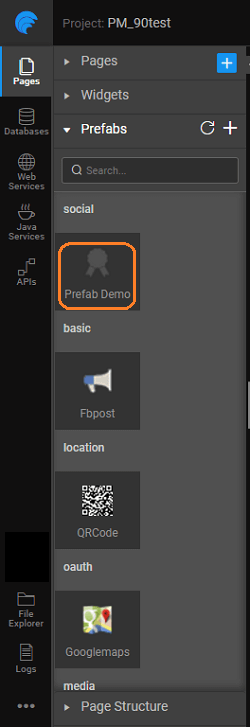
Publish Prefab to Workspace
Only for non-Enterprise Version
Using the Publish to Workspace option from the Main Menu listed under the app name, you can make your Prefab available across all projects within your workspace.  Once Published the Prefab will be displayed in the Prefab section of the Widgets Panel under the category specified at the time of publishing.
 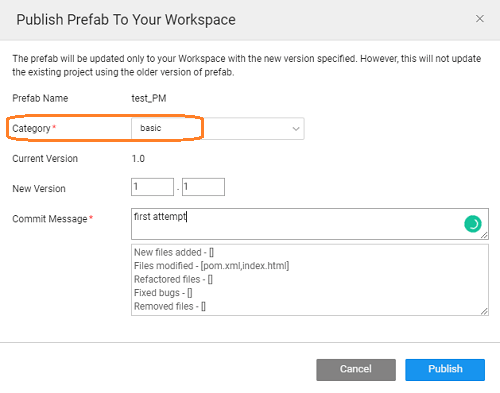 If you want to share the Prefab with another WaveMaker Developer, Export the Prefab as Zip. This zipped file can be imported from the Prefab section of the Project Workspace.
Publish Prefab to EDN
Only for Enterprise Version
Using the Publish to EDN option from the Main Menu listed under the app name, you can make your Prefab available across all projects. Refer to Artifacts Publishing Mechanism for more details. 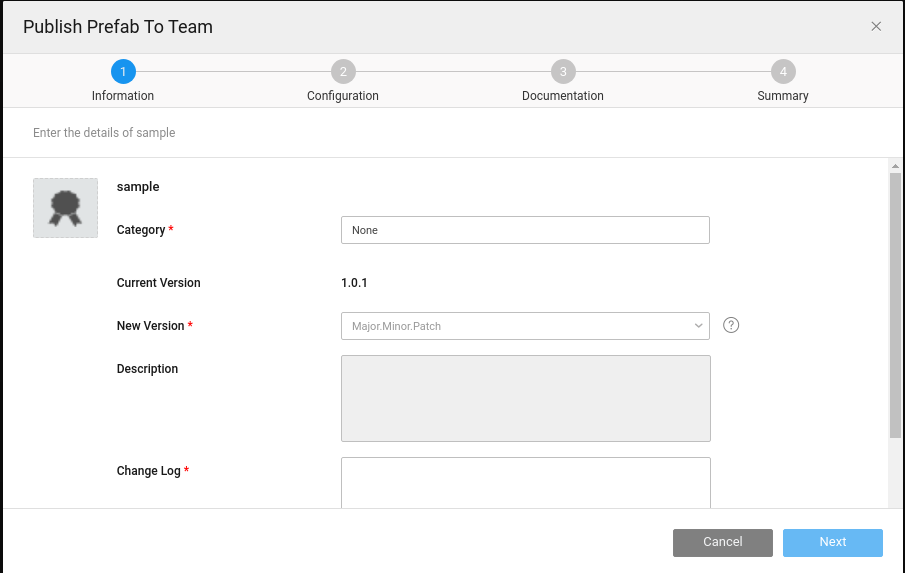
Once approved, these Prefabs will be available for Import from the Artifacts List. IMP: To use the Prefab in a project, the developer must Import the prefab into the project from the artifact repository and refresh the Prefab panel.
Publish Prefab to Project
Sometimes a Prefab may be used within a single project for testing purposes while it is still in development stages or changes made to a Prefab needs to be incorporated into a single project. In such cases, you can choose to Publish Prefab to Project. You can choose the project to which the Prefab needs to be updated, by selecting from the list. The Prefab will be displayed in the Widget Panel under Prefab section with a tag to indicate that it is an unpublished Prefab.

You need to remember the following:
- This version of the Prefab will not be available to other projects within your Project Workspace, nor will it appear in the Artifacts list (if not published).
- If it is an already published Prefab:
- When you open the selected project, you will be prompted either to revert to the published Prefab or continue with the modified, unpublished version.
- Choose to continue, when you want to test the Prefab for any changes before Publishing the changes.
- If the Prefab is not published
- You have published the Prefab directly to the project, or,
- You have imported a project zip file and it uses a Prefab that does not exist in your workspace, or,
- You have deleted the Prefab from the Artifacts dialog.
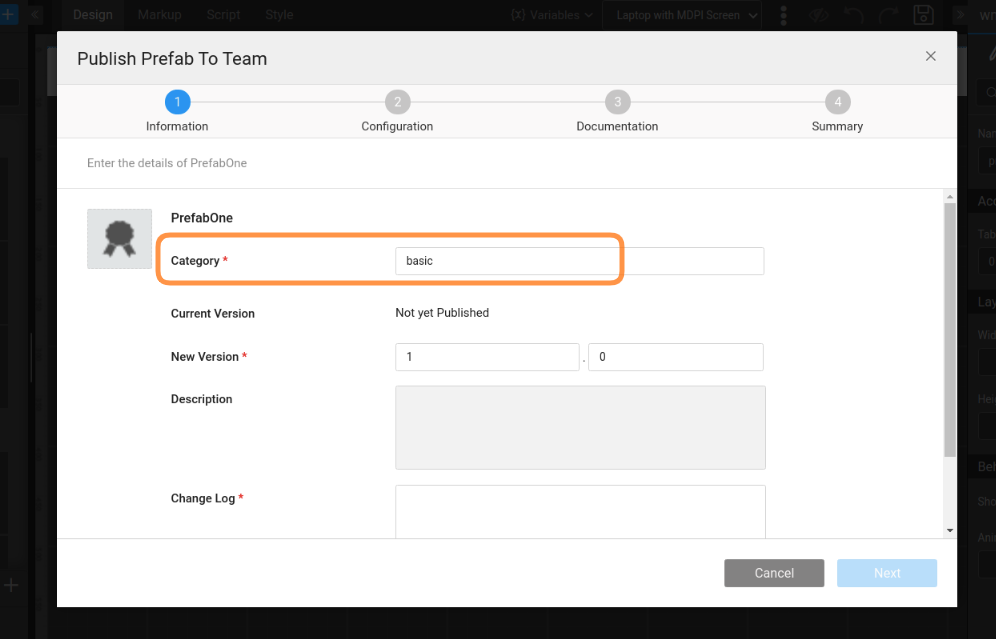
Publish Prefab to Team
You can publish the Prefab to Team, and make it available to the entire team.

Select a category and fill the required details and publish.

Once the prefab is published, it needs to be approved by the Team Admin from Team Portal.
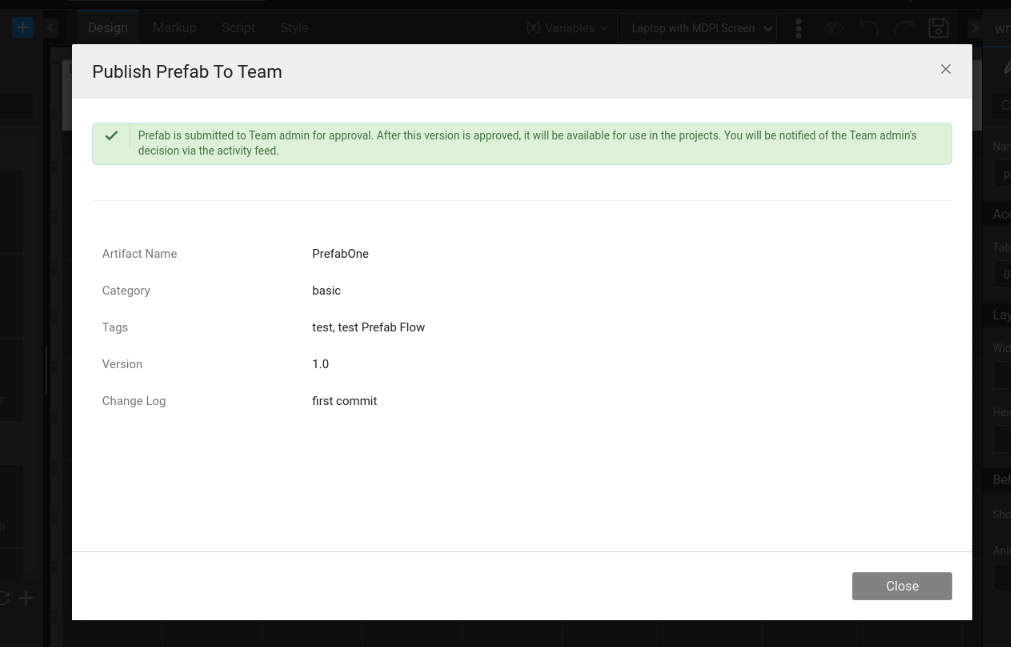
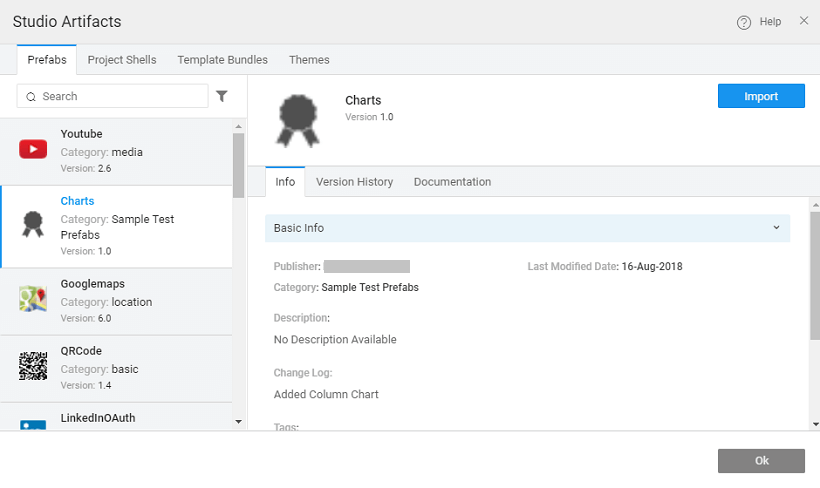
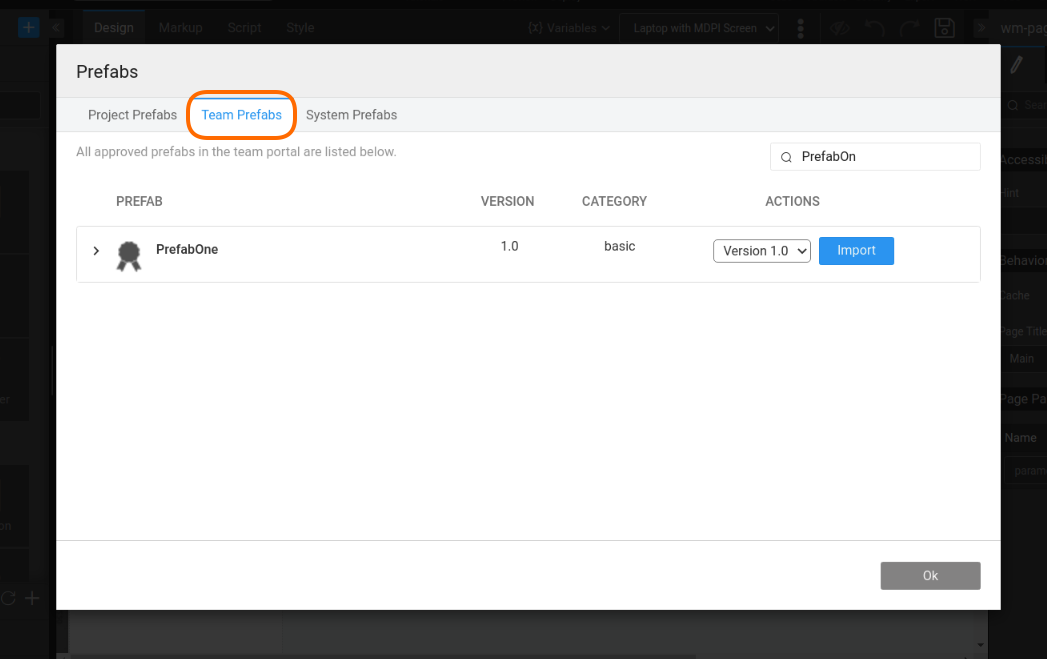
After the Admin's approval, these Prefabs will be available for import from Prefabs dialog under Artifacts dropdown.


Update Prefab
In continuous development scenario, Prefabs may be enhanced to incorporate new functionality. In such cases you need to Publish the Prefab, changing the version number.
Prefab editing inside the application is disabled from 11.7.1.
To streamline the development process, editing Prefabs directly within the application is not allowed. Developers should make code changes to the Prefab project itself and then publish the updated project to see the changes reflected in the application.
Updated Prefabs: By updating the Prefab version while publishing the Prefab will update the version and the latest version will be available across all the projects. When a project using this Prefab is opened, the developer will be prompted to update the same within the project. When you open a project using the Prefab (i.e the Prefab was dragged and dropped onto the canvas) you will see a dialog asking you to update the Prefab You can choose to update or continue with the previous version. In case you choose to continue with the previous version, whenever you try to drag and drop the Prefab, you will be prompted to update the same.
Version Mismatches
Conflicts can arise when different versions of Prefabs are in use. Consider the following cases:
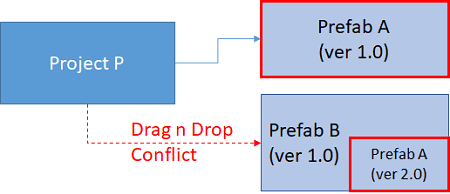
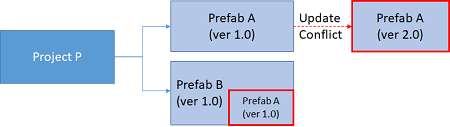
Case-1
- Project P is using Prefab A (ver 1.0).
- Drag and drop Prefab B which internally uses Prefab A (ver 2.0).
- Conflict arises over the version of Prefab A.
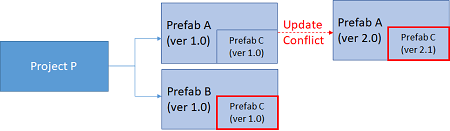
Case-2
- Project P is using Prefab A which internally uses Prefab C (ver 1.0).
- Drag and drop Prefab B which internally uses Prefab C (ver 2.0).
- Conflict arises over the version of Prefab C.

Case-3
- Project P is using Prefab A ver 1.0 and Prefab B which internally uses Prefab A (ver 1.0).
- Update on Prefab A (ver 2.0) is available.
- Project P tries to update Prefab A.
- Conflict arises over the version of Prefab A.
Case-4
- Project P is using Prefab A and Prefab B
- Both the Prefabs use Prefab C (ver 1.0).
- Prefab A (ver 2.0) is updated with Prefab C ver 2.1.
- Project P tries to update Prefab A.
- Conflict arises over the version of Prefab C.
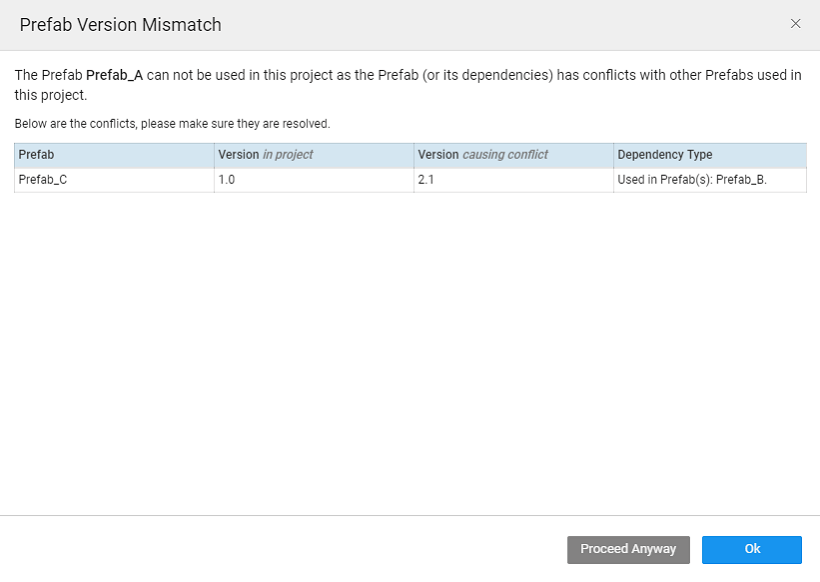
In all of the above cases, WaveMaker gives you an option of the following.
Proceed Anyway
Update the Prefab in conflict. This might break the functionality of the other Prefab which uses the conflict Prefab.
OK
This will retain the older version of the Prefab in conflict and cancel the current action which resulted in the conflict - drag and drop of Prefab B in Case 1 & 2 or update Prefab A in Case 3 & 4.
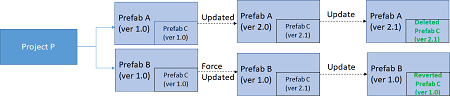
Versioning Special Case
In case an updated dependent Prefab is deleted that the force update will be reverted in the conflict Prefab. Revisiting the Case 4 above:
Case-4
- Project P is using Prefab A and Prefab B
- Both the Prefabs use Prefab C (ver 1.0).
- Prefab A (ver 2.0) is updated with Prefab C ver 2.1.
- Project P tries to update Prefab A.
- Conflict arises over the version of Prefab C.
Assume that the Project P developer choose to update Prefab C
- Both Prefab A and Prefab B are working with Prefab C ver 2.1.
- Consider that Prefab A is updated to ver 2.1 wherein the Prefab C has been deleted
- If Project P updates Prefab A to ver 2.1, then the Prefab C in Prefab B will be reverted to the original ver 1.0.
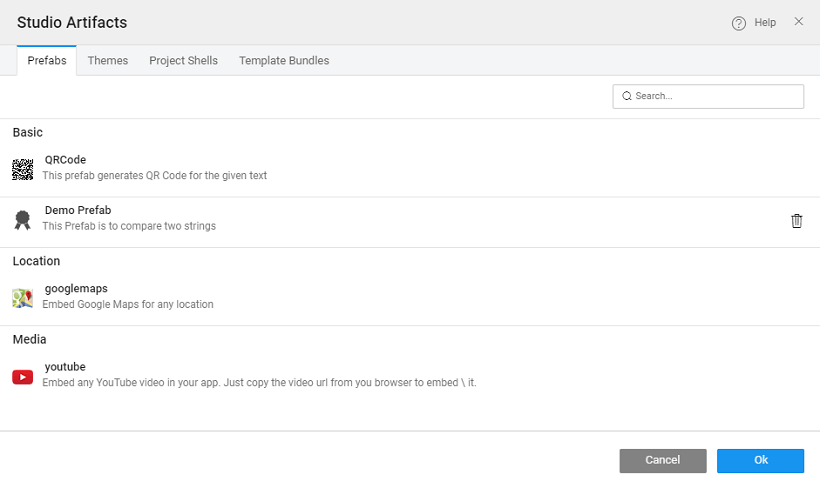
Deleting Prefab
You can delete a custom Prefab from your project using the delete icon in the [Studio Artifacts](http://[supsystic-show-popup id=120]) listing dialog.
Accessing Prefab through Scripting
- Once the Prefab properties are set, a onPropertyChange event is created, which can be programmed from the Script.
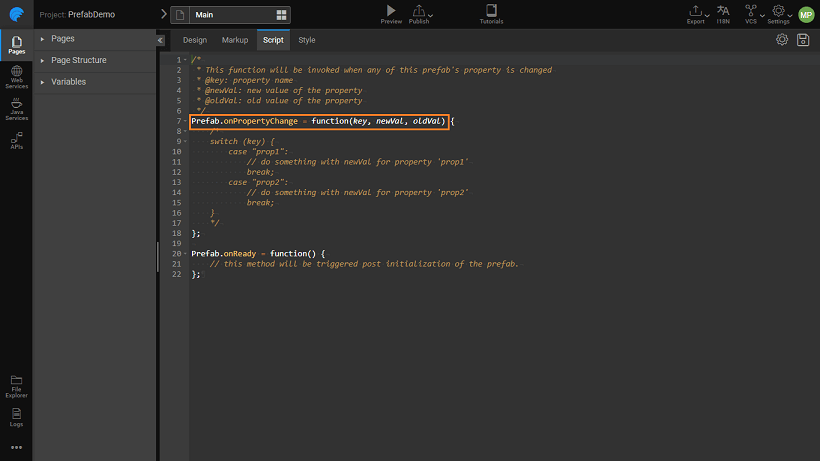
- The exposed properties are defined on the Prefab scope. They can be accessed/modified in the Prefab script using:
Prefab.[propertyname]
We have seen the basics of creating a Prefab including the configuration settings, and various publishing options. Check out various use cases for Prefab creation by clicking this link.