Deploy static content to AWS CDN for WaveMaker Apps
The frontend code of any WaveMaker application can be configured to deploy onto a CDN. This improves the end-user experience of the WaveMaker application because of dramatic gains made in the page load times. In this document, you will learn how to setup the deployment of WaveMaker frontend artifacts to CDN. While the instructions here deal with AWS, similar steps can be followed to deploy onto CDNs provided by any other cloud infrastructure providers.
- Create an Amazon S3 bucket
- Configure Origin Access Identity
- Create an Amazon CloudFront distribution
- Build and Deploy static Content to S3
Create an Amazon S3 bucket
Sign in to the AWS Management Console and open the Amazon S3 console .
Choose Create bucket, Next Enter Bucket Name, and Select the region for the bucket.
In Bucket settings for Block Public Access, choose the Block Public Access settings that you want to apply to the bucket.
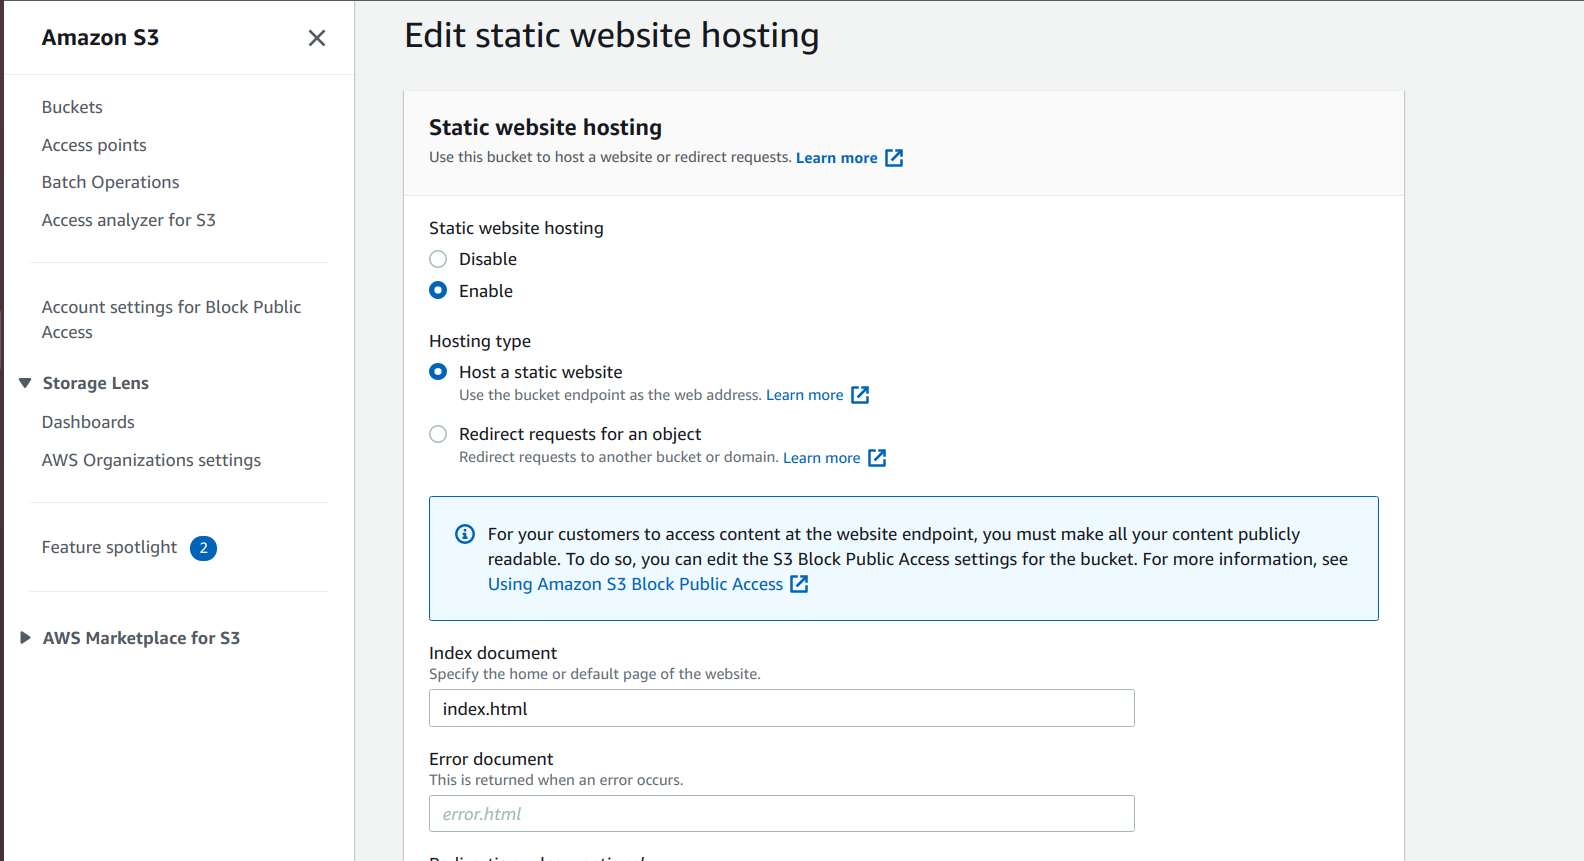
Go to bucket properties, enable static website hosting.

If the web application loaded in one domain and the frontend code in s3 loaded with a different CDN domain, then the end-user will receive error No 'Access-Control-Allow-Origin' header which is present on the requested resource. So, to selectively allow cross-origin access to your Amazon S3 resources, add CORS rules in the bucket permission section. If website content requires CORS, then add rules in the bucket permission section. For more details, visit aws s3 cors.
Configure Origin Access Identity
- An Origin Access Identity (OAI) is used for sharing private content via CloudFront. The OAI is a special CloudFront user and OAI has read permissions to the bucket. CloudFront will use the OAI to access the files in your bucket and serve them to end-users.
- When end-users access your Amazon S3 files through CloudFront, the CloudFront origin access identity gets the files on behalf of end-users. If end users request files directly by using Amazon S3 URLs, they're denied access. The origin access identity has permission to access files in your Amazon S3 bucket, but users don't. For more details visit private content restriction in s3
- Sign in to the AWS Management Console and open the CloudFront console, at security section select origin access identity and create Origin Access Identity by providing comment.
Create an Amazon CloudFront distribution
Sign in to the AWS Management Console and open the CloudFront console, select Create Distribution
On the first page of the Create Distribution Wizard, in the
Websection, choose Get Started.At Origin Domain Name select previously created S3 Bucket, if you want to store content in any specific directory provide an origin path.
select restrict buckets access as
yesand select previously created existing Identity.At Grant Read Permissions on Bucket select
yesfor update bucket policy ,it will provide read permission to the origin access identity when you create the distribution.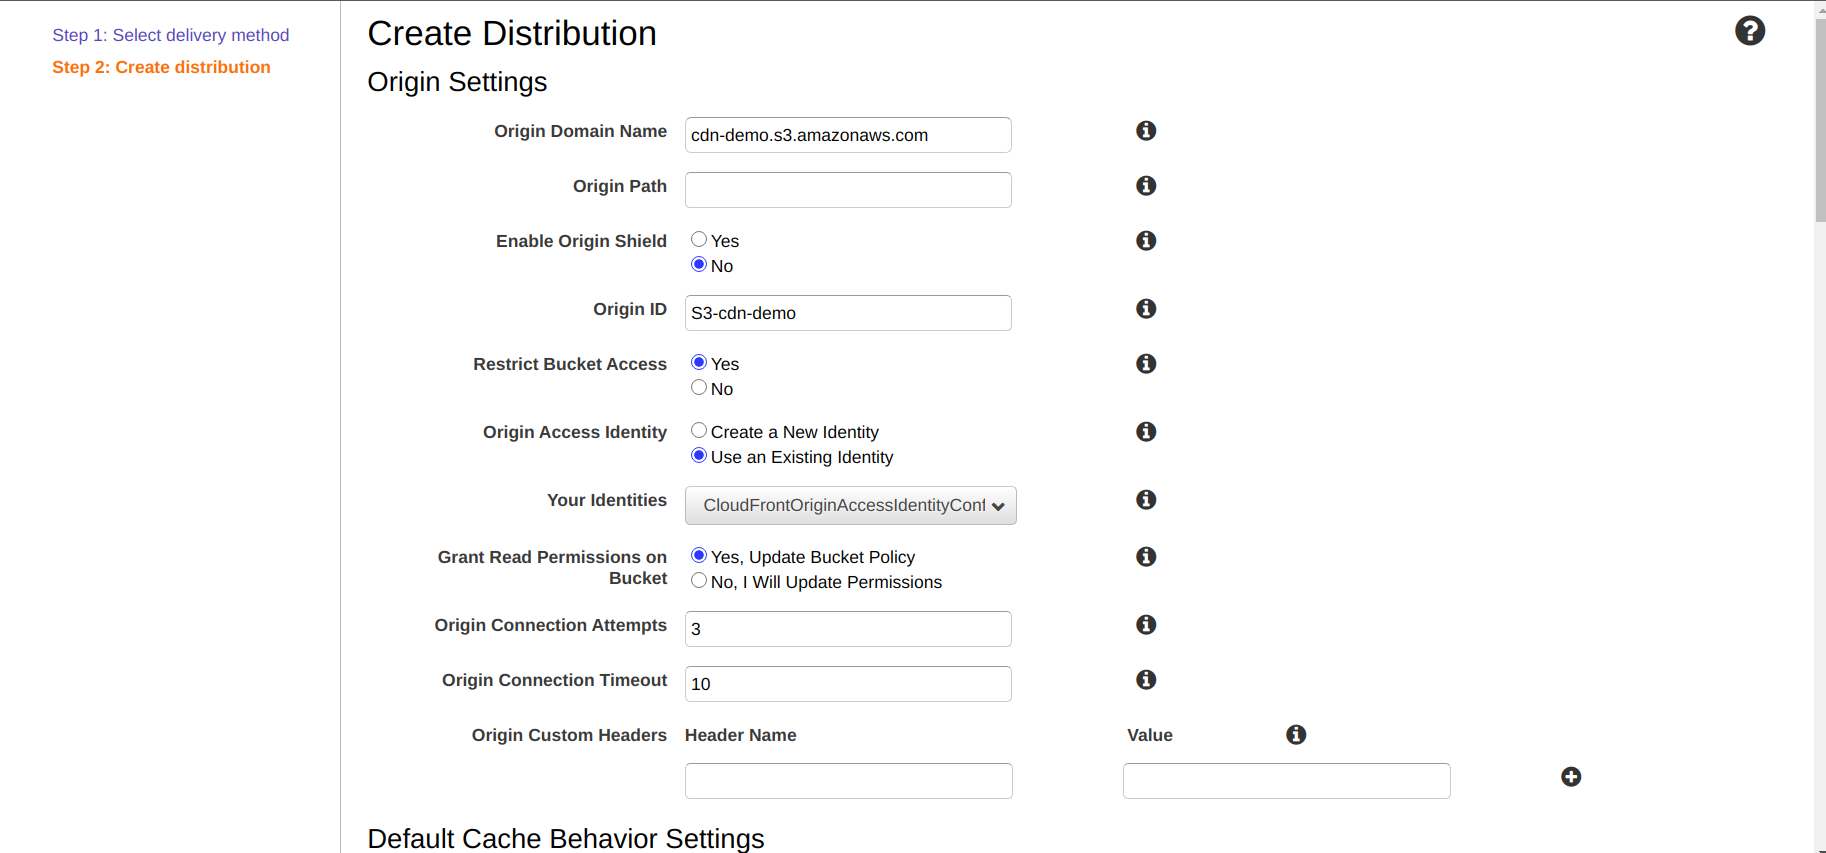
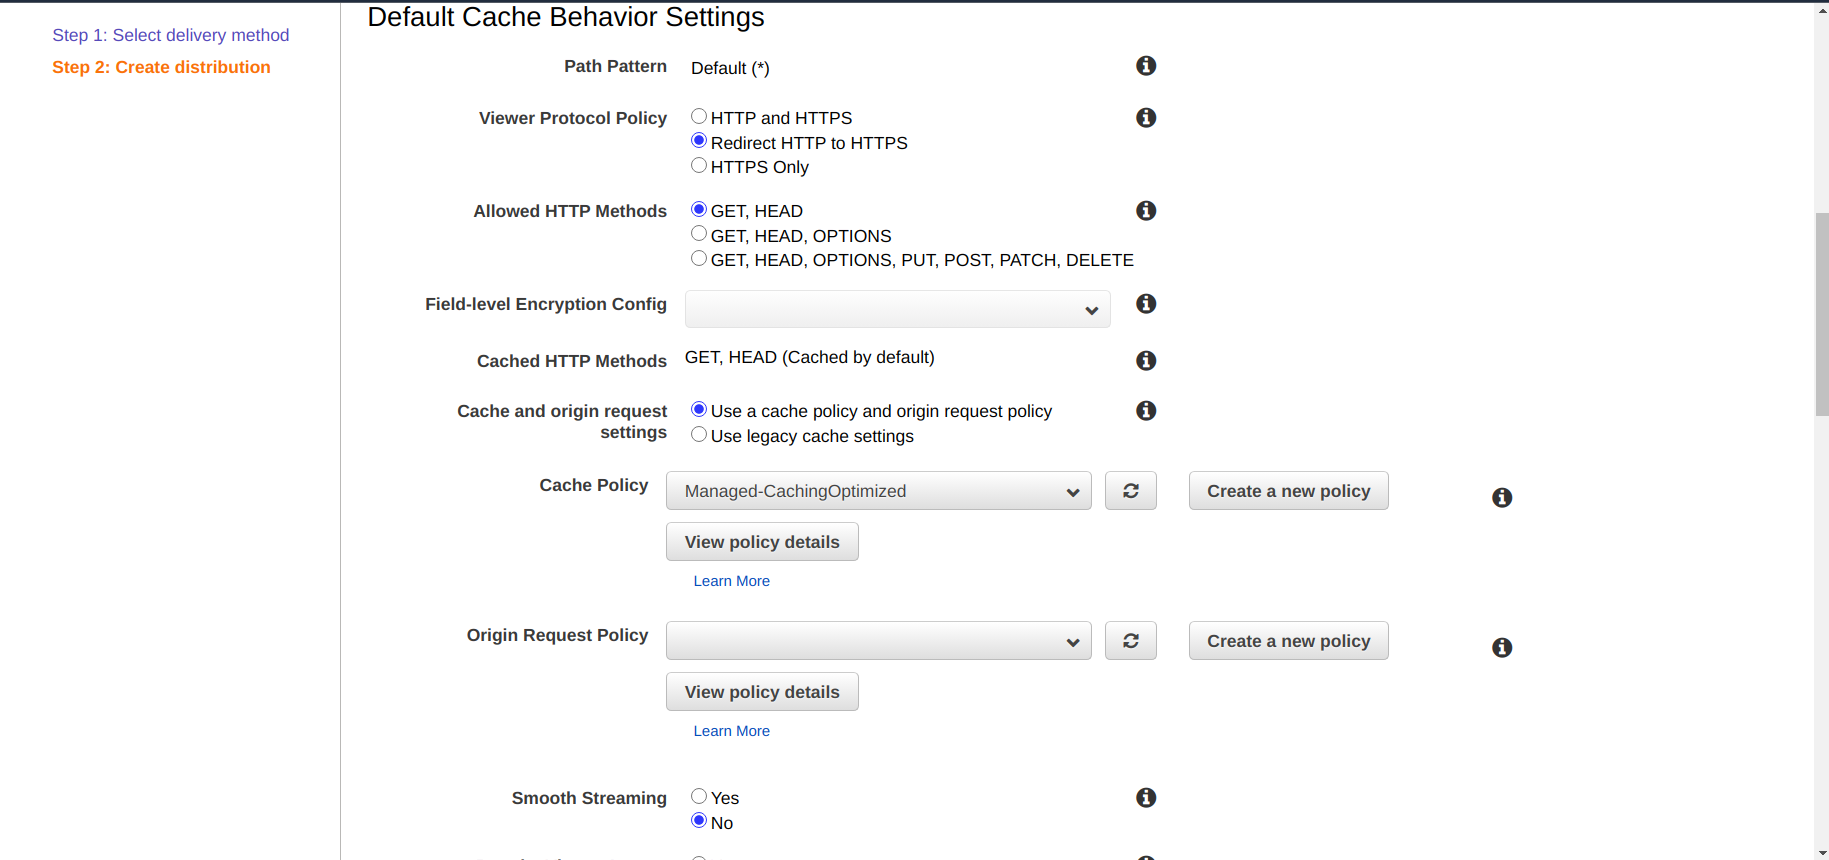
Provide Cache behavior configuration details
At distribution settings select Default CloudFront certificate or import custom SSL certificate , then click on create distribution by providing required values for creation.
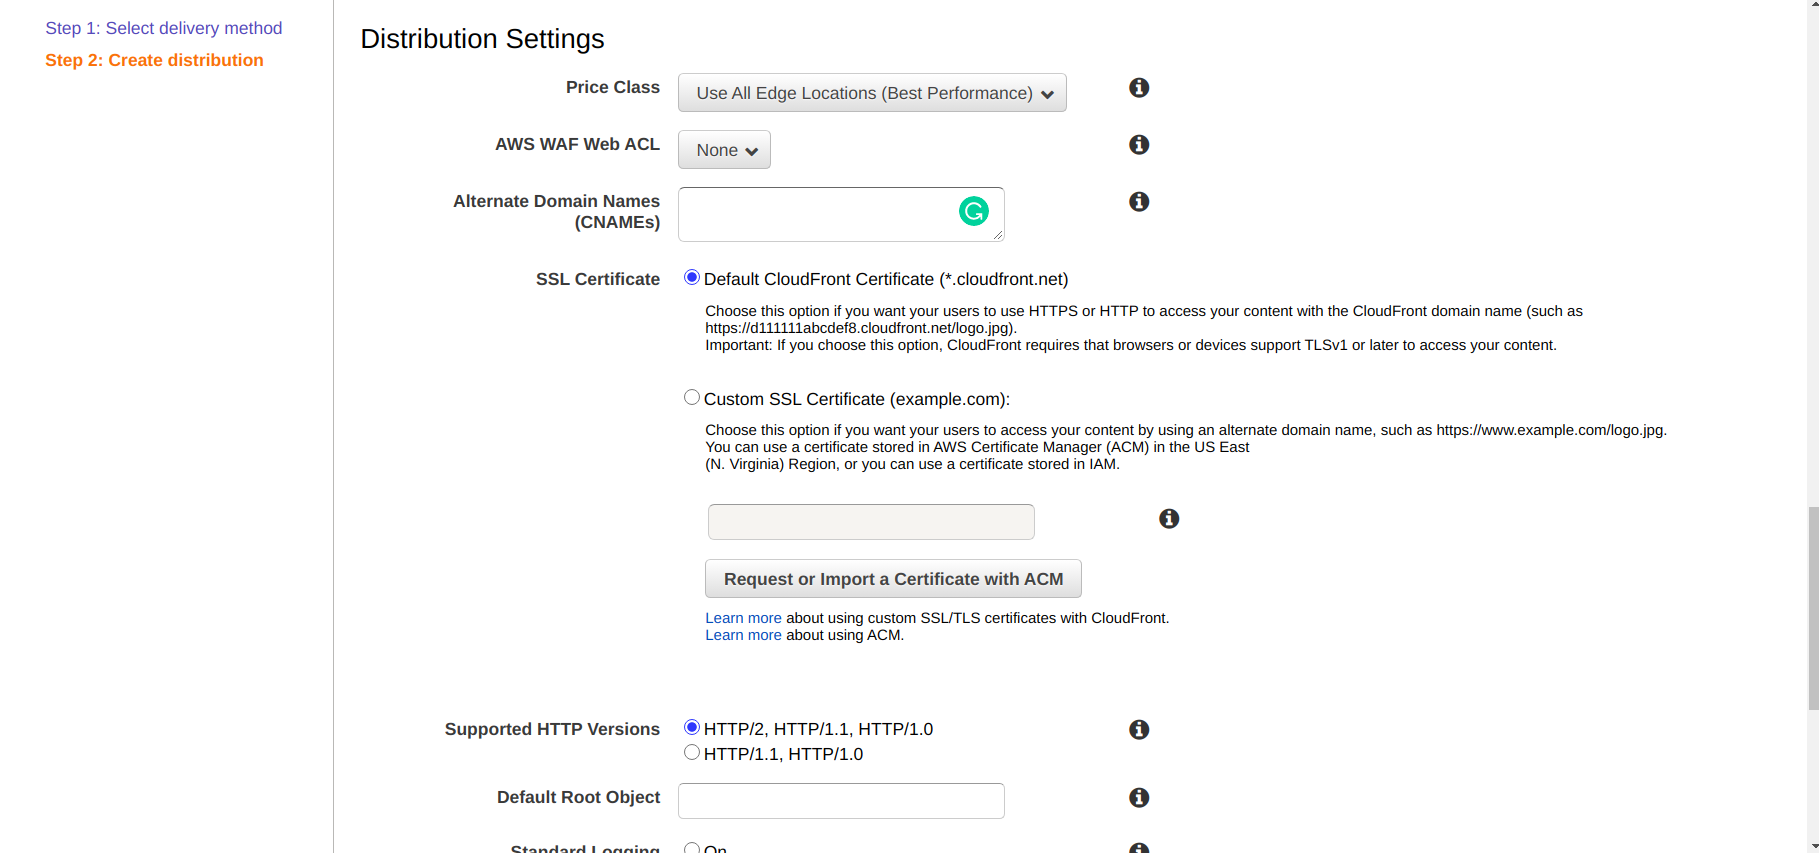
Wait for few minutes to create distribution and after creating distribution note down the domain name of CloudFront distribution.


Build and Deploy static Content to S3
- Check Build Process Maven Build Process to Support CDN Deploy
- Ensure that the selected profile has the
build.ui.modeproperty set toangular. - The above command generates two deployable artifacts:
ui-artifacts.zip,project.war. Both these files can be found in thetargetfolder. - Use the following commands to unzip and upload to S3.
- To unzip the file and store contents in a specific folder.
- Upload files to AWS S3 bucket
- For instructions on configuring the CDN URL in your application see Configuring CDN URL.