Building Project with Maven
This guide helps to create a war file for deploying the project in your local machine or a web server like Apache Tomcat. It also provides the required information to host static content and web applications separately.
System prerequisites
- You can find the System prerequisites from Angular Web and React Native Mobile.
Go to Source Location
- WaveMaker Project sources can be fetched in two ways.
Clone VCS Repository
- Clone Project into your pipeline or your local machine using git clone
<repo_url>. - You can clone only if you have configured custom VCS or push to your own repo (in both WaveMaker Enterprise Setups, WaveMaker Online Teams). For more information, see Configure Custom VCS.
Download Zip from Studio
- Export the project as zip.

Extract the downloaded zip file.
Get the project location path.
In the command line, go to the project path. See the image below.
cd <location>
![]()
Choose Profile to Build
- WaveMaker project has two default profiles, including development and deployment. Prefix the profile name with a P. If you do not prefix the profile name; the system selects a development profile by default. You can add Custom Profiles from the Config Profiles section in the Project Settings options.
- Use
<ProfileName>in the next sections from default_profile/custom_profile.
Build War file
- Use the below command to do a maven build with the profile.
mvn clean install -P<ProfileName>
For example
mvn clean install -Pdeployment
- This command will generate a
project warfile in the target directory. Theproject warfile has both frontend artifacts (HTML, CSS, JS, images, etc), and backend artifacts (Java Classes). - This war file can be deployed into any webserver like Tomcat. For more information, see App Deployment to Tomcat.
Build War file and Static Content to Deploy them Separately
WaveMaker app consists of frontend artifacts (HTML, CSS, JS, images, etc), and backend artifacts (Java Classes). It is recommended to host frontend artifacts in Static Content Server like Nginx, apache, etc, or Content Delivery Network (CDN), and backend artifacts can be hosted on any web server like Tomcat.
Generating Deployable Artifacts
To generate frontend and backend artifacts from a WaveMaker application, follow these steps:
- Ensure that the selected profile has the
build.ui.modeset asangular. - Execute the following Maven command:
mvn clean install -P<profile-name>
For example
mvn clean install -Pdeployment
This command generates two deployable artifacts: ui-artifacts.zip and project.war, both located in the target folder.
Both the WAR file and ui-artifacts must be deployed for the application to function correctly. Simply deploying the frontend artifacts on a CDN is insufficient.
Upload frontend artifacts to CDN
Unzip the file ui-artifacts.zip and upload it to CDN origin (S3 bucket in AWS Cloudfront case, storage container in AZURE CDN Profile case, or put it into Nginx or apache). For specific instructions on how to use different CDNs, see WaveMaker apps integration with AWS CDN to configure CDN in AWS, and for Azure, see WaveMaker apps integration with AZURE CDN Profile.
Configuring CDN URL
The CDN URL can be passed to the application by setting the property app.cdnUrl in one of the following ways:
- Environment/System property. For specific instructions on how to set environment/system property, see Using Environment Properties.
- Maven build parameter.
For example
mvn clean install -Pdeployment -Dapp.cdnUrl=https://mydomain.cloudfront.net/my_app>/1234/
- Profile property.
The priority order for reading the CDN URL is also the same as above.
Handling Build Failures
WaveMaker build may fail due to:
- Insufficient memory to Node Process.
- Compilation issues.
On build failure due to the out-of-memory error, the profile property called
build.ui.node.argsshould be adjusted; this configures the build. Increase themax-old-space-sizememory value where the default value is 1024 MB. The build should be triggered again after increasing the memory value. There are two ways to do this:- Go to WaveMaker Studio -> File Explorer -> profiles -> open the file
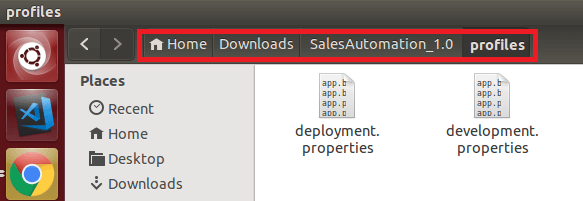
<profilename.properties>. - Or, go to the Project folder -> profiles -> open the file
<profilename.properties>. As shown in the image below:
- Go to WaveMaker Studio -> File Explorer -> profiles -> open the file
- Adjust the value of
build.ui.node.args. See the image below:

- Re-do build.