Embed WaveMaker React Native apps into Native Apps
React Native apps can be embedded into existing native applications. Using the CLI command, developers can integrate React Native code with native code, enabling them to leverage React Native's benefits—like cross-platform development and faster iteration—while preserving or enhancing the existing native codebase.
Embed WaveMaker React Native apps into Native App starting from WaveMaker 11.8.
How it helps
Extending Existing Native Apps with WaveMaker
WaveMaker enables seamless integration of new features into existing native applications, showcasing its powerful and flexible embedding capabilities:
- Embed Full Applications: Entire apps built in WaveMaker can be embedded into your existing native app, streamlining development and extending functionality effortlessly.
- Add New Features: Develop new features or modules in WaveMaker and integrate them into your app as data, libraries, or even via an iframe, without disrupting the existing architecture.
- Flexible Embedding:
- Page-Level: Introduce complete pages into your app for modular feature additions.
- Section-Level: Integrate specific sections or components for incremental enhancements.
Integrate New Feature into an Existing App
Integrate new features developed in WaveMaker into an existing native app. This approach enables seamless feature extension by treating WaveMaker components as reusable data or libraries within the existing app.
- Existing App: Start with your native app (non-WaveMaker).
- Feature Development in WaveMaker: Build the new feature as a modular component in WaveMaker.
- Embed in Native App: Incorporate the WaveMaker feature into the existing app, treating it as data or a library for easy integration.
Step 1: Prepare the Existing App
- Ensure the existing app is stable and can support external integrations.
- Identify the feature gaps or extensions required in the app.
Step 2: Develop the New Feature in WaveMaker
- Log in to the WaveMaker Studio.
- Design the required feature in the WaveMaker React Native environment:
- Use WaveMaker’s widgets, prefabs, and APIs for rapid development.
- Test the feature to ensure it meets functional requirements.
- Package the feature as a modular component:
- Ensure the component has a well-defined API for data exchange.
- Add documentation or metadata for its usage.
Step 3: Export as a Library or Data Module
- Export Options:
- Export as a library (.aar for Android or .framework for iOS).
- Alternatively, expose the feature as a web view or API endpoint if dynamic updates are preferred.
- Ensure compatibility with the existing app’s tech stack.
Step 4: Integrate with the Native App
Step 5: Test and Deploy
- Debugging: Use tools like WavePulse for debugging the integration without exposing source code.
- End-to-End Testing: Validate the new feature’s functionality and its interactions within the app.
- Deployment: Roll out the updated app through appropriate app stores or distribution channels.###
Embedding React Native
When using this feature, you can add WaveMaker React Native application to an existing native application, such as a small component or an SPA, or even a micro application. Once the code is converted to a native app, by running the CLI commands, React Native code inside the Embedded Application can be updated. However, for the first time, you must implement the following setup.
Requirements
Ensure that the following tools are installed:
- JDK 17
- Apache Maven 3.8.2
- Node 18.16.1
- npm 9.5.1
- wm-reactnative-cli and its dependencies
This feature supports embedding a WaveMaker app—whether it's a component, single-page app (SPA), or micro-application—into an existing native app.
WaveMaker Commands to Embed
To embed React Native apps into native apps, changes are required in both React Native project and the Native project. @wavemaker/wm-reactnative-cli will handle the React Native project requirements. Steps to make changes in the Native project depends on the type of environment and below you can find the examples to embed React Native code in Android and iOS platforms.
WaveMaker CLI Command
The @wavemaker/wm-reactnative-cli tool helps modify the React Native project.
CLI Installation
Before you initiate embedding React Native into Native application using CLI commands, install wm-reactnative-cli in your local environment using the below command
npm install github:rraajvamsy/wm-reactnative-cli
Embed Command
To embed a React Native app in an Native Project, run:
wm-reactnative embed <platform:android|ios> –mp="${NATIVE_ANDROID_PROJECT_PATH}" "${REACT_NATIVE_ZIP_PATH}"
Android
Setup
Step 1: Export React Native Project
Download the React Native project zip from the Export as ReactNative Zip dialog in WaveMaker, then use the wm-reactnative embed command to integrate it into your Android project.
Step 2: Create a New Android Project or use Existing Project
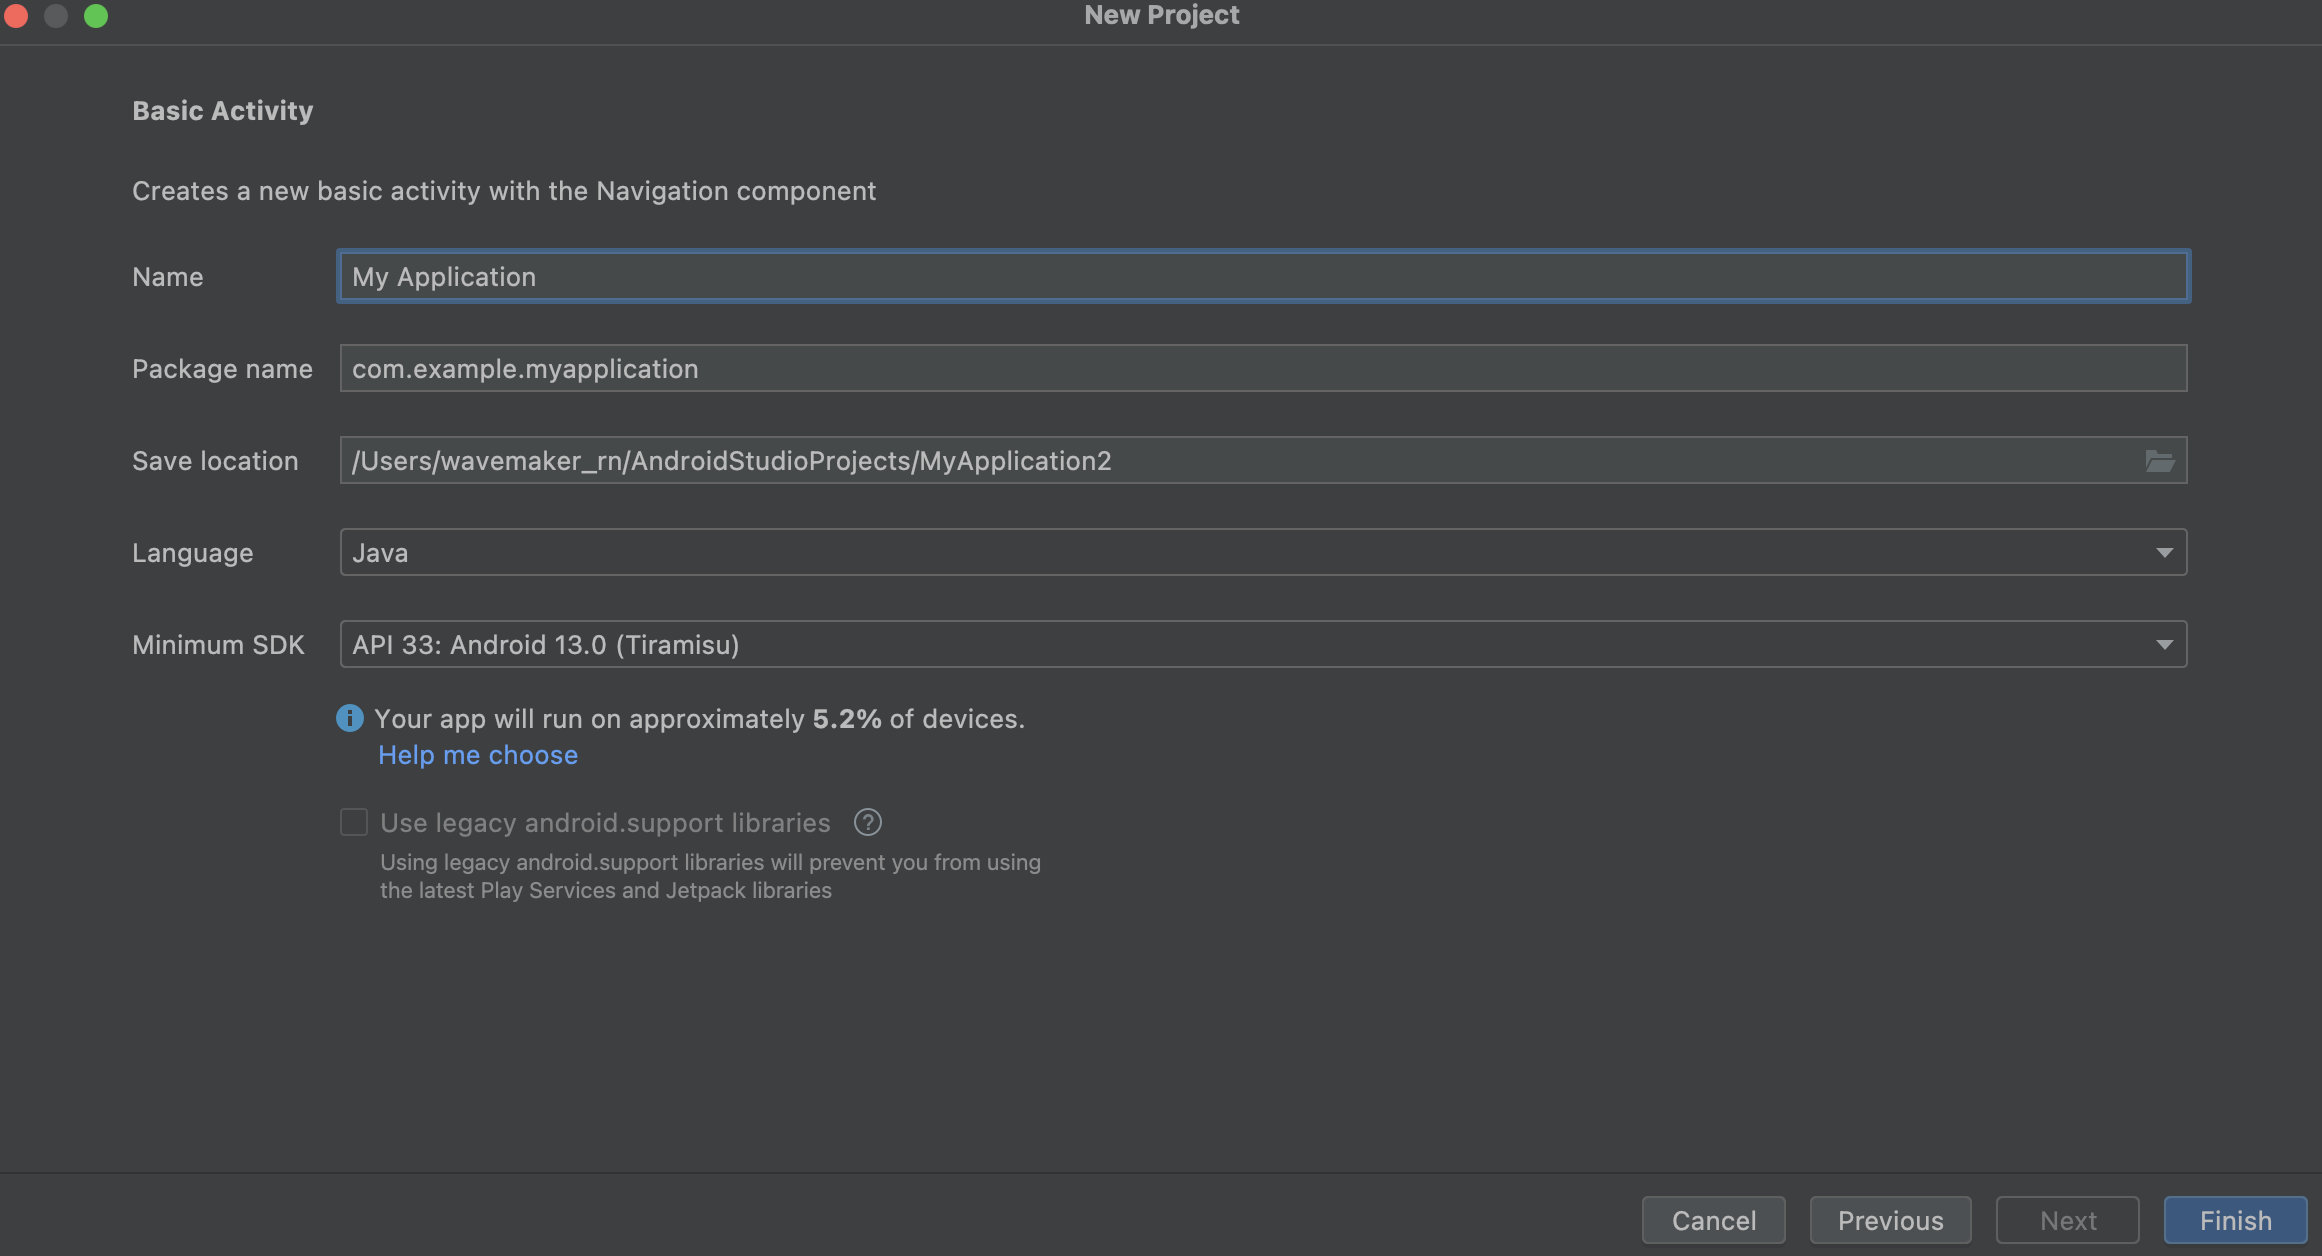
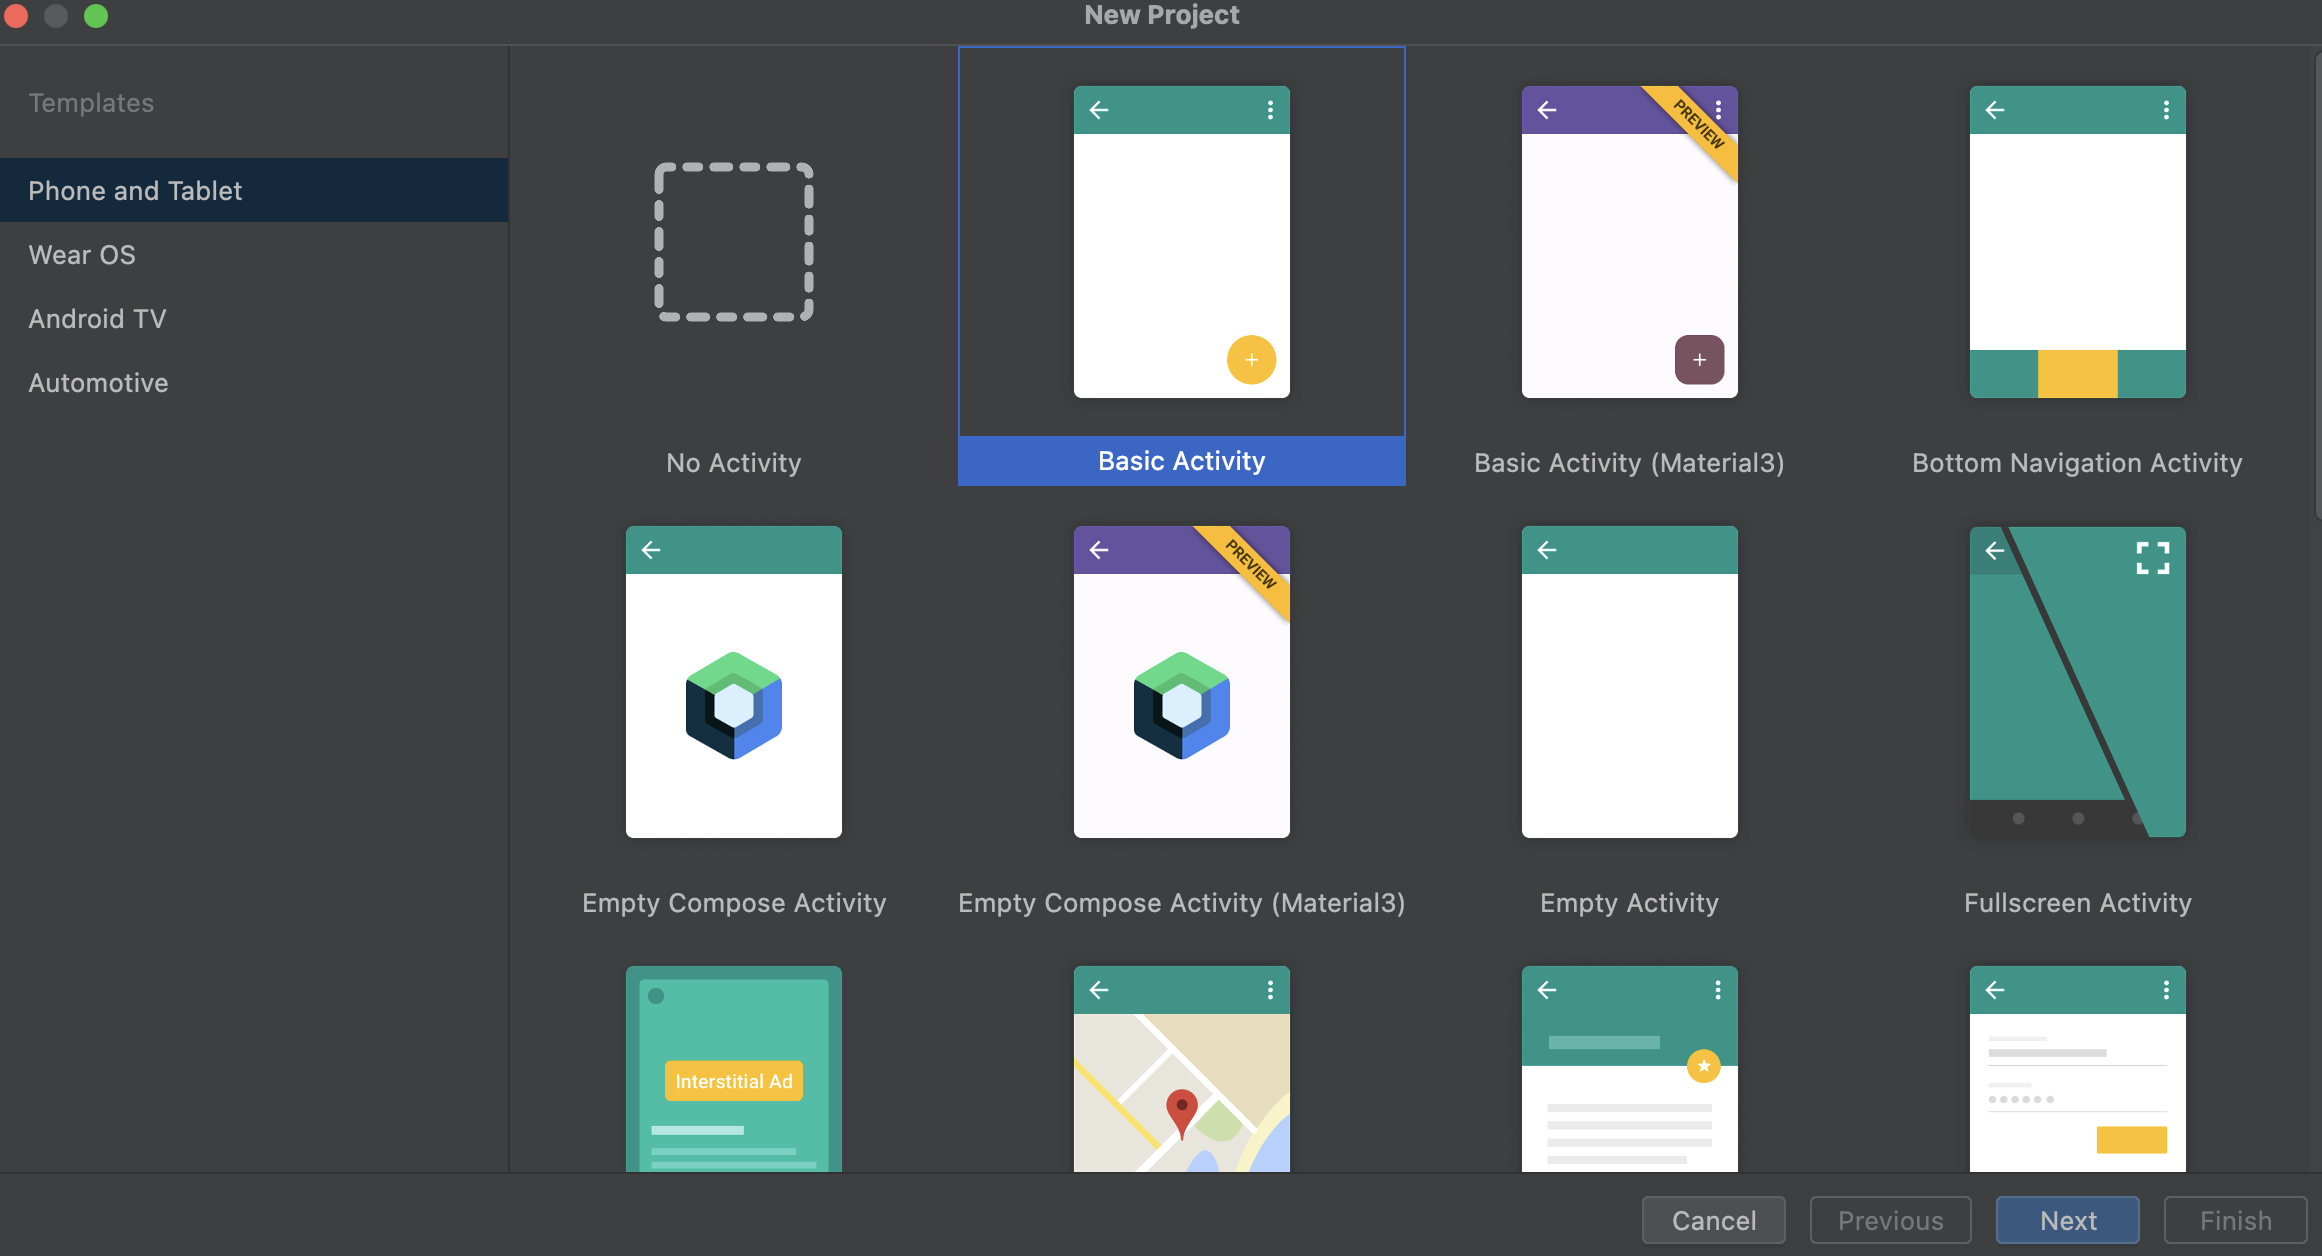
New Project
Create a new Android project using Basic Activity.
Run the wm-reactnative-cli command to embed the React Native project. The embedded code will be located at dest_path/android-embed.
Step 3: Modify Gradle Files
settings.gradle: Comment out dependencyResolutionManagement:
// dependencyResolutionManagement {
//     repositoriesMode.set(RepositoriesMode.FAIL_ON_PROJECT_REPOS)
//     repositories {
//         google()
//         mavenCentral()
//     }
// }
Move the buildScript from rnApp/root.build.gradle to the project-level build.gradle.
Remove the following from rnApp/root.build.gradle:
apply plugin: "com.facebook.react.rootproject"
Update the distributionUrl in gradle/wrapper/gradle-wrapper.properties:
distributionUrl=https\://services.gradle.org/distributions/gradle-8.4-all.zip
Update android.defaultConfig in rnApp/build.gradle:
defaultConfig {
    buildConfigField "boolean", "IS_NEW_ARCHITECTURE_ENABLED", "false"
    buildConfigField "boolean", "IS_HERMES_ENABLED", "true"
    buildConfigField("boolean", "REACT_NATIVE_UNSTABLE_USE_RUNTIME_SCHEDULER_ALWAYS",
    (findProperty("reactNative.unstable_useRuntimeSchedulerAlways") ?: true).toString())
}
Loading WaveMaker App
Loading WaveMaker App as a Page
You can load the embedded WaveMaker app through an Intent. Add a button in activity_main.xml:
<Button
    android:id="@+id/launchRNPageButton"
    android:layout_width="0dp"
    android:layout_height="wrap_content"
    android:text="Launch RN as Full Page"
    android:layout_marginTop="16dp"
    app:layout_constraintTop_toBottomOf="@id/embedRNButton"
    app:layout_constraintStart_toStartOf="parent"
    app:layout_constraintEnd_toEndOf="parent" />
In MainActivity.java, include the necessary imports and code:
import android.content.Intent;
import android.widget.Button;

Button launchRNPageButton = findViewById(R.id.launchRNPageButton);
launchRNPageButton.setOnClickListener(v -> {
    Intent intent = new Intent(MainActivity.this, com.embed.MainActivity.class);
    startActivity(intent);
});
Preview

Loading WaveMaker App as an iFrame
You can also embed the app as a Fragment. Modify activity_main.xml:
<FrameLayout
    android:id="@+id/fragmentContainer"
    android:layout_width="0dp"
    android:layout_height="0dp"
    android:background="#E0E0E0"
    app:layout_constraintTop_toBottomOf="@id/launchRNPageButton"
    app:layout_constraintStart_toStartOf="parent"
    app:layout_constraintEnd_toEndOf="parent"
    app:layout_constraintBottom_toBottomOf="parent" />

<Button
    android:id="@+id/embedRNButton"
    android:layout_width="0dp"
    android:layout_height="wrap_content"
    android:text="Embed RN in Frame"
    app:layout_constraintTop_toBottomOf="@id/textView"
    app:layout_constraintStart_toStartOf="parent"
    app:layout_constraintEnd_toEndOf="parent" />
In MainActivity.java:
import com.wavemaker.reactnative.ReactNativeAppFragment;
import android.widget.Button;
import androidx.fragment.app.FragmentTransaction;

Button embedRNButton = findViewById(R.id.embedRNButton);
embedRNButton.setOnClickListener(v -> loadReactNativeFragment());

private void loadReactNativeFragment() {
    ReactNativeAppFragment reactNativeFragment = ReactNativeAppFragment.newInstance("Main");
    FragmentTransaction transaction = getSupportFragmentManager().beginTransaction();
    transaction.replace(R.id.fragmentContainer, reactNativeFragment);
    transaction.addToBackStack(null);
    transaction.commit();
}
To pass launchOptions to the WaveMaker app, update the getLaunchOptions() method inside ReactNativeAppFragment.java:
private Bundle getLaunchOptions(String pageName) {
    Bundle initialProperties = new Bundle();
    initialProperties.putString("pageName", pageName);
    initialProperties.putString("test", "this is a test prop");
    return initialProperties;
}
We can pass initialProperties to the WaveMaker app as shown above by updating the getLaunchOptions() method inside ReactNativeAppFragment.java, and these initialProperties can be accessed, by using App.props in WaveMaker App - Script.
App.getLaunchOptions = function () {
  return JSON.stringify(App.props);
};
Preview
WaveMaker-Native Communication
To enable communication between the native app and the WaveMaker app, add the following dependencies in android-embed/app/build.gradle:
implementation project(':wavemaker-expo-native-module')
implementation project(':expo-modules-core')
In the native app, update the TextView in activity_main.xml:
<TextView
    android:id="@+id/textView"
    android:layout_width="wrap_content"
    android:layout_height="wrap_content"
    android:text="Initial Text"
    android:textSize="18sp"
    android:layout_marginTop="16dp"
    app:layout_constraintTop_toBottomOf="@id/nativeTextView"
    app:layout_constraintStart_toStartOf="parent"
    app:layout_constraintEnd_toEndOf="parent" />
In MainActivity.java, update the TextView when receiving data from the WaveMaker app:
import com.wavemaker.reactnative.embed.CommunicationService;
import expo.modules.kotlin.Promise;

CommunicationService.Companion.getINSTANCE().process("updateTextView", (message, promise) -> {
    if (message.hasKey("newText")) {
        String newText = message.getString("newText");
        textView.setText(newText);
        promise.resolve("TextView updated");
    }
});
In the WaveMaker app,use EmbedCommModule to send data to the native app:
Page.button1Tap = async function () {
  const { requireNativeModule } = require("expo-modules-core");
  const EmbedCommModule = await requireNativeModule("EmbedCommModule");

  EmbedCommModule.sendToNative("updateTextView", {
    newText: "Hello from React Native!",
  });
};
Preview
MainActivity.java
package com.rvcodex.myapplication;

import android.content.Intent;
import android.os.Bundle;
import android.util.Log;
import android.widget.Button;
import android.widget.TextView;
import android.widget.Toast;

import androidx.activity.EdgeToEdge;
import androidx.appcompat.app.AppCompatActivity;
import androidx.fragment.app.FragmentTransaction;

import com.facebook.react.bridge.Arguments;
import com.facebook.react.bridge.ReactApplicationContext;
import com.facebook.react.bridge.ReadableMap;
import com.facebook.react.modules.core.DefaultHardwareBackBtnHandler;
import com.wavemaker.reactnative.ReactNativeAppFragment;
import com.wavemaker.reactnative.embed.CommunicationService;
import com.wavemaker.reactnative.embed.MessageProcessor;

import expo.modules.kotlin.Promise;

public class MainActivity extends AppCompatActivity implements DefaultHardwareBackBtnHandler {
    private static final String TAG = "MainActivity";
    private ReactNativeAppFragment reactNativeFragment;
    private TextView textView;

    @Override
    protected void onCreate(Bundle savedInstanceState) {
        super.onCreate(savedInstanceState);
        EdgeToEdge.enable(this);
        setContentView(R.layout.activity_main);

        textView = findViewById(R.id.textView);
        Button launchRNPageButton = findViewById(R.id.launchRNPageButton);
        launchRNPageButton.setOnClickListener(v -> {
            Intent intent = new Intent(MainActivity.this, com.embed.MainActivity.class);
            startActivity(intent);
        });

        Button embedRNButton = findViewById(R.id.embedRNButton);
        embedRNButton.setOnClickListener(v -> loadReactNativeFragment());

        // Register the message processor to receive updates from React Native
        CommunicationService.Companion.getINSTANCE().process("updateTextView", new MessageProcessor() {
            @Override
            public void process(ReadableMap message, Promise promise) {
                if (message.hasKey("newText")) {
                    String newText = message.getString("newText");
                    runOnUiThread(() -> updateTextView(newText)); // Update UI on main thread
                    promise.resolve("TextView updated successfully");
                } else {
                    promise.reject("ERR_MISSING_TEXT", "Missing newText in the message", null);
                }
            }
        });
    }

    private void updateTextView(String newText) {
        if (textView != null) {
            textView.setText(newText);
            Log.d(TAG, "TextView updated: " + newText);
        }
    }

    private void loadReactNativeFragment() {
        Log.d(TAG, "Loading React Native Fragment");
        reactNativeFragment = ReactNativeAppFragment.newInstance("Main");
        FragmentTransaction transaction = getSupportFragmentManager().beginTransaction();
        transaction.replace(R.id.fragmentContainer, reactNativeFragment);
        transaction.addToBackStack(null);
        transaction.commit();
        Log.d(TAG, "React Native Fragment loaded");
    }

}
iOS
Setup
Step 1: Export React Native Project
Download the React Native project zip from the Export as ReactNative Zip dialog in WaveMaker, then use the wm-reactnative embed command to integrate it into your IOS project.
Step 2: Create a New IOS Project or use Existing Project
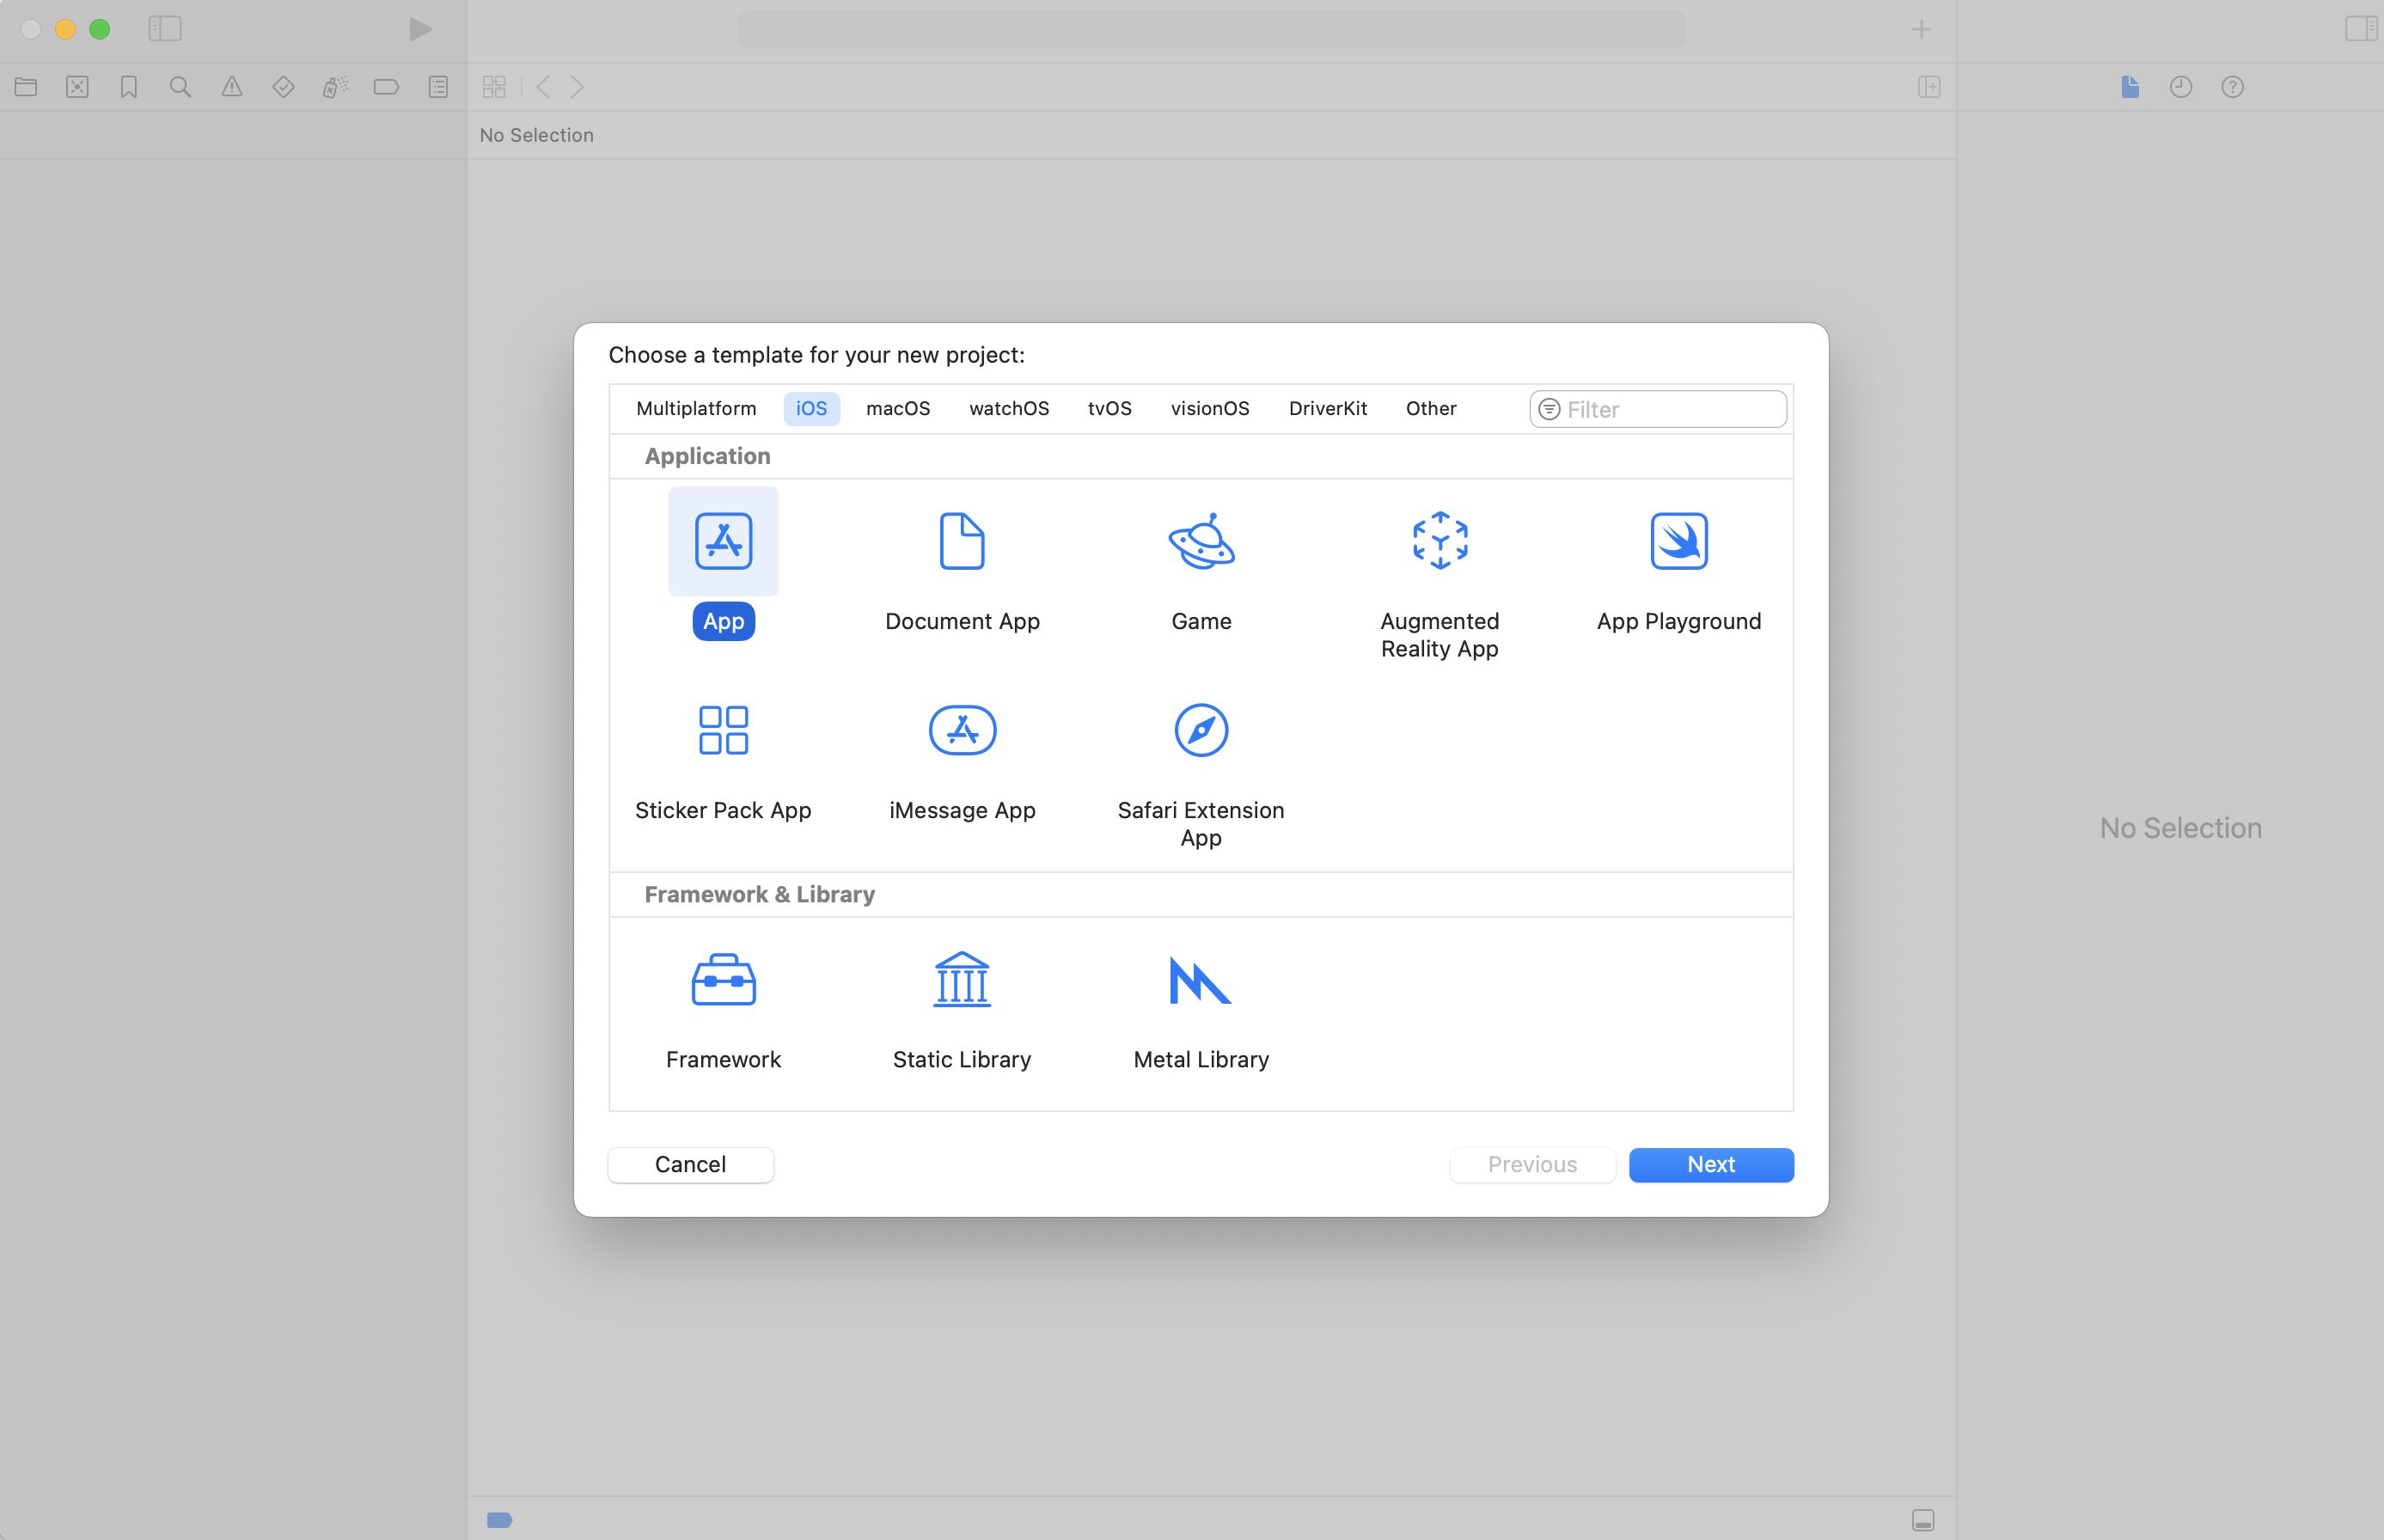
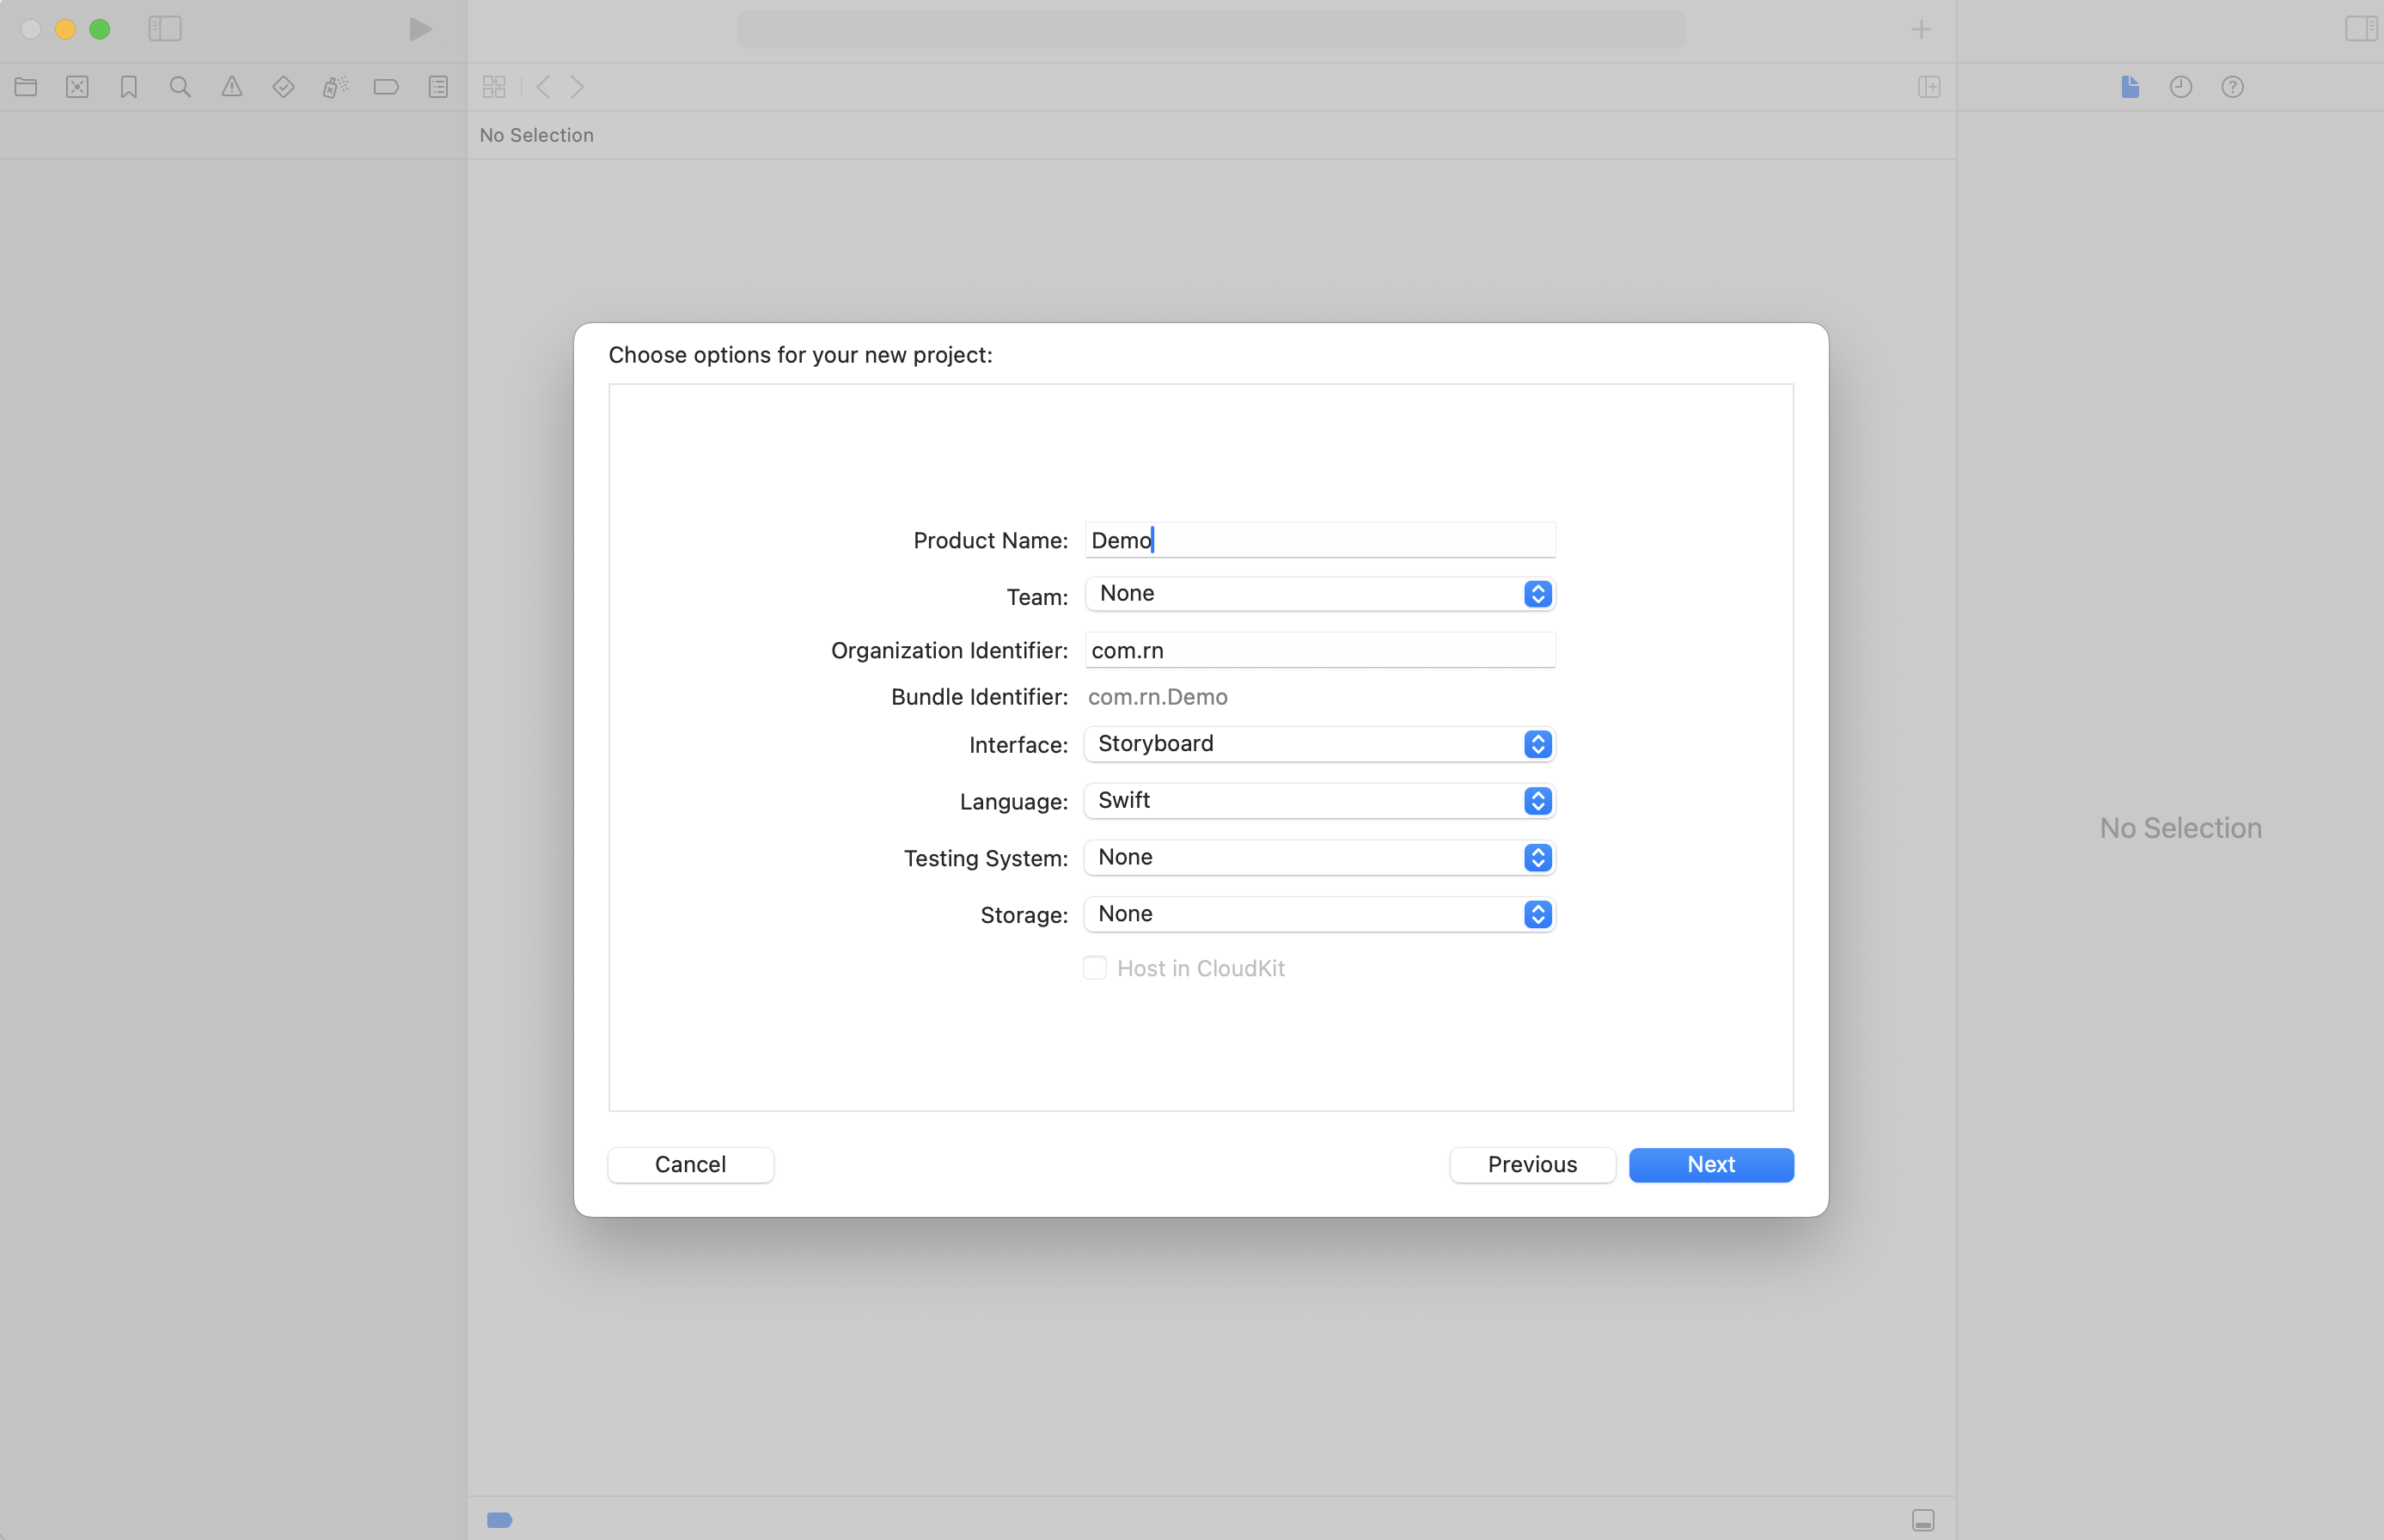
New Project
Create a new Android project using Basic Activity.
Run the wm-reactnative-cli command to embed the React Native project. The embedded code will be located at dest_path/ios-embed.
Step 3: Modify, the following Files
For changes in the Native project, follow the steps below:
Extract rnApp.zip, provided by WaveMaker. Copy the rnApp folder to the iOS project.
Open the Native project in Xcode.
Add the rnApp folder to the project in a new group.
After Copying the Reference, please check if there are any duplicate files in assets and remove them.
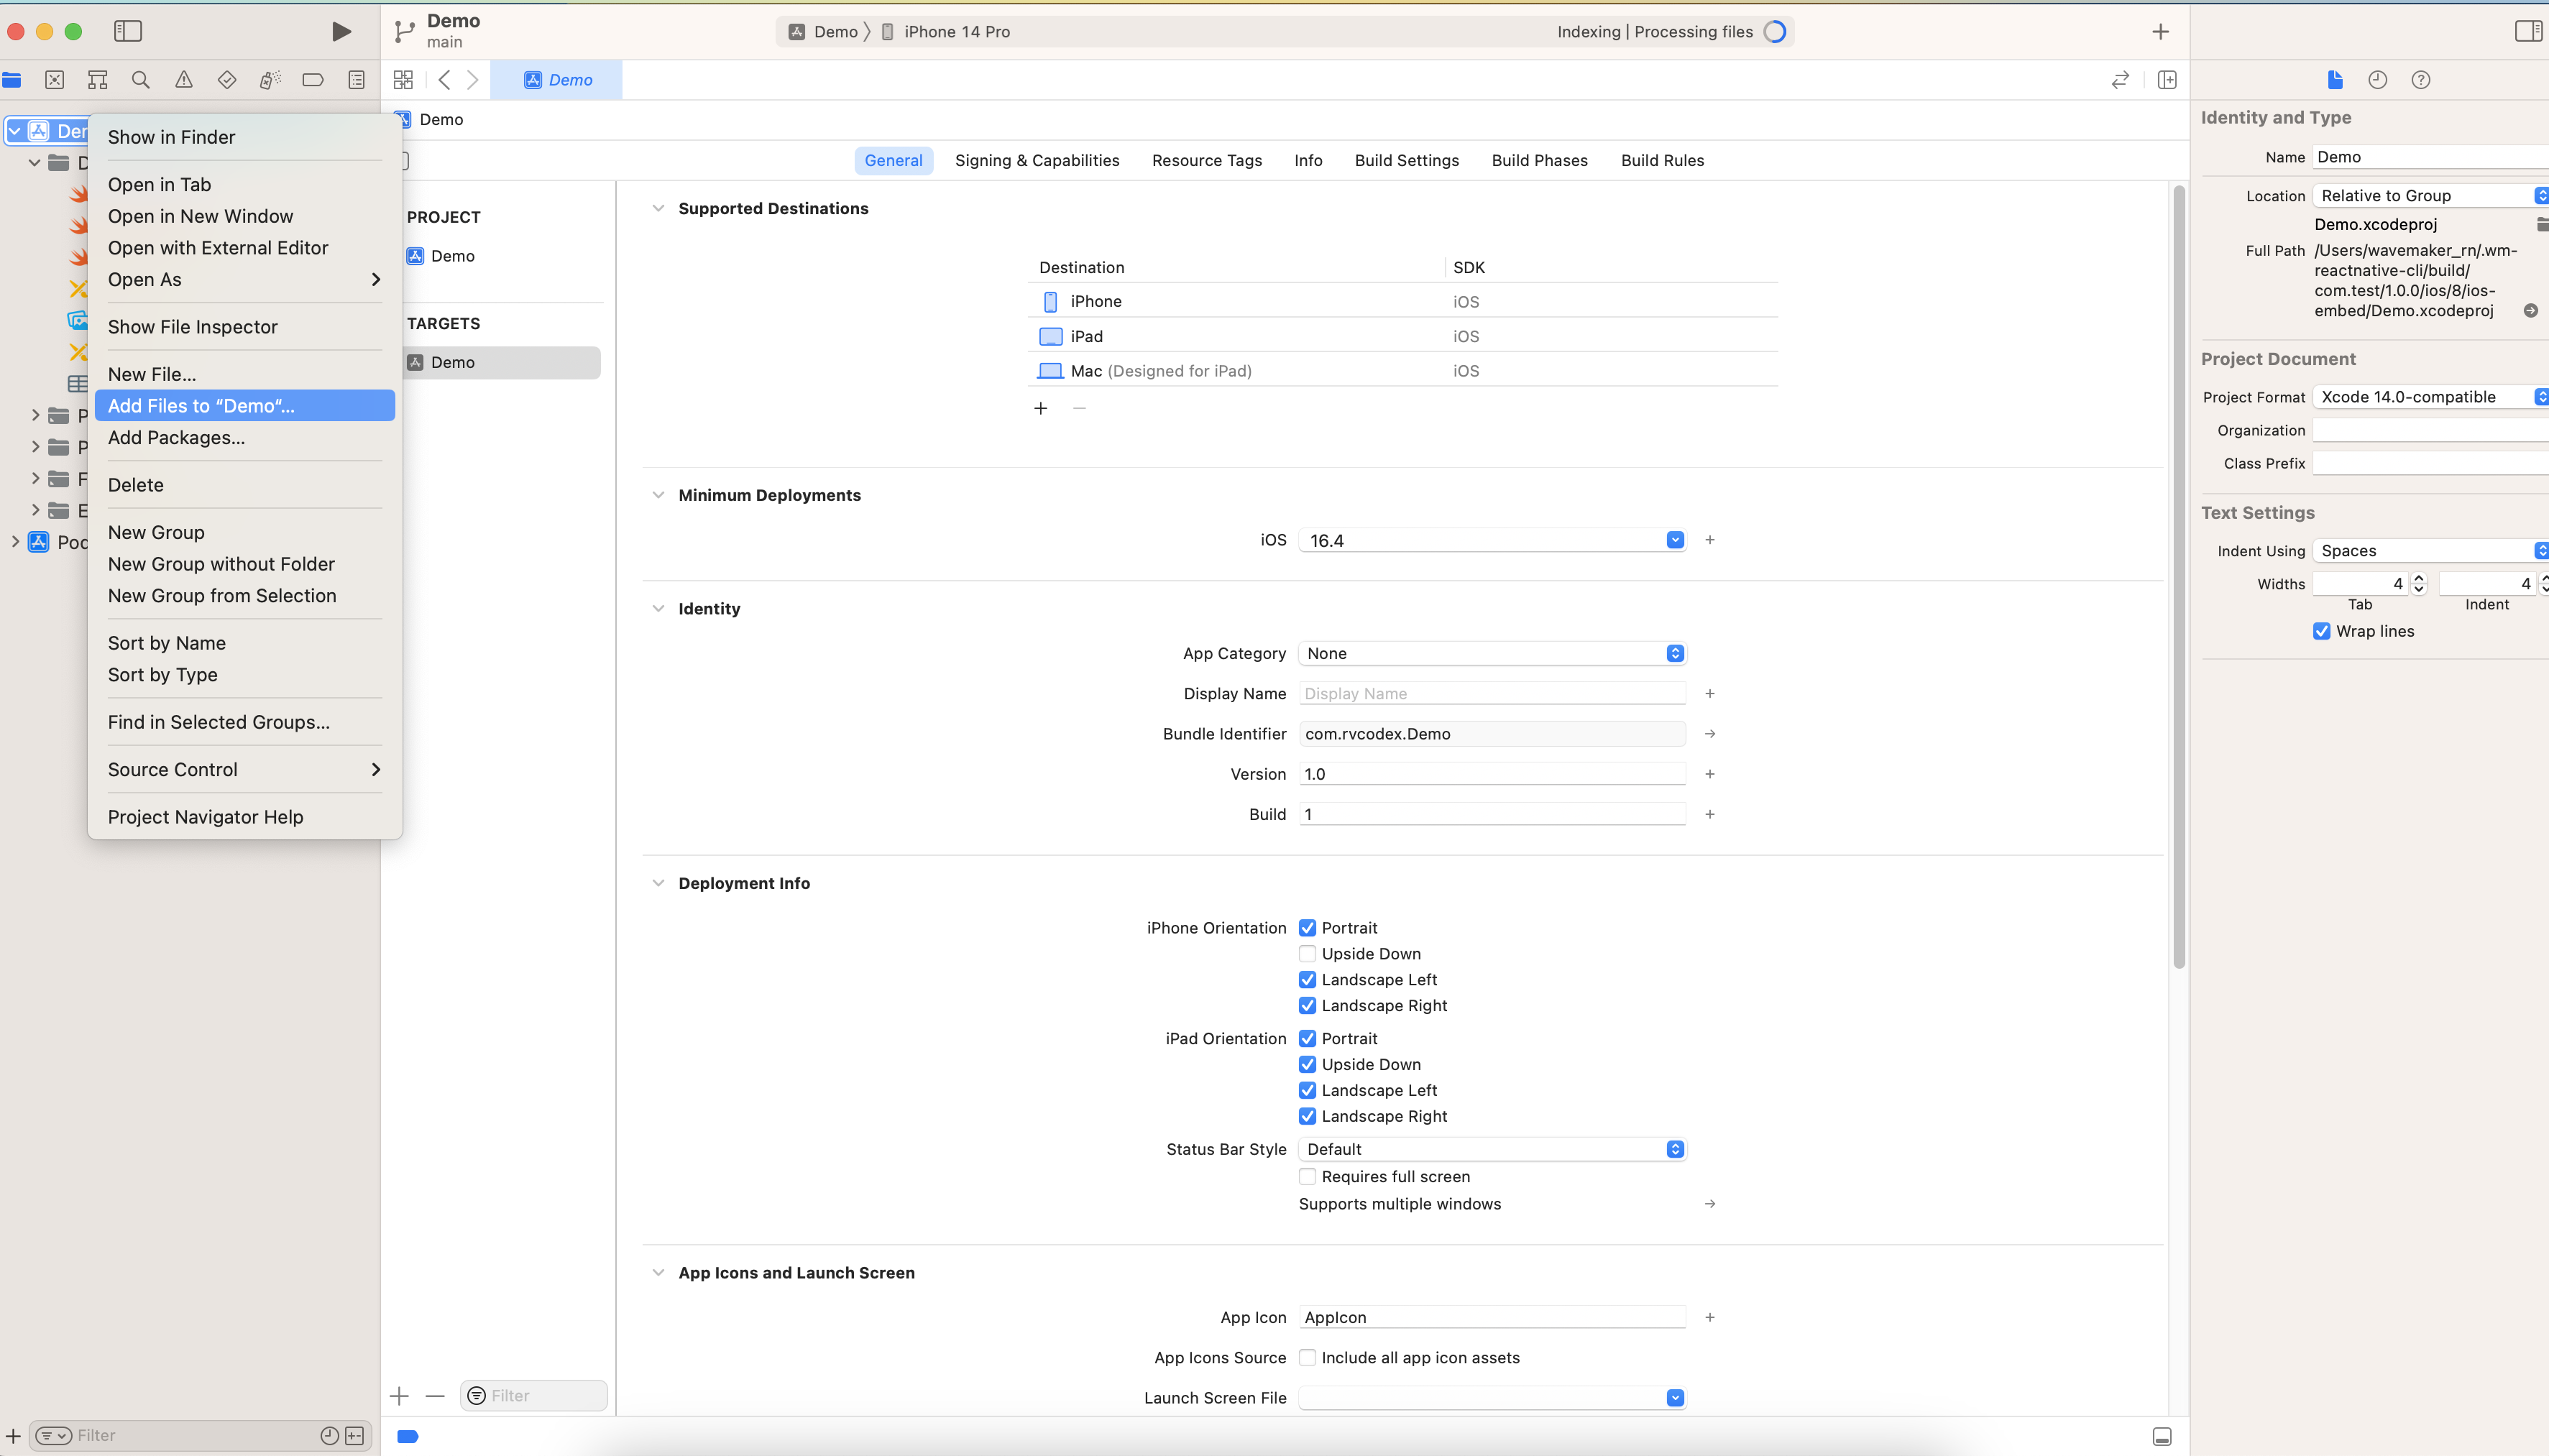
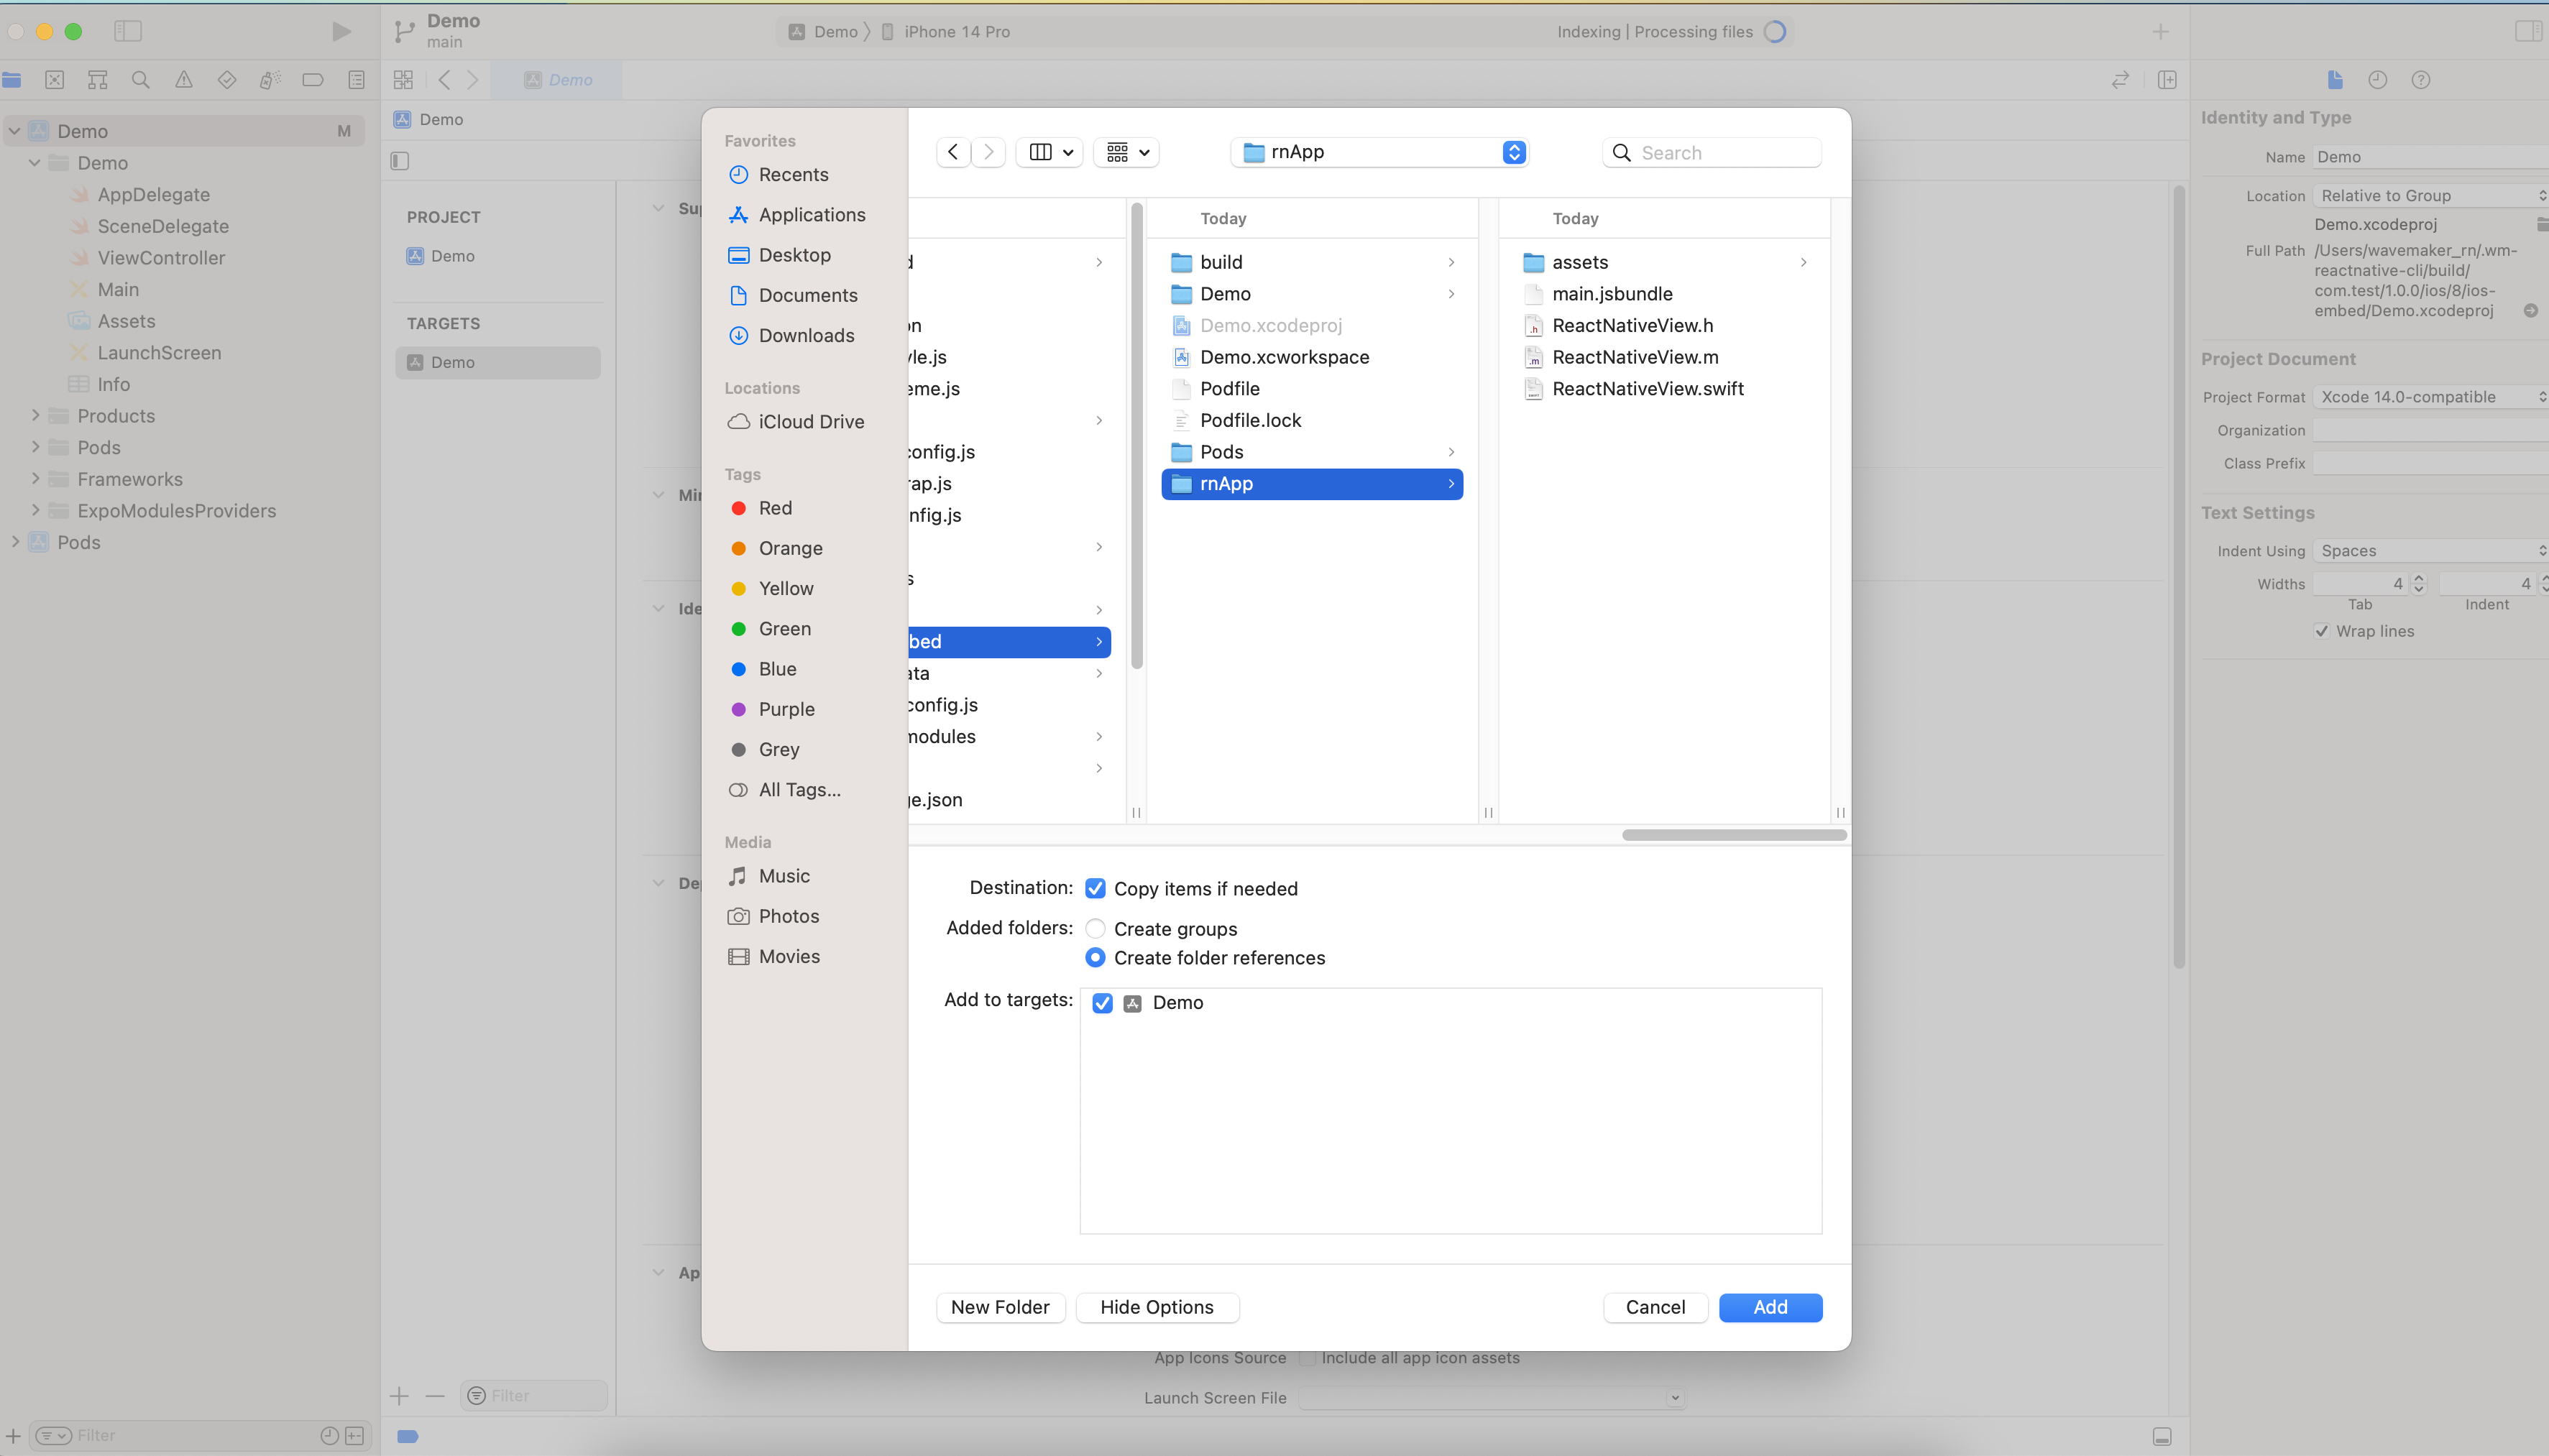
- Add main.jsbundle and assets folder files to the project folder.
The rnApp folder acts a placeholder and gets replaced with the actual content during the embed process.
In project info.list, set UIViewControllerBasedStatusBarAppearance as false.
Update the user script sandboxing to No in build settings
Resolve dependencies.
Podfile
For Podfile, the following steps will be done by wm-reactnative-cli.
- Run
pod init in project/ios-embed - Move Podfile from
project/ios/Podfile to project/ios-embed/Podfile
require File.join(File.dirname(`node --print "require.resolve('expo/package.json')"`), "scripts/autolinking")
require File.join(File.dirname(`node --print "require.resolve('react-native/package.json')"`), "scripts/react_native_pods")

require 'json'
podfile_properties = JSON.parse(File.read(File.join(__dir__, 'Podfile.properties.json'))) rescue {}

ENV['RCT_NEW_ARCH_ENABLED'] = podfile_properties['newArchEnabled'] == 'true' ? '1' : '0'
ENV['EX_DEV_CLIENT_NETWORK_INSPECTOR'] = podfile_properties['EX_DEV_CLIENT_NETWORK_INSPECTOR']

platform :ios, podfile_properties['ios.deploymentTarget'] || '13.4'
install! 'cocoapods',
  :deterministic_uuids => false

prepare_react_native_project!

# If you are using a `react-native-flipper` your iOS build will fail when `NO_FLIPPER=1` is set.
# because `react-native-flipper` depends on (FlipperKit,...), which will be excluded. To fix this,
# you can also exclude `react-native-flipper` in `react-native.config.js`
#
# ```js
# module.exports = {
#   dependencies: {
#     ...(process.env.NO_FLIPPER ? { 'react-native-flipper': { platforms: { ios: null } } } : {}),
#   }
# }
# ```
flipper_config = FlipperConfiguration.disabled
if ENV['NO_FLIPPER'] == '1' then
  # Explicitly disabled through environment variables
  flipper_config = FlipperConfiguration.disabled
elsif podfile_properties.key?('ios.flipper') then
  # Configure Flipper in Podfile.properties.json
  if podfile_properties['ios.flipper'] == 'true' then
    flipper_config = FlipperConfiguration.enabled(["Debug", "Release"])
  elsif podfile_properties['ios.flipper'] != 'false' then
    flipper_config = FlipperConfiguration.enabled(["Debug", "Release"], { 'Flipper' => podfile_properties['ios.flipper'] })
  end
end

target 'iosApp' do
  use_expo_modules!
  config = use_native_modules!

  use_frameworks! :linkage => podfile_properties['ios.useFrameworks'].to_sym if podfile_properties['ios.useFrameworks']
  use_frameworks! :linkage => ENV['USE_FRAMEWORKS'].to_sym if ENV['USE_FRAMEWORKS']

  use_react_native!(
    :path => config[:reactNativePath],
    :hermes_enabled => podfile_properties['expo.jsEngine'] == nil || podfile_properties['expo.jsEngine'] == 'hermes',
    # An absolute path to your application root.
    :app_path => "#{Pod::Config.instance.installation_root}/..",
    # Note that if you have use_frameworks! enabled, Flipper will not work if enabled
    :flipper_configuration => flipper_config
  )

  post_install do |installer|
    react_native_post_install(
      installer,
      config[:reactNativePath],
      :mac_catalyst_enabled => false
    )

    # This is necessary for Xcode 14, because it signs resource bundles by default
    # when building for devices.
    installer.target_installation_results.pod_target_installation_results
      .each do |pod_name, target_installation_result|
      target_installation_result.resource_bundle_targets.each do |resource_bundle_target|
        resource_bundle_target.build_configurations.each do |config|
          config.build_settings['CODE_SIGNING_ALLOWED'] = 'NO'
        end
      end
    end
  end

  post_integrate do |installer|
    begin
      expo_patch_react_imports!(installer)
    rescue => e
      Pod::UI.warn e
    end
  end
end
- If there are any change, modify the Podfile and run the following command to install Pods, from project directory
npx pod-install ios-embed
SceneDelegate
Add the following to SceneDelegate
Loading WaveMaker App
Loading WaveMaker App as a Page
ViewController
// setupUI()
  // Button 1: Full-screen React Native
  let launchRNPageButton = UIButton(type: .system)
  launchRNPageButton.setTitle("Launch RN as Full Page", for: .normal)
  styleButton(launchRNPageButton)
  launchRNPageButton.addTarget(self, action: #selector(launchFullReactNativePage), for: .touchUpInside) // Add target-action for button tap
  view.addSubview(launchRNPageButton)

// Method to launch full React Native page
@objc func launchFullReactNativePage() {
    let jsCodeLocation = Bundle.main.url(forResource: "main", withExtension: "jsbundle")!
    let rootView = RCTRootView(bundleURL: jsCodeLocation, moduleName: "main", initialProperties: nil, launchOptions: nil)

    let rnViewController = UIViewController()
    rnViewController.view = rootView
    present(rnViewController, animated: true, completion: nil)
}
Preview
Loading WaveMaker App as an iFrame
ViewController
// setupUI()
  // Button 2: Embed React Native View in Container
  let embedRNButton = UIButton(type: .system)
  embedRNButton.setTitle("Embed RN in Frame", for: .normal)
  styleButton(embedRNButton)
  embedRNButton.addTarget(self, action: #selector(embedReactNativeView), for: .touchUpInside) // Add target-action for button tap
  view.addSubview(embedRNButton)

// Method to embed React Native view in container
@objc func embedReactNativeView() {
    let initialProperties: [String: Any] = [
        "propertyKey1": "value1",
        "propertyKey2": 42 // You can pass various data types
    ]
    let jsCodeLocation = Bundle.main.url(forResource: "main", withExtension: "jsbundle")!
    let rootView = RCTRootView(bundleURL: jsCodeLocation, moduleName: "main", initialProperties: initialProperties, launchOptions: nil)
    rootView.frame = containerView.bounds
    containerView.addSubview(rootView)
}
we can pass initialProperties to the WaveMaker app as shown above, and these initialProperties can be accessed, by using App.props in WaveMaker App - Script.
App.getLaunchOptions = function () {
  return JSON.stringify(App.props);
};
Preview
WaveMaker-Native Communication
ViewController
// setupUI()
  // Native TextView to show updates from RN
  textView = UILabel()
  textView.text = "Initial Text"
  textView.textAlignment = .center
  textView.backgroundColor = UIColor.systemGray5
  textView.layer.cornerRadius = 10
  textView.clipsToBounds = true
  textView.font = UIFont.systemFont(ofSize: 18, weight: .medium)
  view.addSubview(textView)

// Communication setup between native and React Native
func setupCommunicationListener() {
    // Using CommunicationService to listen for updates
    CommunicationService.INSTANCE.process(messageType: "updateTextView") { message, promise in
        // Safely cast the message to a dictionary
        if let messageDict = message as? [String: Any],
            let newText = messageDict["newText"] as? String { // Safely unwrap `newText`
            DispatchQueue.main.async {
                self.textView.text = newText
                promise?.resolve("TextView updated")
            }
        } else {
            promise?.reject("ERR_INVALID_MESSAGE", "No text provided or invalid message format")
        }
    }
}


// Handle text updates from React Native
@objc func updateNativeTextView(_ notification: Notification) {
    if let newText = notification.userInfo?["newText"] as? String {
        textView.text = newText
    }
}
In the WaveMaker app,use EmbedCommModule to send data to the native app:
Page.button1Tap = async function () {
  const { requireNativeModule } = require("expo-modules-core");
  const EmbedCommModule = await requireNativeModule("EmbedCommModule");

  EmbedCommModule.sendToNative("updateTextView", {
    newText: "Hello from React Native!",
  });
};
Preview
we can use both bundle file and bundle url while using the above code
for bundle url, run the following command
//Bundle URL
let jsCodeLocation = URL(string: "http://localhost:8081/index.bundle?platform=ios")!
//Bundle File
let jsCodeLocation = Bundle.main.url(forResource: "main", withExtension: "jsbundle")
ViewController
import UIKit
import React
import EmbedCommModule


class ViewController: UIViewController {

    // Declare UI elements
    var containerView: UIView!
    var textView: UILabel!

    override func viewDidLoad() {
        super.viewDidLoad()

        // Set up UI
        setupUI()

        // Handle communication (optional)
        setupCommunicationListener()
    }

    func setupUI() {
        // Set the background color
        view.backgroundColor = UIColor.black

        // Button 1: Full-screen React Native
        let launchRNPageButton = UIButton(type: .system)
        launchRNPageButton.setTitle("Launch RN as Full Page", for: .normal)
        styleButton(launchRNPageButton)
        launchRNPageButton.addTarget(self, action: #selector(launchFullReactNativePage), for: .touchUpInside) // Add target-action for button tap
        view.addSubview(launchRNPageButton)

        // Button 2: Embed React Native View in Container
        let embedRNButton = UIButton(type: .system)
        embedRNButton.setTitle("Embed RN in Frame", for: .normal)
        styleButton(embedRNButton)
        embedRNButton.addTarget(self, action: #selector(embedReactNativeView), for: .touchUpInside) // Add target-action for button tap
        view.addSubview(embedRNButton)

        // Container for embedding React Native
        containerView = UIView()
        containerView.backgroundColor = UIColor.systemGray5
        containerView.layer.cornerRadius = 10
        containerView.clipsToBounds = true
        view.addSubview(containerView)

        // Native TextView to show updates from RN
        textView = UILabel()
        textView.text = "Initial Text"
        textView.textAlignment = .center
        textView.backgroundColor = UIColor.systemGray5
        textView.layer.cornerRadius = 10
        textView.clipsToBounds = true
        textView.font = UIFont.systemFont(ofSize: 18, weight: .medium)
        view.addSubview(textView)

        // Set up Auto Layout constraints
        setupConstraints(launchRNPageButton: launchRNPageButton, embedRNButton: embedRNButton)
    }


    func styleButton(_ button: UIButton) {
        button.backgroundColor = UIColor.systemBlue
        button.setTitleColor(.white, for: .normal)
        button.titleLabel?.font = UIFont.systemFont(ofSize: 18, weight: .bold)
        button.layer.cornerRadius = 10
        button.layer.shadowColor = UIColor.black.cgColor
        button.layer.shadowOpacity = 0.3
        button.layer.shadowOffset = CGSize(width: 2, height: 2)
        button.layer.shadowRadius = 4
    }

    func setupConstraints(launchRNPageButton: UIButton, embedRNButton: UIButton) {
        // Disable autoresizing masks for Auto Layout
        launchRNPageButton.translatesAutoresizingMaskIntoConstraints = false
        embedRNButton.translatesAutoresizingMaskIntoConstraints = false
        containerView.translatesAutoresizingMaskIntoConstraints = false
        textView.translatesAutoresizingMaskIntoConstraints = false

        // Set up constraints for buttons
        NSLayoutConstraint.activate([
            // Button 1: Launch Full Page
            launchRNPageButton.topAnchor.constraint(equalTo: view.safeAreaLayoutGuide.topAnchor, constant: 20),
            launchRNPageButton.centerXAnchor.constraint(equalTo: view.centerXAnchor),
            launchRNPageButton.widthAnchor.constraint(equalToConstant: 300),
            launchRNPageButton.heightAnchor.constraint(equalToConstant: 50),

            // Button 2: Embed RN View
            embedRNButton.topAnchor.constraint(equalTo: launchRNPageButton.bottomAnchor, constant: 20),
            embedRNButton.centerXAnchor.constraint(equalTo: view.centerXAnchor),
            embedRNButton.widthAnchor.constraint(equalToConstant: 300),
            embedRNButton.heightAnchor.constraint(equalToConstant: 50),

            // Container View for embedding RN View
            containerView.topAnchor.constraint(equalTo: embedRNButton.bottomAnchor, constant: 30),
            containerView.centerXAnchor.constraint(equalTo: view.centerXAnchor),
            containerView.widthAnchor.constraint(equalToConstant: 300),
            containerView.heightAnchor.constraint(equalToConstant: 500),

            // Native TextView to show updates from RN
            textView.topAnchor.constraint(equalTo: containerView.bottomAnchor, constant: 30),
            textView.centerXAnchor.constraint(equalTo: view.centerXAnchor),
            textView.widthAnchor.constraint(equalToConstant: 300),
            textView.heightAnchor.constraint(equalToConstant: 50)
        ])
    }

    // Method to launch full React Native page
    @objc func launchFullReactNativePage() {
        let jsCodeLocation = Bundle.main.url(forResource: "main", withExtension: "jsbundle")!
        let rootView = RCTRootView(bundleURL: jsCodeLocation, moduleName: "main", initialProperties: nil, launchOptions: nil)

        let rnViewController = UIViewController()
        rnViewController.view = rootView
        present(rnViewController, animated: true, completion: nil)
    }

    // Method to embed React Native view in container
    @objc func embedReactNativeView() {
        let initialProperties: [String: Any] = [
            "propertyKey1": "value1",
            "propertyKey2": 42 // You can pass various data types
        ]
        let jsCodeLocation = Bundle.main.url(forResource: "main", withExtension: "jsbundle")!
        let rootView = RCTRootView(bundleURL: jsCodeLocation, moduleName: "main", initialProperties: initialProperties, launchOptions: nil)
        rootView.frame = containerView.bounds
        containerView.addSubview(rootView)
    }

    // Communication setup between native and React Native
    func setupCommunicationListener() {
        // Using CommunicationService to listen for updates
        CommunicationService.INSTANCE.process(messageType: "updateTextView") { message, promise in
            // Safely cast the message to a dictionary
            if let messageDict = message as? [String: Any],
               let newText = messageDict["newText"] as? String { // Safely unwrap `newText`
                DispatchQueue.main.async {
                    self.textView.text = newText
                    promise?.resolve("TextView updated")
                }
            } else {
                promise?.reject("ERR_INVALID_MESSAGE", "No text provided or invalid message format")
            }
        }
    }


    // Handle text updates from React Native
    @objc func updateNativeTextView(_ notification: Notification) {
        if let newText = notification.userInfo?["newText"] as? String {
            textView.text = newText
        }
    }
}
Preview
Android

iOS