Using Cordova Plugins
WaveMaker provides common plugins like camera, contacts etc. for you to use within a Mobile app. These plugins are exposed as services under Device Variables. The output of a plugin operation is available as the variable's outbound property. You can bind the values to another variable or a widget.
There might be a case when this list of plugins provided by default falls short of the app requirements. You might be required to use additional Cordova plugins. This document explains how to add Cordova plugins to a WaveMaker mobile application.
Steps to include Cordova plugins
Search and identify the plugin that meets your app requirement. You can find additional plugins from:
- https://www.npmjs.com/
- https://github.com/
- or by using any regular search engine
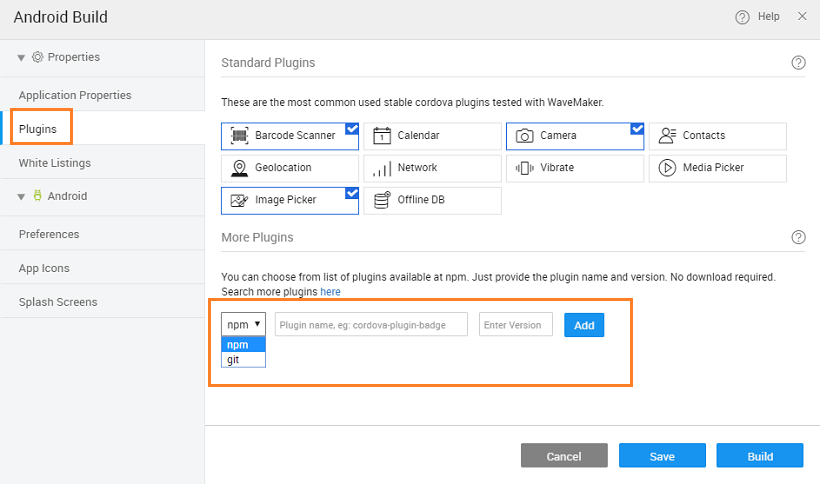
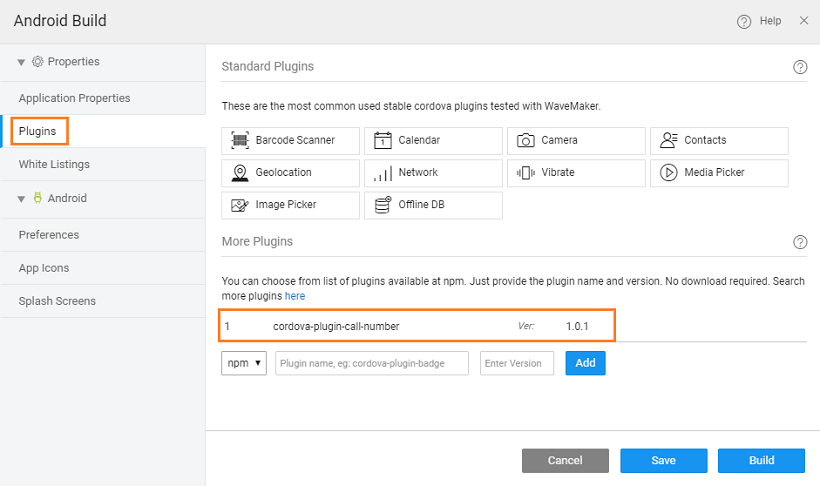
In the project open the Android Build dialog. From the Plugins section and under More Plugins, add the new plugin by providing the following information:
- Source: choose between npm or git,
- Plugin name: provide the plugin’s name,
- the version of the plugin in case source is npm or git repository URL in case of git source.
Click ‘ADD’ button to include the plugin, to be able to use the plugin's API.
Cordova plugin functionality has to be triggered by JavaScript. Based on requirements, identify the trigger point where the plugin has to be invoked. Following is the list of some common triggers:
- onAppReady function in app.js: if the plugin needs to be triggered at application startup time.
- onPageReady function in a page: if the plugin needs to be triggered at page ready event.
- Widget events: if the plugin needs to be triggered when a certain event (like tap, double tap etc.) occurs on a widget. Select JavaScript for the event and invoke the plugin from the JavaScript callback.
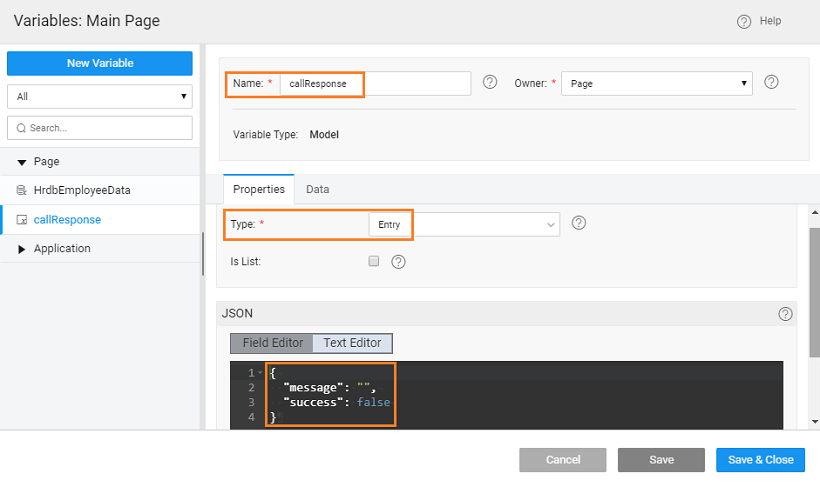
Create a model variable to hold the response from Cordova plugin. Whenever Cordova plugin is executed, update this variable. This variable can be used in further bindings.
- Check the plugin documentation for the API usage.
- Cordova JavaScript APIs are an async type. So, they take success and error function as arguments which are invoked after execution of native code.
- Before invoking the Cordova API, a check has to be done whether Cordova is there. This will prevent errors while previewing in a browser.
- CONSTANTS must be injected into your controller or service.
Use Case
Problem Statement
An application has to be built to list the phone numbers of employees in an organization. The user should be able to call directly from the app. For the database, we will be using the sample HR database that is available in WaveMaker.
Solution
- Import the sample hrdb and create a page.
- Drag and drop a list widget
- select Database CRUD service type, hrdb service and employees entity
- choose a template of your choice, here we are using Action List with basic pagination
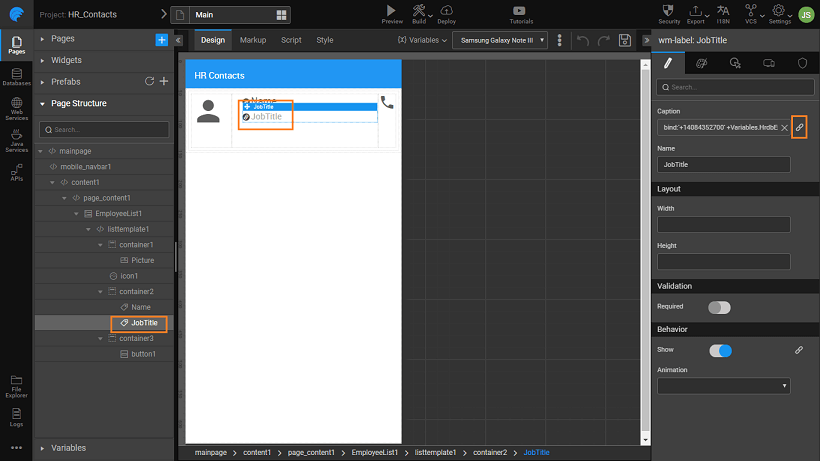
- set Picture widget to the picurl field, the Name to firstname and leave JobTitle field empty. We will be using this to display the phone number.
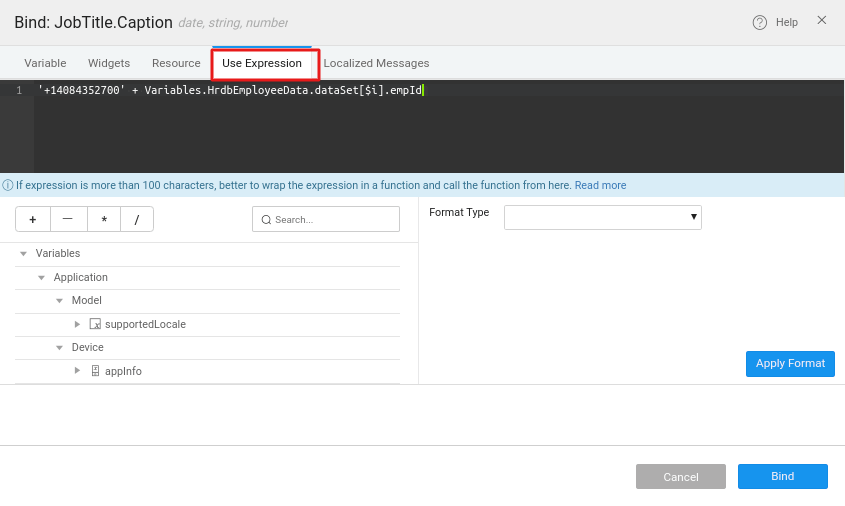
- Since phone numbers are not present in HR database, phone numbers are a computed based on the following expression.
- From the canvas select JobTitle label widget, using the bind icon next to its Caption property, from the Use Expression dialog bind it as specified below.
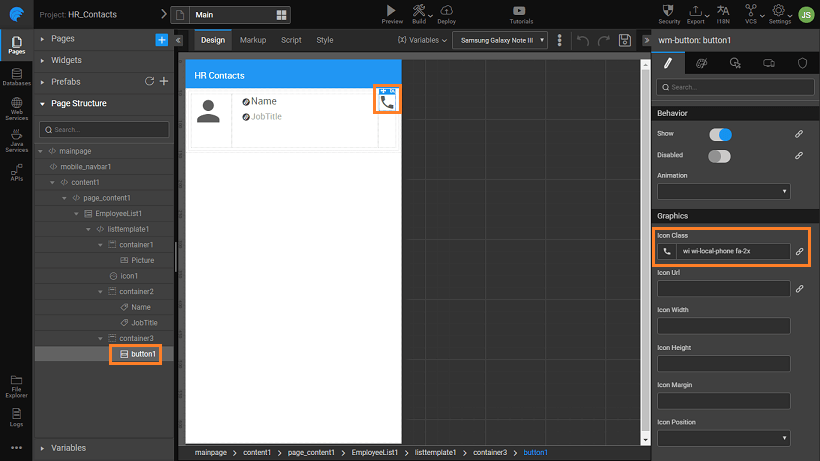
- Replace the default share icon in the live list with a call icon.
As per our use case, upon clicking a contact info, a call should initiate. None of WaveMaker standard plugins can make a call. So, a third party Cordova plugin is needed in order to make a call. We will use the following cordova-plugin-call-number found in npm.
To add this plugin
- Open Android build dialog
- Navigate to Plugins section.
- Enter plugin details and click ‘Add’ button.
- Click ‘Save’
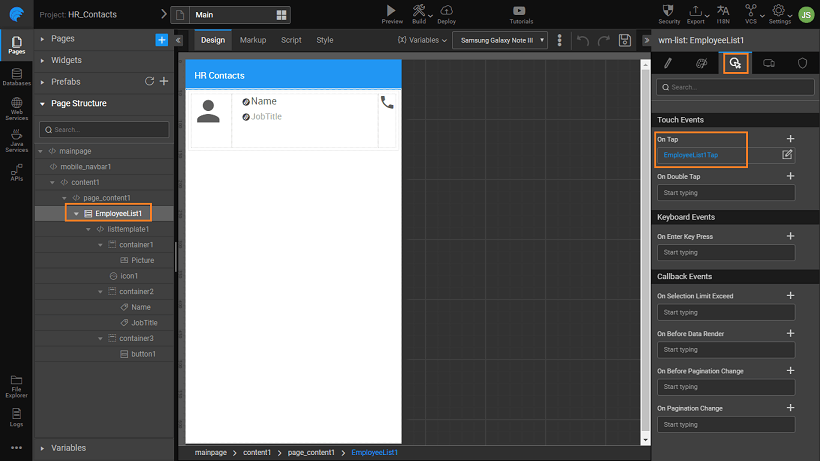
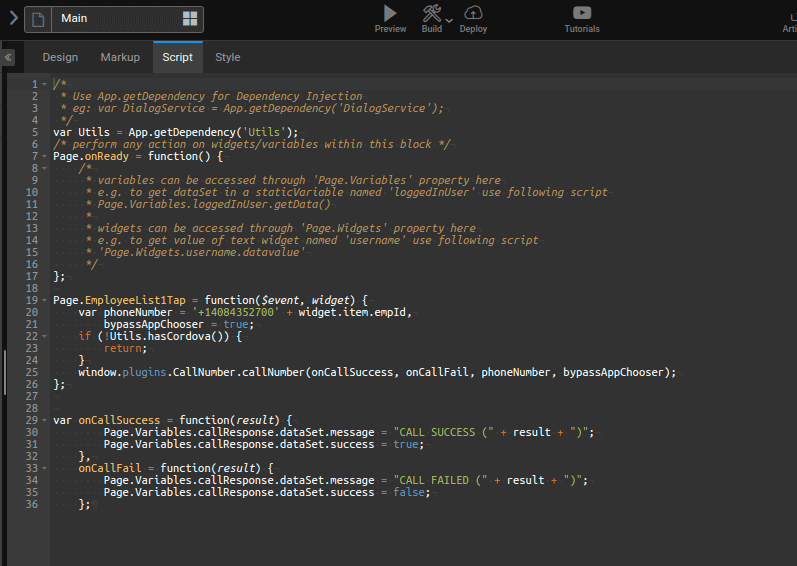
Now, plugin's API can be used. Since we need to make a call when the user taps on the list, set the on Tap event of the list to JavaScript and define the following JavaScript function to invoke the plugin API. Before invoking the Cordova API, a check has to be done whether Cordova is there. This will prevent errors in preview in browser.
Add Utils dependency to the page as below.
- Create a Model Variable called
callResponsethat will hold the plugin's response.callResponseis of entry type with message and success as its properties. Giving default values will help in identifying the type of the property. For example, success has false as the default value. From that, it can be inferred that success is of boolean type.
- The plugin's API takes success and error function as arguments which are invoked after execution of native code. From the onCallSuccess and onCallFailure callback of the plugin set the plugin's response to
callResponse.
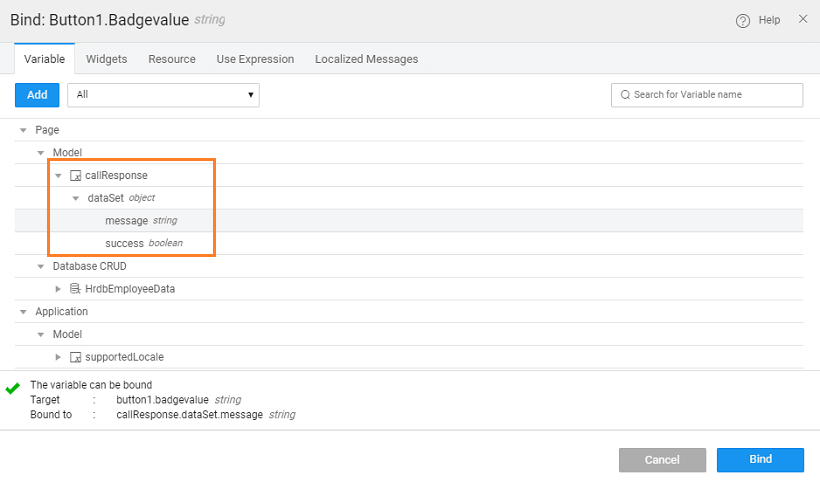
callResponsevariable can be used in bindings. In the below image we are showing how a Button widget's Badge property can be used to display the call response message.
- Third party plugins will not work WaveLens. So, build the app to test it.
