Deployment to Application Server
Overview document for deploying your app to a web server.
Applications built with WaveMaker can be deployed to a number of environments. In this document, we walk through the process of WaveMaker app deployment to Web Server.
Web Server Installation
You will need a valid Web Server installation. The following is a list of Web Servers where the WaveMaker apps can be deployed.
This list is for reference purpose. Apart from these, you can use any standard Java Web Server running on JDK 17/JDK 21 and Servlet Framework version 4.0.1
| Web Server | Versions | Instructions |
|---|---|---|
| 10.x | Deployment Instructions | |
 | 19.0.0.1+ Liberty Profile | Deployment Instructions |
| WildFly 15+ | Deployment Instructions | |
| 14c (14.1.1.0.0) | Deployment Instructions |
Profile Configuration
Set up the configuration profile. You can choose to use the default profile configured by WaveMaker based upon the services incorporated within the app, or build a custom profile.
Generate a WAR file
To deploy your WaveMaker application, you will need to generate a WAR file. There are multiple ways to create the WAR file, as outlined below.
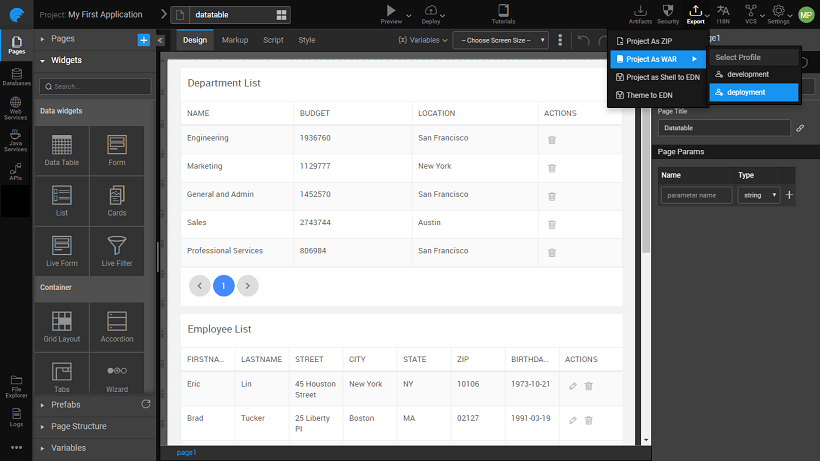
Method 1: Using the WaveMaker Export Option

- Open your WaveMaker application.
- Select Export.
- Choose Project as WAR to directly generate the WAR file.
Alternatively:
- Select Export.
- Choose Project as ZIP to download a ZIP file of your project, which you can then use to generate the WAR file via Maven.
Method 2: Using Maven Build (from Project ZIP)
If you exported your project as a ZIP, follow these steps to generate the WAR file through Maven:
- Extract the ZIP file to a desired location.
- Open a terminal in the project directory.
- Run the following Maven command:This command compiles your project and creates a WAR file in the
targetdirectory.
For more details on Maven usage, refer to the Maven Build Documentation.
Method 3: Using Docker to Generate the WAR Locally
To generate the WAR file locally using Docker, follow the steps below. This approach is helpful if you want a containerized, isolated environment for the build process.
Basic Command
Run the following Docker command, replacing <your_project_location> with the path to your local project folder:
This command mounts your project directory to the container, builds the application, and generates the WAR file in the specified directory.
Optimized Command with Maven and npm Cache
For faster and more efficient builds, you can specify custom Maven and npm cache locations. This setup reduces the need to download dependencies each time by caching them locally.
Replace <local_m2_cache_location>, <local_npm_cache_location> and <your_project_location> with the appropriate paths on your system. For <wavemaker_version>, specify the WaveMaker release version, or set the tag to "latest" (or leave it out) to push the latest version automatically.
Explanation of Options
-e profile=<profile_name>: Sets the build profile.-e MAVEN_CONFIG=$HOME/.m2: Specifies the location for Maven configuration and cache files.-v <local_m2_cache_location>:$HOME/.m2: Maps your local Maven cache, speeding up dependency resolution.-v <local_npm_cache_location>:$HOME/.npm: Maps your local npm cache, improving build efficiency for projects using npm.-v <your_project_location>:/usr/local/content/app: Maps your project directory to the container’s working directory.
Note: Make sure that the specified directories exist and have the correct permissions for Docker to access them.
Once a WAR file is generated, deploy it to Tomcat, JBoss, WebLogic, or WebSphere.
Deploy to Private or Cloud Server
Alternatively, the WAR file may also be deployed to public or private cloud servers. To deploy an application to one of the supported clouds you will need to:
- Acquire an account (public cloud) or install the software (private cloud)
- Create a cloud instance - a virtual machine with a standard operating system
- Install a Java web server - for example, Tomcat
- Deploy the WaveMaker WAR to the Java web server
Instead of above steps you can instantly deploy to Amazon Web Service or to WaveMaker Demo Cloud with just a single click. Learn about one-click deployment.