Import, Export & Update Apps
Overview
Collaborated development experience can be extended to include developers outside your network by using the following options:
- Import,
- Export, and
- Update
Export Project
- Export Project allows you to create a ZIP or a WAR file including the project along with the resources used. The projects are Maven compliant.
- Here we will be using the ZIP option. WAR option can be used for deployment to a Web Server, see here for more.

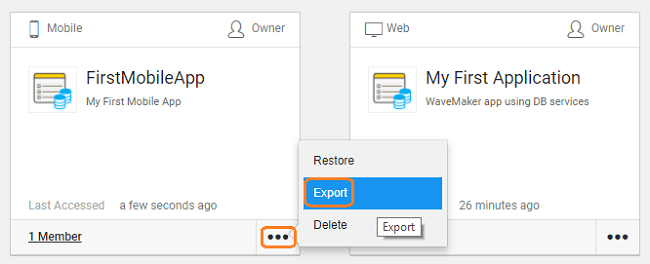
- You can also use the ZIP icon from the Project Dashboard to export the project without opening the same.

- Once a ZIP file is created you can download it to your machine.
Note: For security reasons, the export project option is restricted to the projects you own. Note: In case the project is using a database, only the data model is exported, data is not included in the export.
Import Project
You can import a project or a prefab in the ZIP format using the Import from the Project Dashboard. Choose the file from the import dialog and click on Import. These are the files that were created from the Export option of WaveMaker Studio as discussed above.
- On the Project Dashboard, click the Import button.

- Select the ZIP file from your machine to import and give it an appropriate name. You can retain the original name or change it.
- Now this project will be available on your Project Dashboard for selection.
Updating Projects
You will use this option when you want to incorporate the changes made to the project after export i.e. when you want to "re-import" the project.
- Open the Project that you want to update.
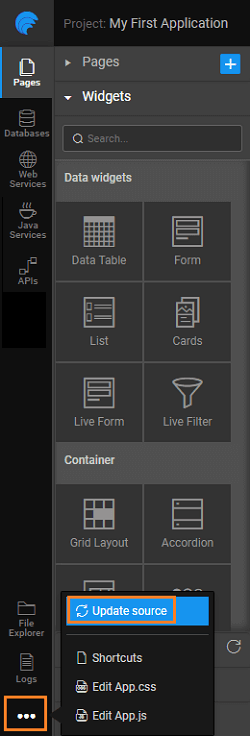
- Select Update Source option from the Developer Utilities.

- Select the location of the ZIP file with the updates. Keep in mind, this operation will overwrite the project source file from your local copy.
Project Recovery
In the previous section, we have seen how WaveMaker provides options to export the project as zip using Export menu and provides Update Source option to update the project sources back. Sometimes projects may fail to open because of conflicts or some corrupt files. In such cases, Export & Update Source options without opening the project itself come in handy. This will help to export the project in conflict/corrupt state, fix the project outside of WaveMaker using an IDE and update the content.
Implementation Details
Each project tile in the Project Dashboard shows
- an Export option for exporting the project as zip, and
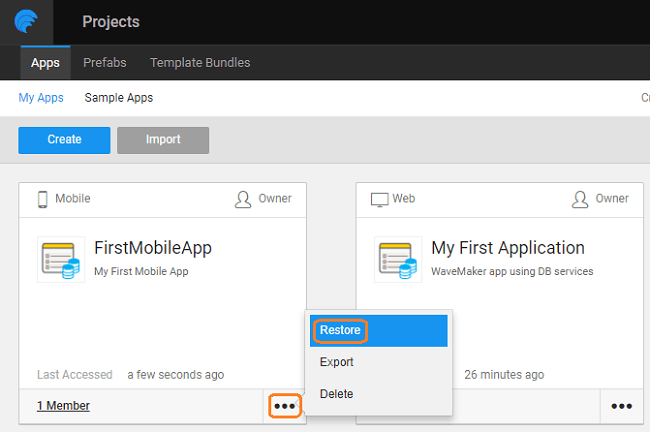
- a Restore option further provides the following options:
- restore from the Previous Snapshot
- restore from Project zip
- a Delete option to delete the project
We will be looking at each of these options in the following sections.
Export Project
Export option downloads project as a ZIP file. Using this option you can export the project (.zip) without opening the project and make changes if any required by working on it using an IDE of your choice and update the project with new changes.
Restore Project options
 Restore opens a dialog with two sub-options:
- Restore to last stable state
- Restore from project ZIP
Restore to last stable state
The last stable state is picked from the snapshot of the project. This option will work only if there is a previous snapshot available, i.e. when there is a VCS conflict. Every time user makes a VCS pull request, WaveMaker takes a snapshot of the project content before making a pull request. If the pull is successful (i.e no conflicts after the pull), the snapshot will be deleted, thus there will not be any previous snapshots for certain cases. Also if there are conflicts the snapshot will be deleted after resolving all conflicts. In such cases, you will get a message to the effect. After applying the Restore from the previous snapshot, your source may be behind the VCS status. In such case, you need to pull the changes again from the VCS to be in sync with the latest status of the VCS server.
Restore from project ZIP
Upon selecting this option you will be asked to upload the zip file (exported from export option) to update the project sources with the zip file content. The entire content in the project workspace will be updated with the new content thus losing any changes done post the export.
To prepare the zip file for upload, we recommend using the “mvn clean install” command which prepares the zip for uploading in the “target/export” directory of the project sources where you extracted the zip file that you downloaded through Export option.
This option also clears the VCS conflict state if any. But any changes to the files (added/deleted/modified) will be reflected in the VCS status.