How to Set Name of Blob Type Downloaded from Data Table
Learn how to set the name for a blob type when downloading it from a Data Table to have the same name when the blob was uploaded.
In this example, we have created a simple table to describe this use-case.
Insert New Column in the Table
Go to the table which contains the blob file.
Add a new column in the table. For example, name the new column as
filenamewith astringdata type. This field stores the uploaded blob's filename.Once the filename column is added into the database, save the table and go to the Data Table page.
Configure the New Column Properties
You can use an existing Data Table which contains the blob, or drag and drop a new table on the canvas. In this example, we are creating a new Data Table with an Inline Editable layout.
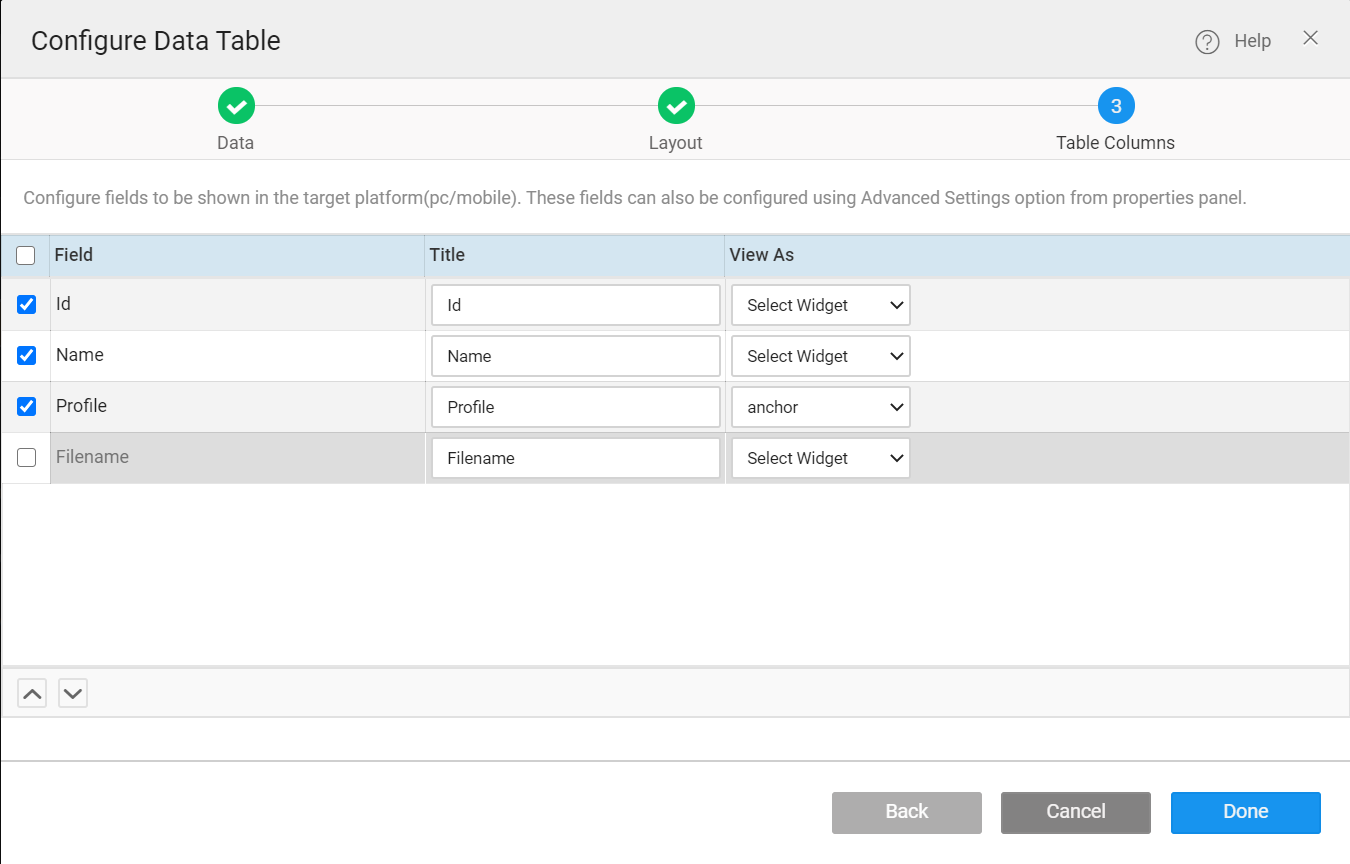
- When you create a Data Table, uncheck the column as below. By doing this, the new
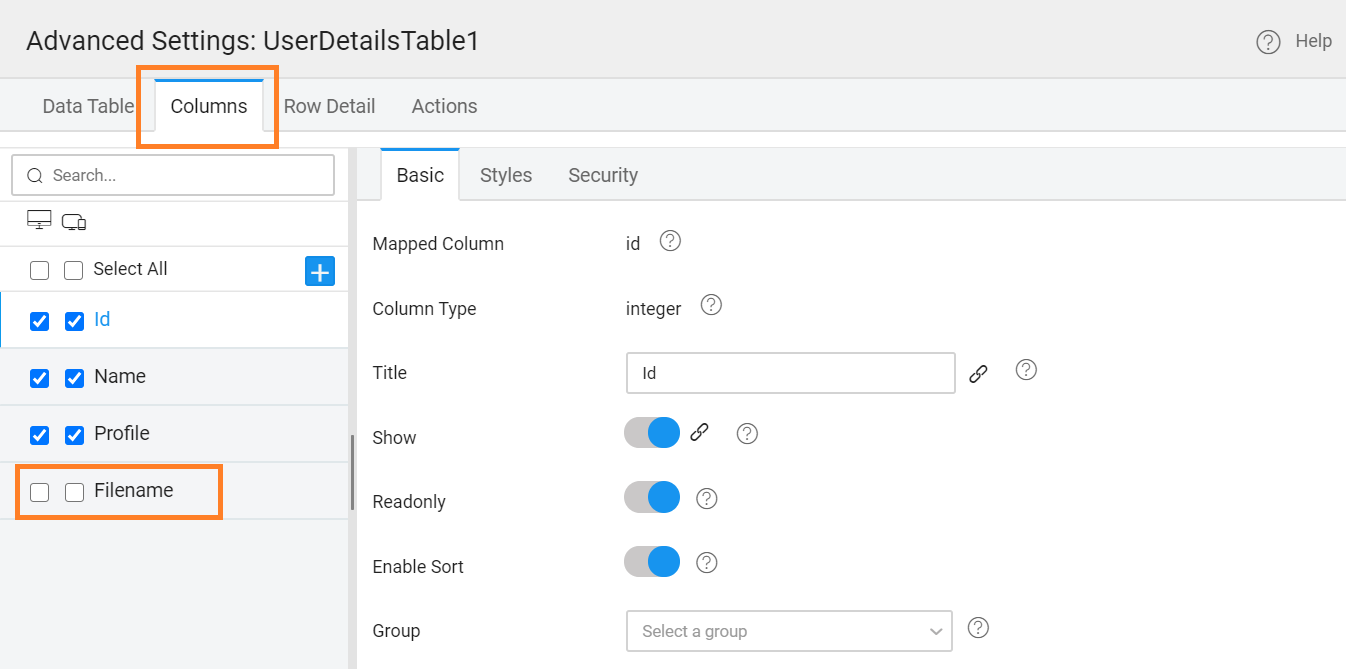
filenamecolumn hides and it would not display in the Data Table.

- Or, when you are using an existing Data Table, click the table, go to the Advanced Settings of the Data Table and go to the Columns section. Uncheck the Blob filename column as shown in the image below.

Configure Events
Blob file is named as Profile.
The newly added column is named as filename.
Go to the Data Table Events' tab and locate the
On Before Record Insertevent and selectJavascriptfrom the dropdown. Similarly, go to theOn Before Record Updateevent and selectJavascriptfrom the dropdown.After this, go to the script tab of the page for the events
On Before Record InsertandOn Before Record Updateand add the following script.
For example:
Set Blob and Download Properties
- Now, go to the Advanced settings of the Data Table widget and navigate to the Columns tab.
- In the columns tab, select the Blob type column. For example, the
Profilecolumn. - Go to the Value Expression property for the blob column and change the
hyperlinkproperty as shown below.
- In the same expression, add the
download="true"property to it, and click Save.
The entire expression for the Value Expression property would look as shown below.
Preview the application and check the functionality. With this, when downloading a blob from a Data Table will have the same name when the file was uploaded.