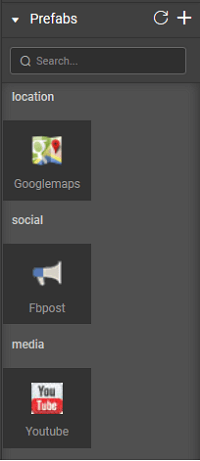
Googlemaps
The Googlemaps prefab connects with Google Maps and displays the map on your page. It can be used either for location map or as route map or as a heat map.
 In order to use GoogleMaps, you need to register your app with Google Maps and add the API key here:

Layouts
Three types of maps can be plotted using Googlemaps Prefab:
Heat map
Location map
Route map
Features
Using Googlemaps Prefab, you can:
- display various types of maps,
- use events to customize the map behavior, and
- use scripts to enhance the functionality.
There are three Map Types supported by Googlemaps Prefab:
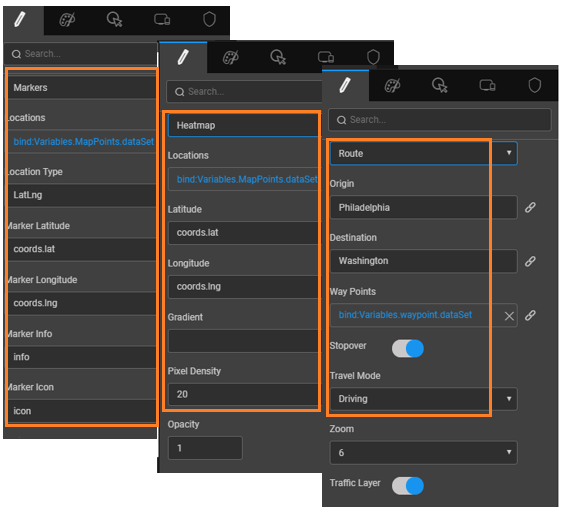
- Markers help to mark a given location with an icon, information, highlight using a circle of given radius and shade(color). The input can be any variable which has the above-mentioned fields delimited. The variable can be bound to the Locations property and each of the above properties can be set to the elements of the variable.
- Locations: Variable containing the location details. Can be static variable in JSON format, or a Live Variable with the following fields
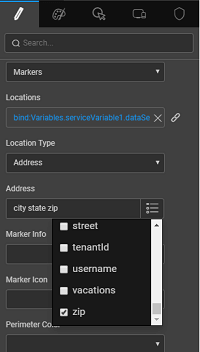
- Location type: tells the format of the location being plotted. It can be
- LatLng in which case Marker Latitude and Marker Longitude of the location is given as the input
- Address wherein the Address fields in the form of a city, state, zip etc can be picked from the multi-list dropdown. These are the fields from the variable bound to the Locations property above.
- Marker Icon: Used to mark the location
- Marker Info: Any information that needs to be displayed when the location is clicked
- Perimeter Color: Used to set a circle shaped boundary around the marker.
- Perimeter Radius: Used to set the radius of the boundary around the marker. This change is reflected in prefab only when Perimeter property is enabled.
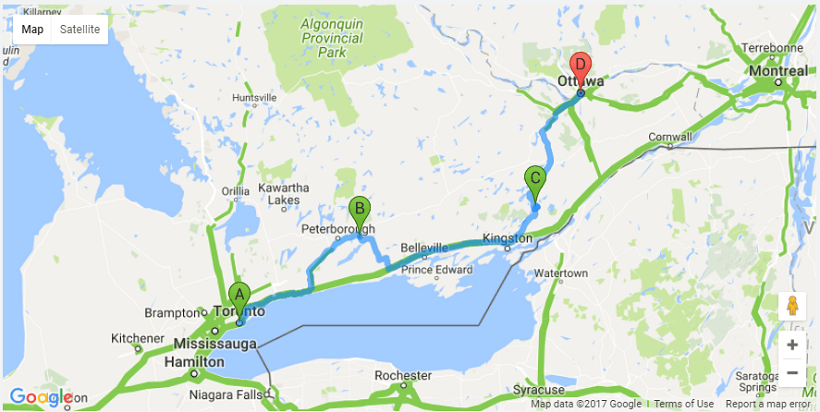
- As a route map you can mark:
- the origin and destination by passing the String or GeoLocations(Latitude and longitude) to get the route rendered on the map,
- the Waypoints a location which needs to be included in the route from the origin to destination,
- using the Stopover property you can choose to mark the waypoint in the route,
- the Travel Mode can be Driving, Walking or Transit. The Route information like Origin, Destination, Duration, Distance is displayed below the map.
- As a Heatmap, the traffic congestion points can be marked. You can set:
- Marker Latitude and Longitudecan be selected from the fields from the Locations variable
- Gradient
- Pixel Density to mark the size of the marker
- Opacity to set the appearance of the marker
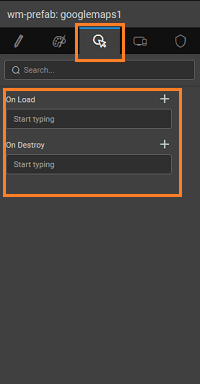
Events
The following events are exposed for Googlemaps Prefab:
- On Load: this can be used to trigger any action when the Prefab is loaded on the page containing it
- On Destroy: this can be used to trigger any action when the Prefab is deleted/closed
- onMarkerclick: this can be used to trigger any action when a marker on the map is clicked
- onMarkerhover: this can be used to trigger any action when a marker on the map is hovered on
Script Access
- You can get the marker information from $data in the On Marker Click event of the google map.
- You can open the info window of the marker by invoking the showInfoWindow method on the widget scope. Params required for the method : ‘mapMarkerData’. For example Page.Widgets.googlemaps1.showInfoWindow(mapMarkerData). This will open the info window for the selected marker. Example: To open the info window of the marker in the Marker on Click event is shown below:
- You can plot a custom Marker on the map either by sending the Address to the markAddress function (or) by sending the lat, lng values to the markLatLng function. For example: Page.Widgets.googlemaps1.markAddress('Chicago') will plot the marker in Chicago, USA. Page.Widgets.googlemaps1.markLatLng(31.619770, 74.876713) will plot the marker according to the provided latitude, longitude values.
- You can remove all the custom Markers by invoking the function clearAllMarkers on widget scope
Usage Scenario
We will see three use cases for various features of the Googlemaps prefab:
- Location from Database
- Location from Static Variable
- Route Map
Location from Database
- Drag and drop the Googlemaps prefab onto the canvas on any of the pages in your application.
- Bind the Locations property to a database which contains the address fields. Here we are using HrdbEmployeeData table from the imported Sample DB.
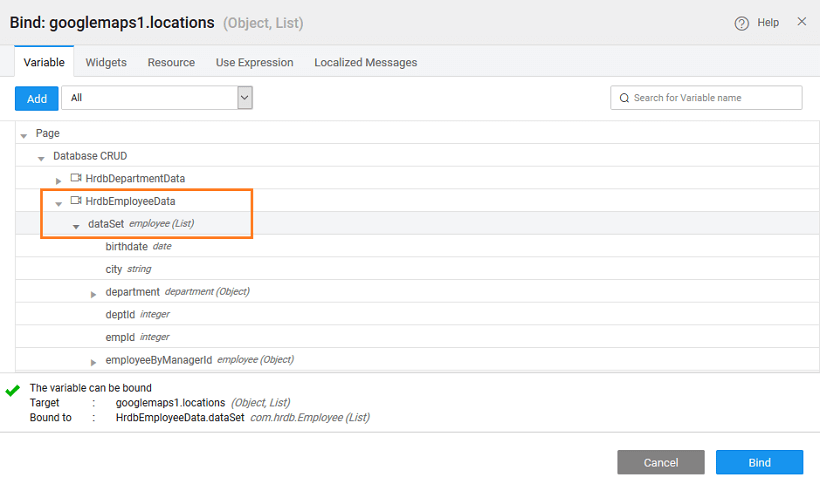
- Set the Markertype to Address and choose a city, state, and zip for the Address property.

- You can set the other properties to any fields in your DB. Here we are not setting them since we do not have corresponding fields in the sample DB.
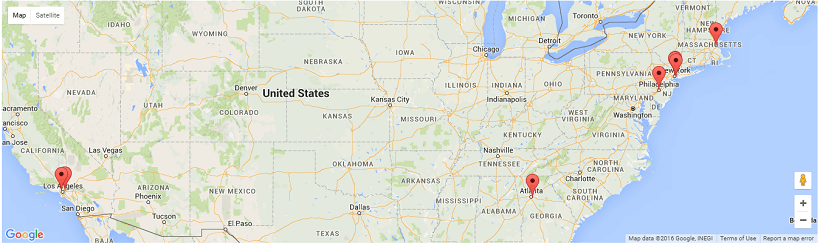
- Run and see the map.


Location from Static Variable
- Drag and drop the Googlemaps prefab onto the canvas on any of the pages in your application.
- Create a custom variable as per your requirements. Know more from here. Then enable the isList property, and enter the appropriate JSON in the Text Editor.
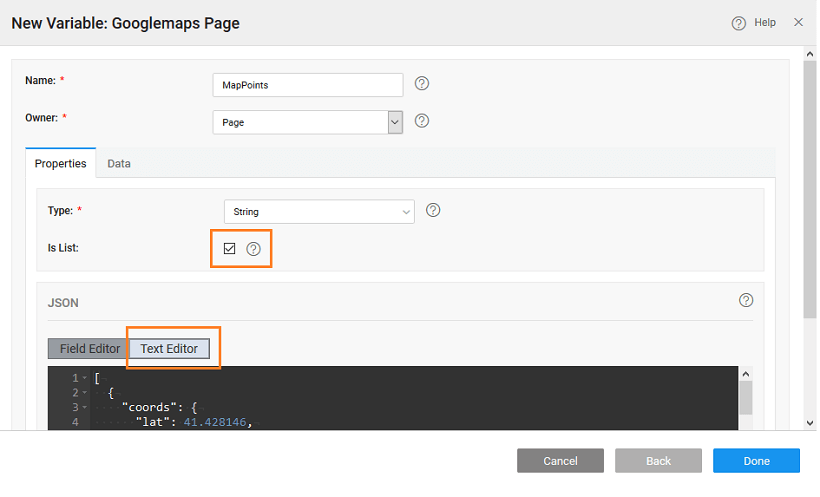 As an example you can use the following:

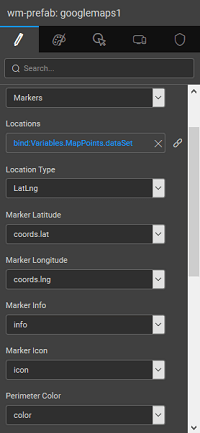
- Bind the location's property of the prefab to the model variable created.
- Select coords.lat for Lat property, coords.lng for Lng property, icon for Icon property and info for info property. You can set the height and width of the prefab. The zoom property can be set for the default level of display, set the width and height of the display window.

- Save and run the application.
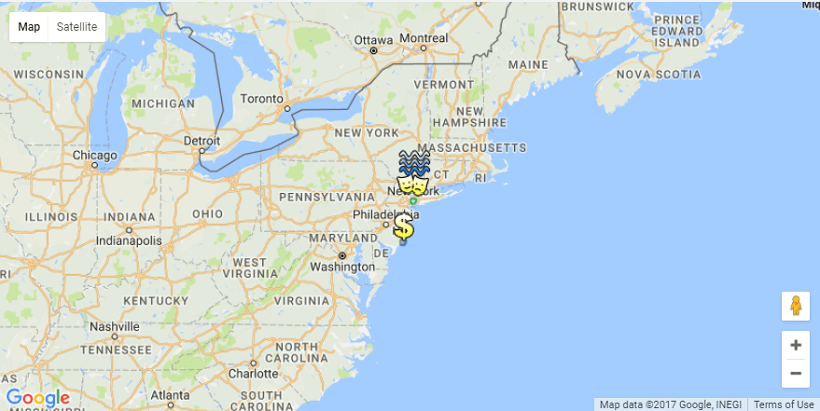
- You will see the google map displayed with the cities mentioned in the static variable highlighted with the appropriate icon and information tags. You can zoom in, zoom out, pan left, right, top and bottom as you would with google maps.

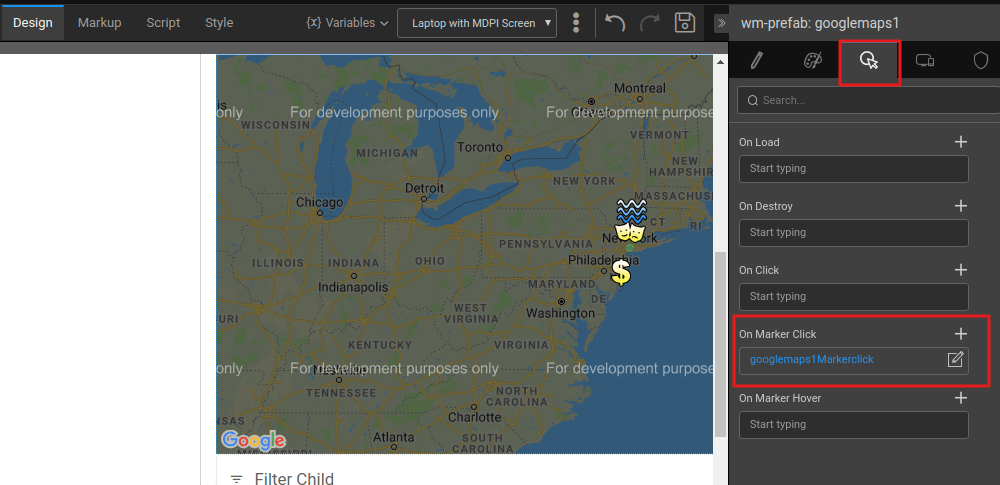
- To get the marker details in the on click event of the marker:
- Go to the google map prefab and navigate to the Events tab in the properties panel. Here, in the On Marker Click event, select javascript from the dropdown.

- In the Script tab from the Markerclick event, you can access the marker data as below: Example:
- Go to the google map prefab and navigate to the Events tab in the properties panel. Here, in the On Marker Click event, select javascript from the dropdown.
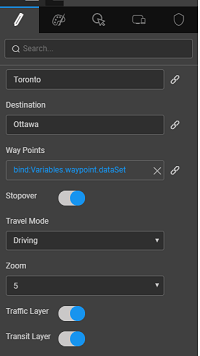
Route Map
Using the Origin and Destination properties, you can plot a route.
- Drag and drop the Googlemaps prefab onto the canvas on any of the pages in your application.
- Enter the values for Origin and Destination. These can be static string values or bound to variables. For example, we have used Toronto and Ottawa values:
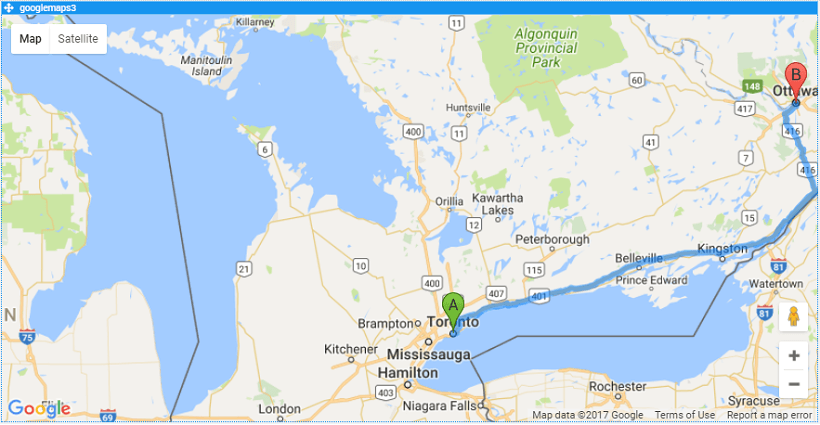
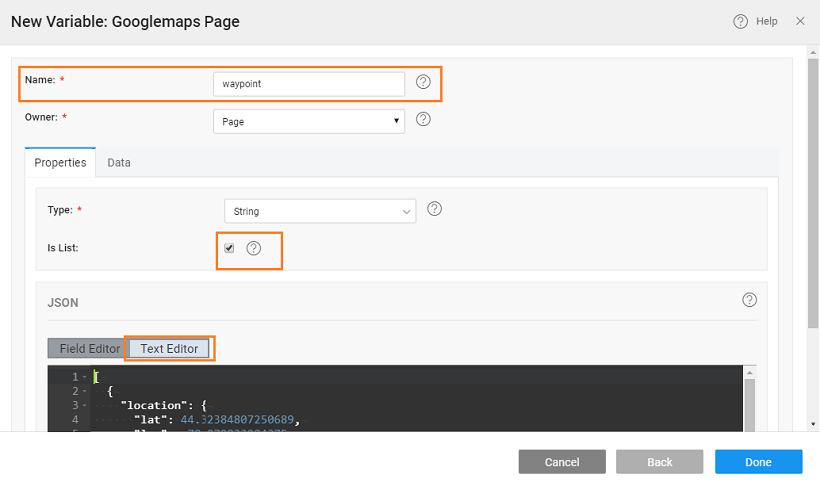
- Using Waypoint property, you can set the intermediary points from origin to destination.

Due to restriction from Google Maps API, the input to waypoint has to be in a JSON format. Create a model variable with this content and bind it to the waypoint property.
 Here is a sample code we have used for this example.
- Set the Origin and Destination to Toronto and Ottawa, and bind the Waypoint to the model variable created in the previous step. Selecting the Stopover property will mark the waypoint.

- Run the app.