Connect To Azure SQL Server
Prerequisites
- To import/connect to SQL Server running in Azure Cloud, you need to have the database driver jar named sqljdbc4.jar available with you. Steps in download
- Access to Azure Account with permission to edit the firewall rules.
- SQL Server running in Azure with database that you want to import.
Steps in Azure Integration
- Connect to Azure SQL Server by uploading the jar and configuring the connection settings
- Map the WaveMaker connection settings with SQL Server settings
- Enable Firewall to access SQL Server
Instructions
- Create/Open the project in which you want to import the SQL Server database.
- From the Add Database dialog, select SQL Server database.
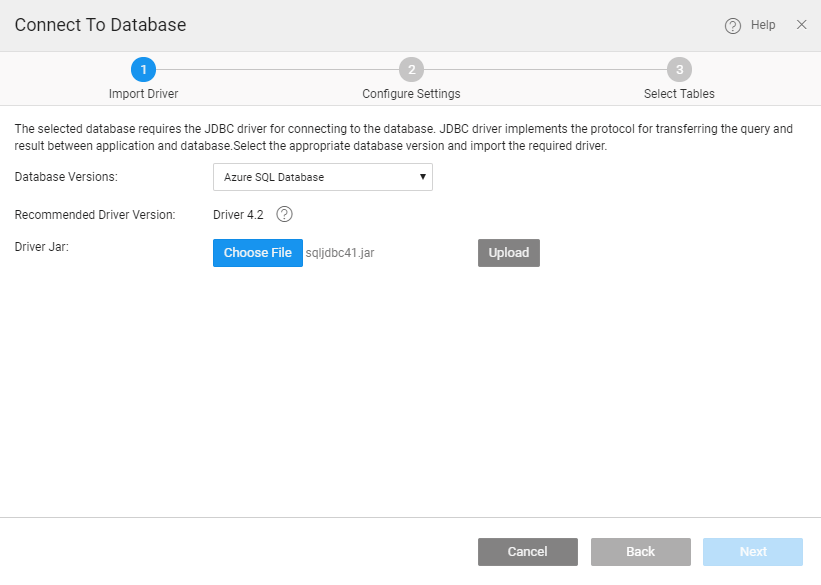
- Select Database Versions as Azure SQL Database and provide sqljdbc4.jar file as Driver jar and click on upload button. After the JAR imported successfully, click on Next.
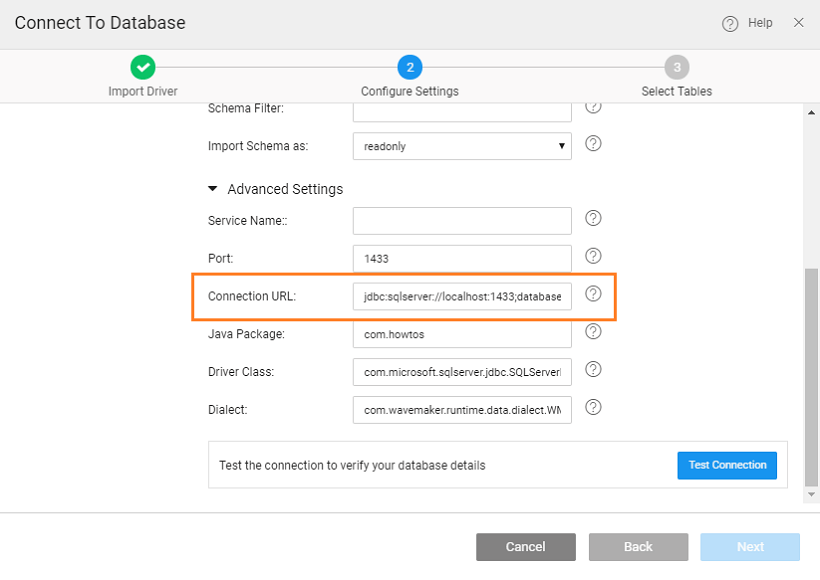
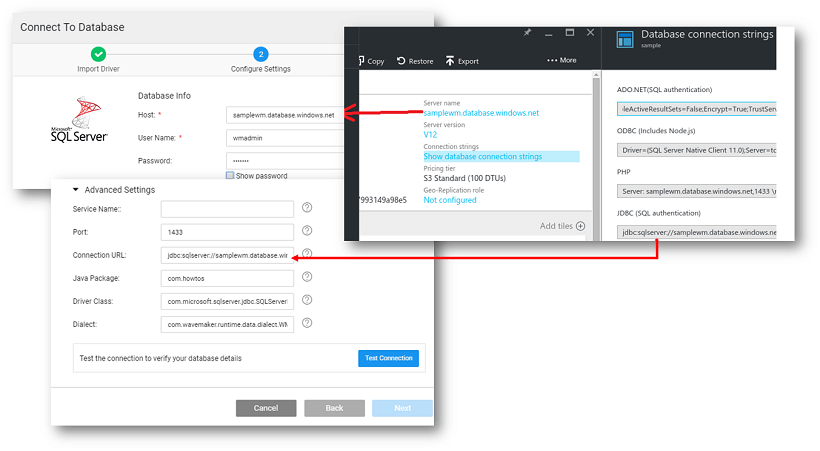
- Provide Azure SQL server details such as Host, User Name, Password and Database Name, Schema Filter (comma-separated list of schema names to import) in the configure settings step and click on ADVANCED SETTINGS button to review the generated connection url. Note: The mappings between the Azure MS SQL Server and WaveMaker are given in the next section.
- Once connection has been successfully established you will be provided with a connection success message and Next button will be enabled. In case you get an error message, check the Firewall settings at Azure as explained here.
- Click on next button to view tables in the database
- Select tables and click on import button.
Your Database is imported and ready to use in the application.
Connection settings Mappings
(NOTE: The screenshots from Azure were current at the time of creation of this document. The actual images might differ)
- Login to Azure Dashboard
- Navigate to Microsoft Azure -> SQL databases ->
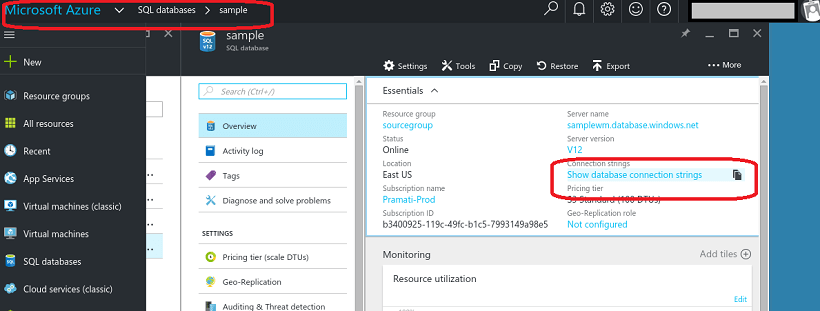
- Click on show database connection strings
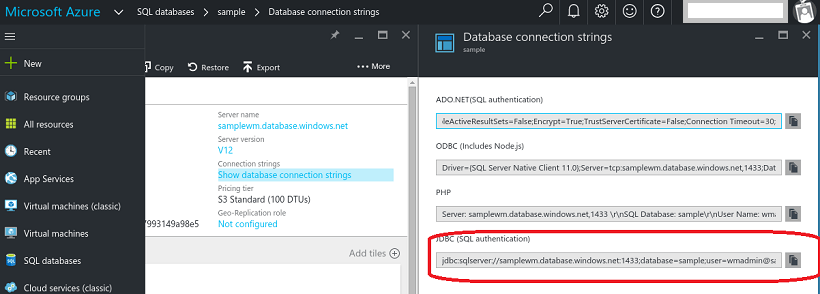
- The Server name maps to the Host and JDBC link maps to the connection URL in the configuration settings dialog
Enable Firewall to access SQL Server
- While Testing Connection with MS SQL Server, it may fail to connect as the firewall does not allow incoming connections from WaveMaker by displaying the message as shown below.

- From the error message, you can extract the IP of WaveMaker and enable firewall for that IP. Beware: This IP address is common to all WaveMakeronline users and as such any WaveMakerOnline user will be able to access your server once you enable firewall for the IP. You are strongly advised to take appropriate measures to protect your server.
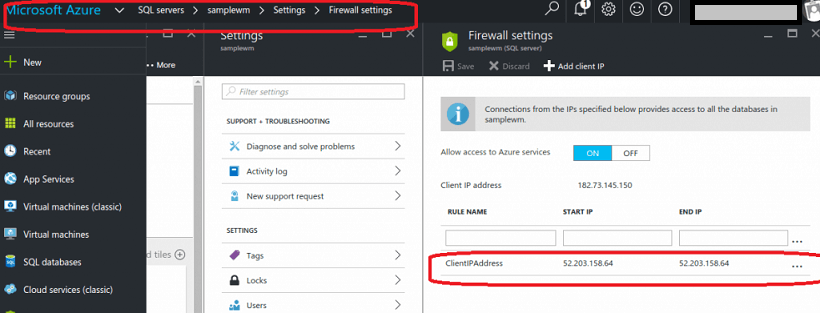
- To set up firewall in Azure SQL navigate to Sql Servers-> <your-database-server> -> settings -> firewall settings
- Add Rule name, Start IP (the IP of WaveMaker, obtained from the error message) and End IP (the IP of WaveMaker, obtained from the error message) and save
