Using the Progress Circle Widget
In this article, you will learn how to create and configure a progress circle widget in a step by step process. A progress circle is a basic widget type.
- You can use this widget to visualize the status of an event in a circle bar.
- You can create reports or dashboards.
To use the progress circle widget for static data, you enter values in the widget properties for default, min and max values. Also, you can execute SQL queries from the database and generate database APIs to get dynamic values; bind those values for default, min and max values in the widget properties to visualize the status or the data.
Use case
On a progress circle widget, visualize the total sales percentage of the product when you click on the item name from the data table.
In the given example, we use the Product table which invokes data from the Sales table. Therefore, make sure to connect to the salesdb sample database. To import the sample database, see Connecting to a Database.
Creating a database API
- In the DataBases menu, navigate to the Query tab.
- Create a query to get the total sales value from the Sales table. For example, write the following lines of code in the query builder to get the sum of sales.
- Click Execute, and then click Save.
- Name the query as MaximumValue; it then saves as a database API.
- Click +New. Create another database API to get the total of each product's sale value. For example, write the following lines of code in the query builder to get the sum of total sales for each product:
- Add parameters for the
PRODUCT_IDincluding TYPE and Test Value. For examples, Type:Integer;Test Value:2;
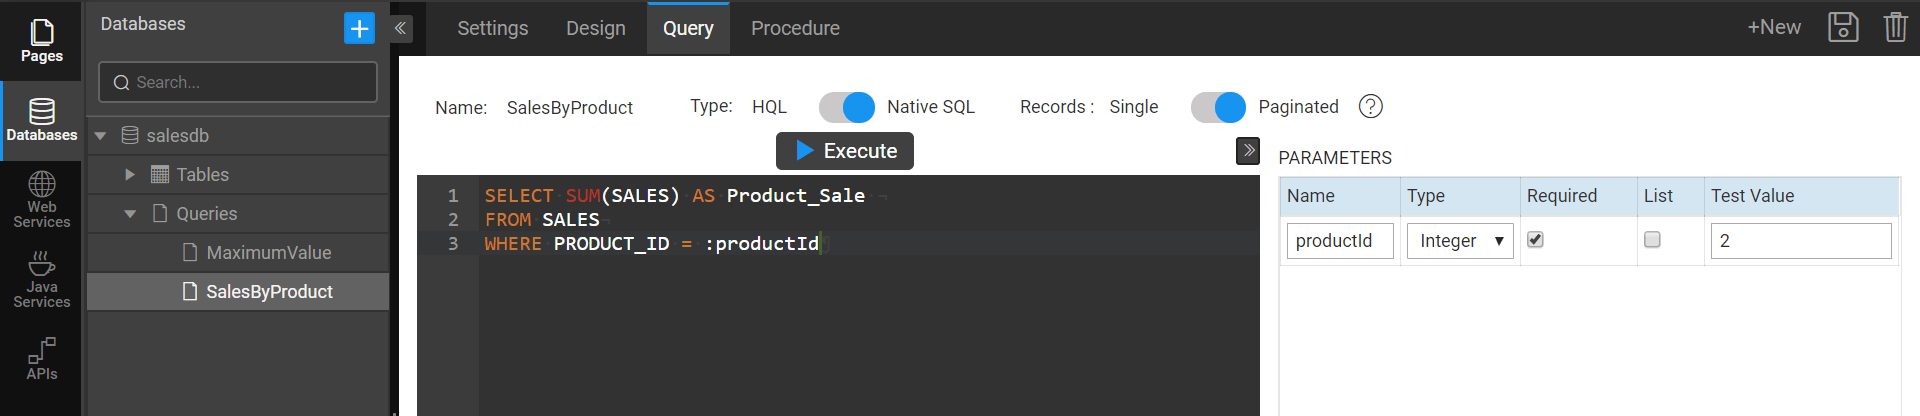
- Click Execute.
- Click Save, and name the query as
SalesByProduct; itsaves as a database API.
Designing the dashboard page
- Create a Page called Product Sales. To create a page, see Page Creation.
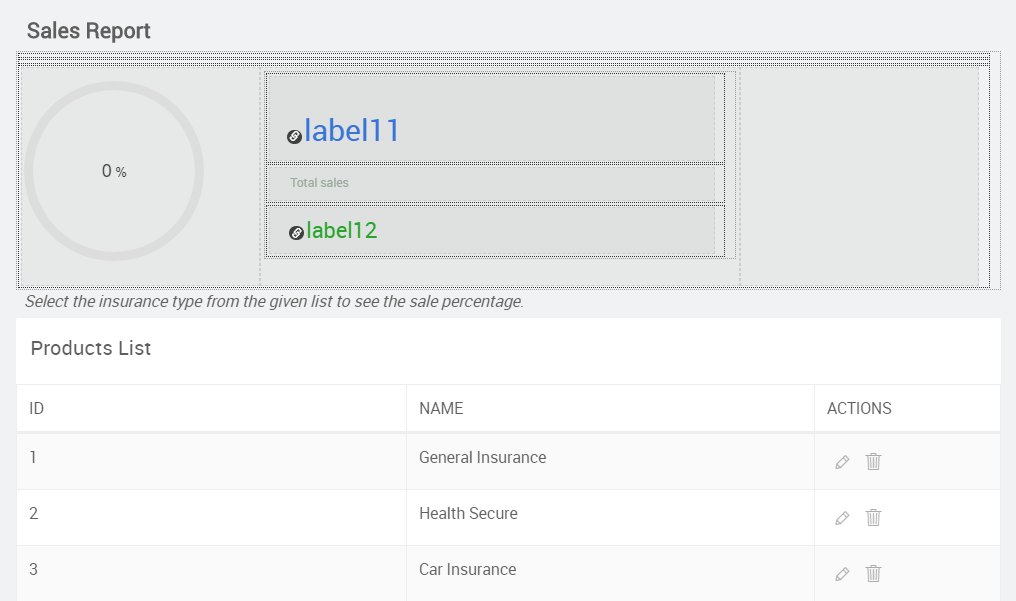
- Design the page to contain the progress circle widget and a data table as shown in the image below:
From the widgets, drag, and drop the Grid Layout widget to design and divide the page evenly.
Drag and drop the Progress Circle widget inside the grid.
Drag and drop a Data Table widget.
Configure the Data Table to show the products table.
- Retrieve Data From → Services.
- Select a service type → All.
- Select a service →
salesdb. - Table/Entity → Products → A variable will be created automatically, for example,
SalesdbProductsData. - Records per request → 5.
- Set Records per request, Update data on input change, Request data on page load, and click Next.
- Enable ReadOnly → Simple View Only → Next.
- Pagination → Basic → Next → Done.
Drag and drop the labels inside the Grid Layout.
Bind the
Label12Caption with the product sales value which is aSalesByProductdatabase API.Bind the
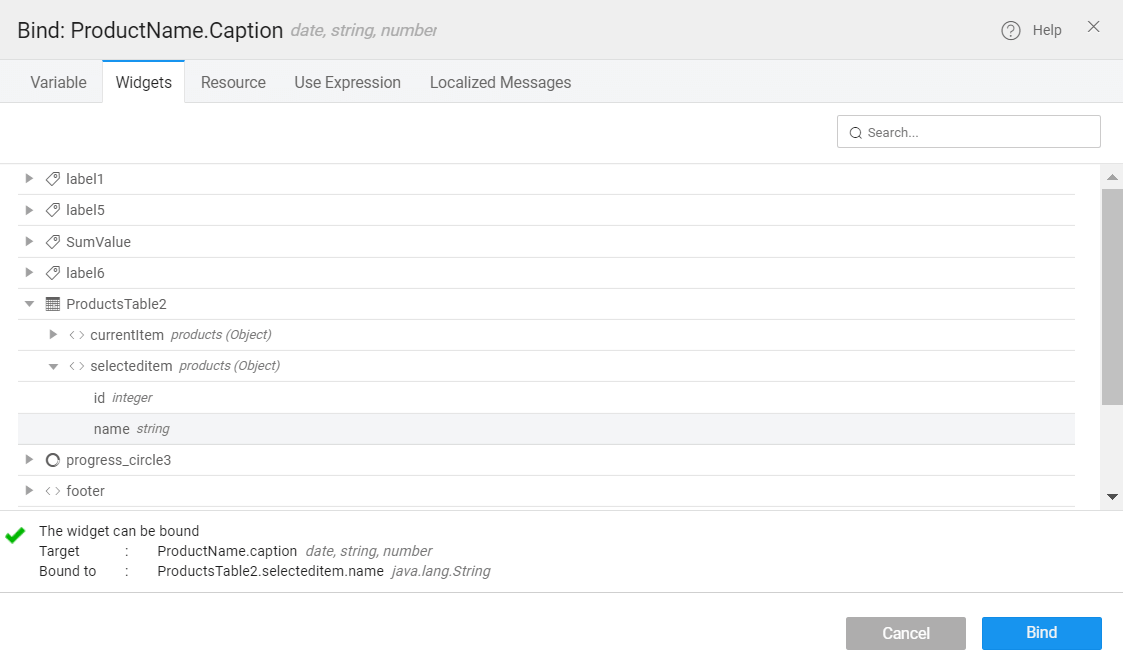
Label11Caption with the product name- Click bind for
Label11caption. - From the Widgets tab, select
ProductTable2→selecteditem→ name. See image below:
- Click bind for
- Bind the
Label12Caption with the product sales value which is aSalesByProductdatabase API.
Creating a database variable
- Open the Variables configuration page.
- Click New Variable, choose Database APIs.
- In the next window, select SalesDB from the drop-down for the Database option.
- Choose an API type to Query APIs.
- Select the Query from the drop-down. For example,
executeMaximumValue. - Provide a Name to the variable as
ServiceMaximumValue, and click Done. - Similarly, add another variable. Follow the steps 1, 2, 3 in the variable configuration page.
- Select the Query from the drop-down. For example,
executeSalesByProduct. - Provide a Name to the variable as
ServiceSalesByProduct, and click Done. - For
ServiceSalesByProduct, configure the Data to bind withproductId. - Go to the widgets tab, select
ProductsTable2→selecteditem→id.
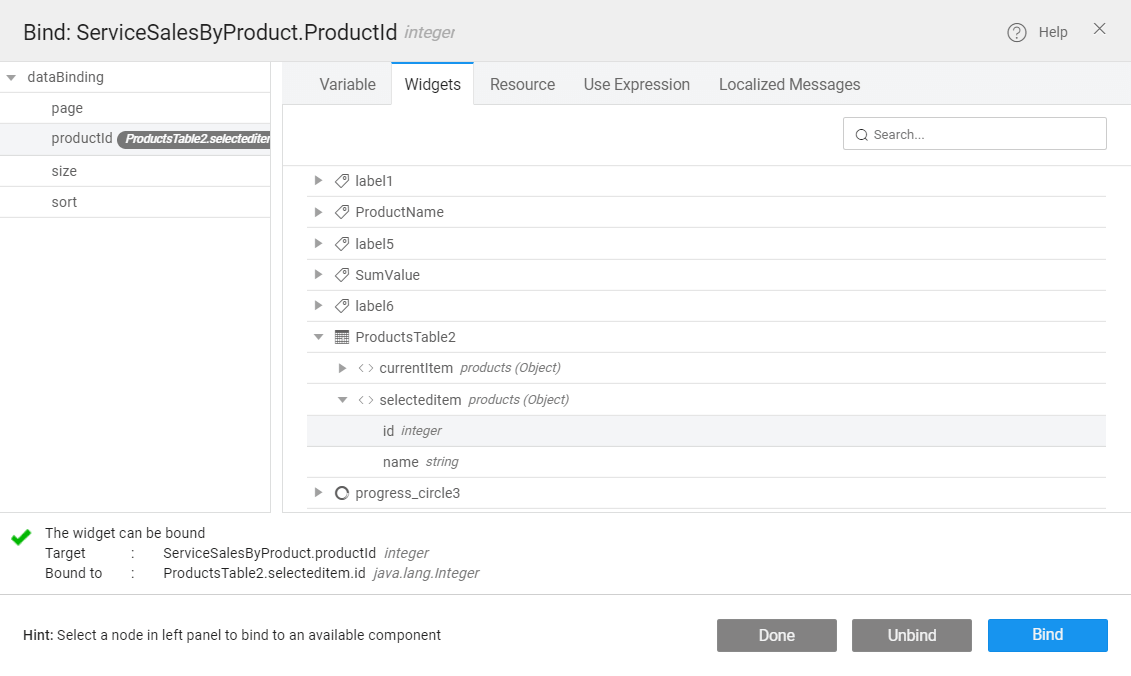
- Click Bind, and then Done.
- Save and Close.
- Click Bind, and then Done.
Configuring the progress circle widget
- Select the progress circle and open the property settings.
- Set the Default Value; for example, enter any number for a static value. For dynamic update, bind the Default value with the variable called Service
SalesByProduct.dataSet[$i].productSale.- Click bind for the Default value in the properties.
- Go to Variable tab and select
ServiceSalesByProduct→dataSet→productSale. See the image below: - Click Bind.

- Set validation for Minimum Value if you want to set a value other than “0”.
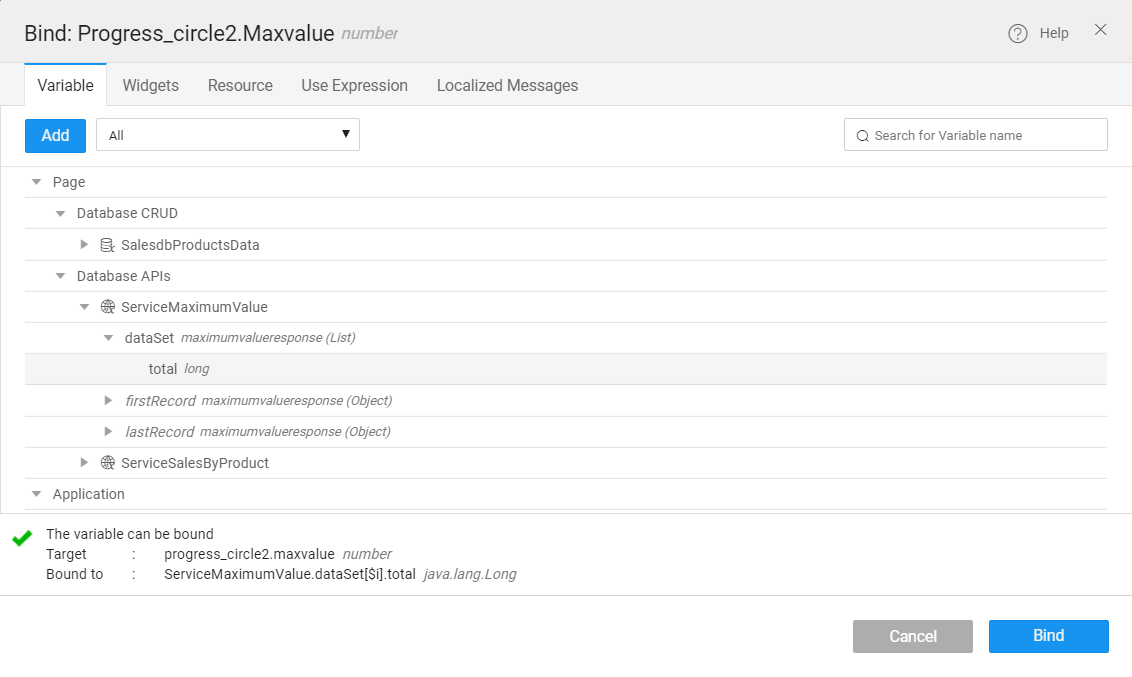
- Set the Maximum Value; for example, enter any number for a static value. For dynamic update, bind the Maximum value with the variable called
ServiceMaximumValue.dataSet[$i].total.- Click bind for the Maximum value in the properties.
- Go to the Variable tab and select
ServiceMaximumValue→dataSet→total. See the image below: - Click Bind.
Click the Preview icon to view the page. When you click on each table item, the product sale value displays on the progress circle widget. Also, on the right side of the progress circle, you will see the item name and total sale value.