Submit Parent and Child Records in a Single Transaction using Form and Data Table
This topic describes how to add Parent and Child records in a single transaction, where a Parent is the master record, and the Child is the extension or the details of the master record using form and Data Table.
Example: Assume that a Pizza is a Parent entity, the Types of Pizzas are the Child entity type. When you enter the Parent record, you want to add the child records at the same time, too. To do this, follow the step-by-step instructions as below. Also, achieve this topic's agenda of:
- Adding parent/child or master-detail's records in a single action.
- Using database CURD and a Model variable.
- Using a Data Table inside a Form.
Database Configuration
Navigate to the Databases section and create your own database. For more information, see Working with Databases.
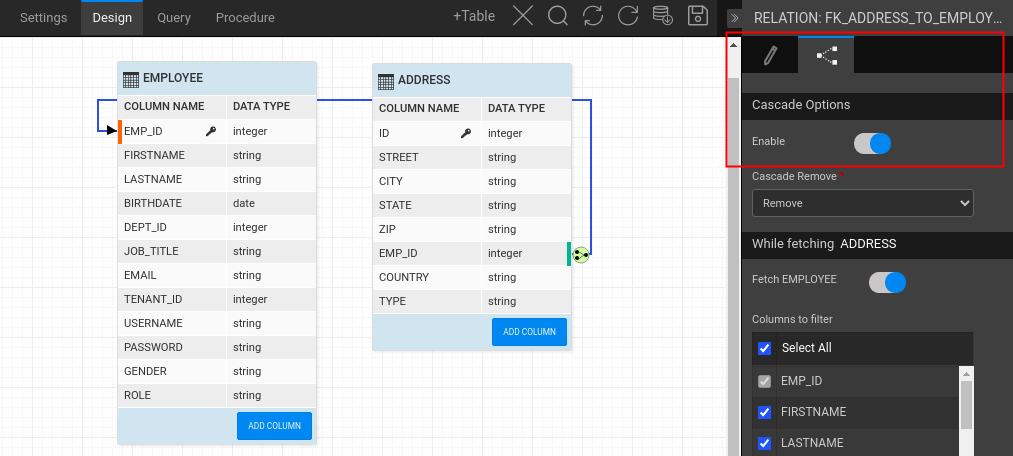
- Step-1: In the database designer, add a one-to-many relation for the parent and child tables.
- Step-2: Enable the Cascade Option for the one-to-many relation as shown in the image below. For more information, see Working with Database Schema.
Page Design
Configure Parent LiveForm
- Step-3: On a page, drag and drop a Live Form and bind it to the Parent entity(Employee Entity in the database). The Employee Live Form is the Parent form.
Model Variable Settings
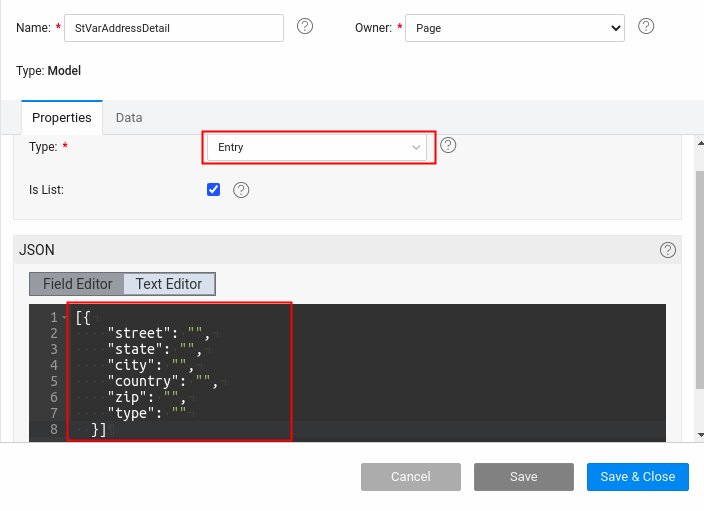
- Step-4: Create a model variable with Entry type and set the flag to the isList option and also the metadata same as the child entity(Address Entity present in the database) as shown in the image below.
Configure Datatable inside Parent LiveForm
Step-5: Drag and drop a Data Table widget inside the Parent LiveForm(Employee LiveForm) and bind it to the model variable created in Step4.
Step-6: Now click the Advanced Settings option present under the Properties panel of the Data Table and from the dialog enable all the actions to insert address details for parent record submission.
Rename Datatable Widget
- Step-7: Now search for the
${ParentEntityName}.javafile under FileExplorer and check the child entity reference name(variable name) and update the datatable widget name which dropped inside the parent LiveForm with the child reference variableName.
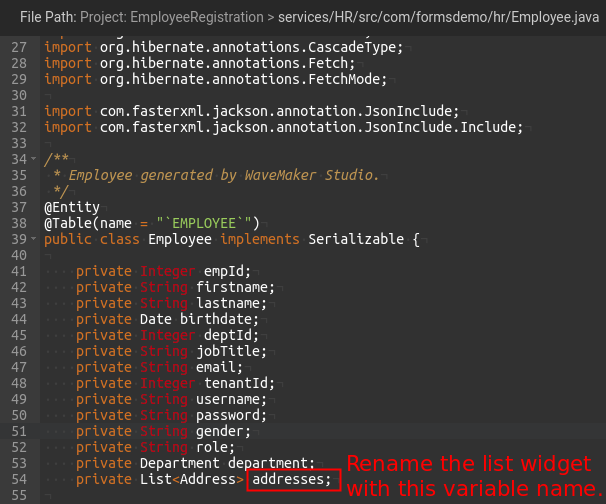
Ensure that the Data Table widget naming convention is same as the related Child entity mentioned in its Parent entity. To verify the name, see .java file of the parent entity from the File Explorer.
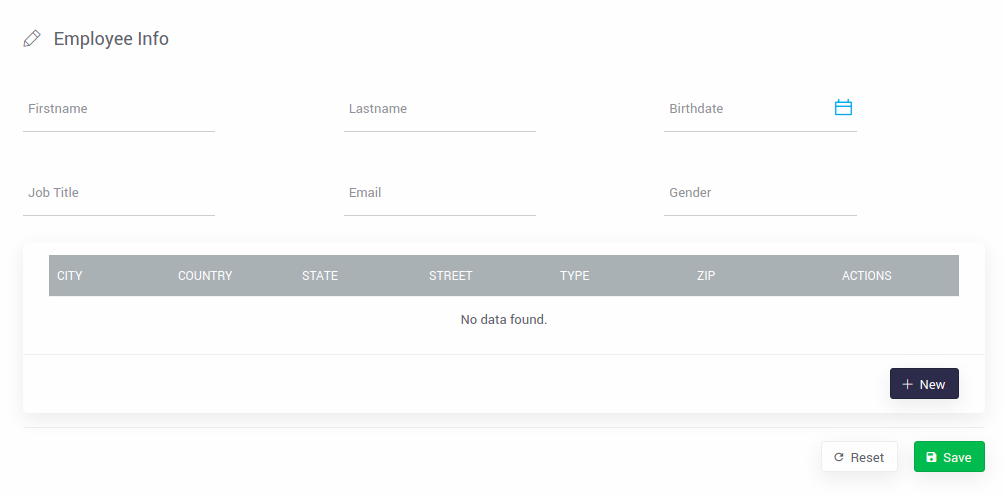
App in Preview
Preview the App. You will see the Employee LiveForm fields along with Data Table as shown below.
Click the New button and add the Address Details. Likewise, you can add any number of address details using Data Table.
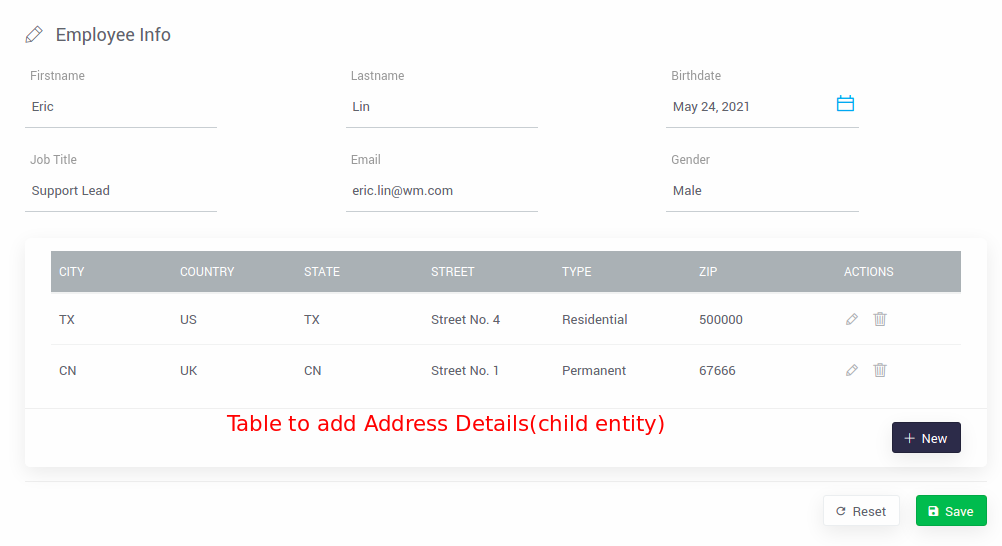
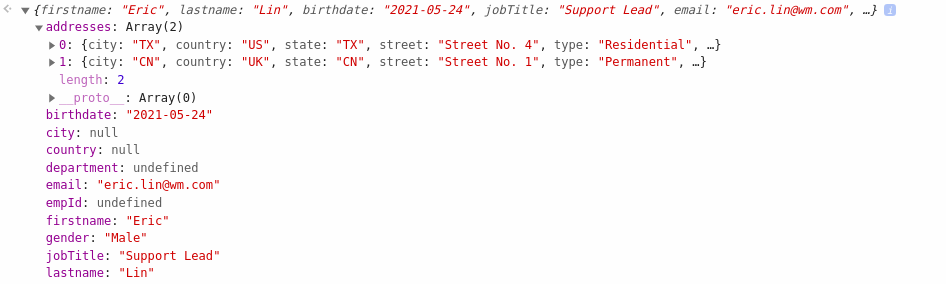
The final object structure will be as shown in the image below along with the employee details, i.e., two address object details, including, one residential and permanent addresses.