Prefab as a Web Component
Web Components are a modern web standard that enables the creation of reusable, encapsulated custom HTML elements. They are:
- Framework-Agnostic: Integrate seamlessly with Angular, React, Vue, or vanilla JavaScript.
- Browser-Native: Built on native browser technologies, requiring no additional dependencies.
- Encapsulated: Ensure isolated styles and functionality.
- Reusable: Shareable across multiple projects.
WaveMaker Prefabs
Prefabs are reusable components designed to integrate seamlessly with web APIs and data in WaveMaker applications. Converting these Prefabs into Web Components extends their usability to any framework or standalone application.
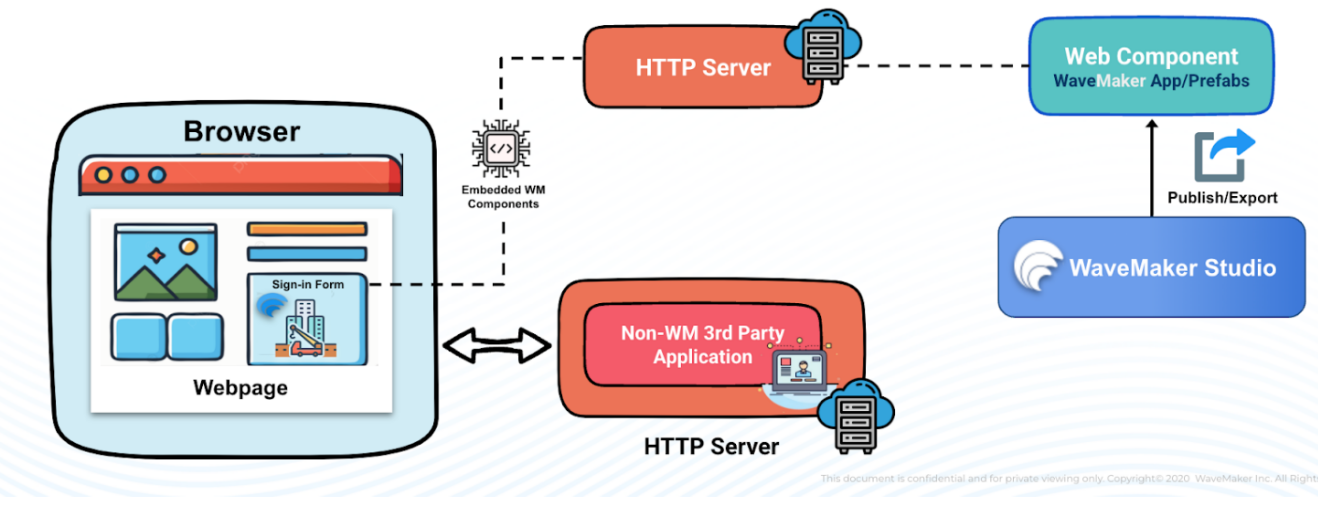
Architecture
This architecture allows for a hybrid approach, where a web application can leverage the capabilities of WaveMaker components while still maintaining independence and flexibility in its overall architecture.
Steps to Convert a Prefab into a Web Component
Converting a WaveMaker Prefab into a Web Component is a straightforward process consisting of three steps:
- Trigger the Job
- Download & Host the Zip
- Integrate the Web Component
Trigger the Job
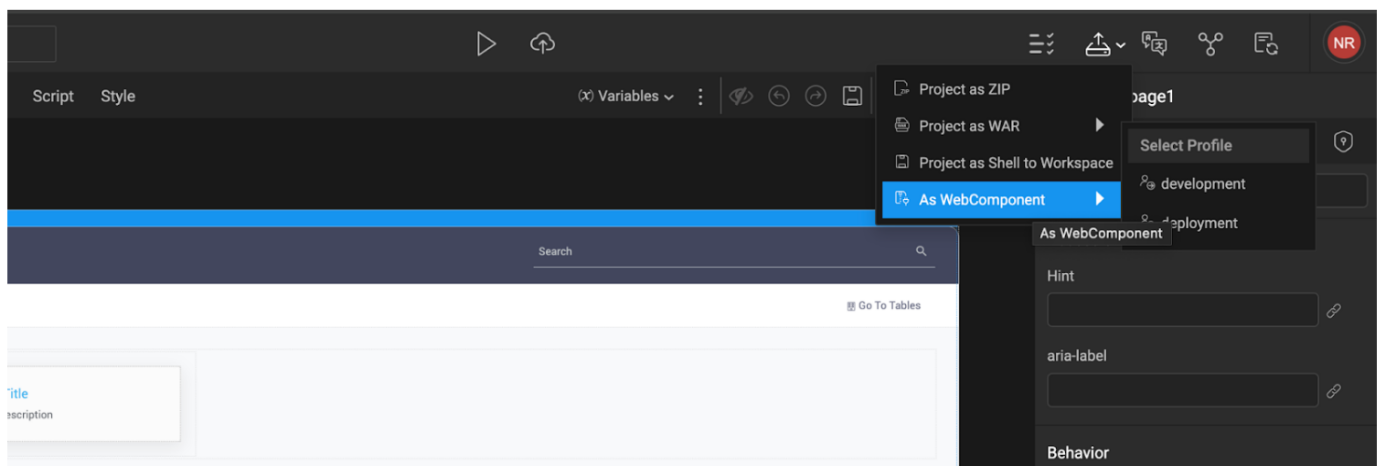
In WaveMaker Studio, a new option allows you to export a Prefab as a Web Component. The steps are as follows:
- Navigate to the Prefab you want to convert.
- Select the option Export as WebComponent.
- Choose the desired profile for the export.
- Trigger the job by clicking the export As WebComponent button.
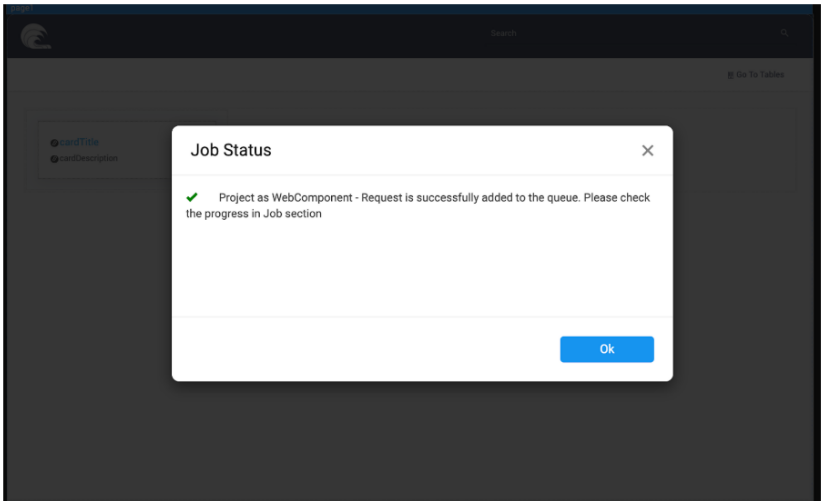
- A confirmation message appears, indicating that the process has started.
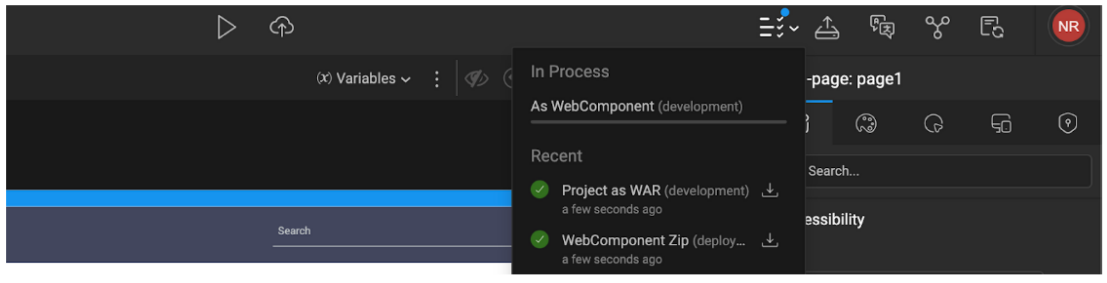
- Monitor the progress of the Web Component job in the Jobs section.
Download & Host the Zip
Once the Web Component export job is complete, you can proceed with downloading and hosting the zip.
- Download the generated ZIP file.
- Host the ZIP file on a preferred server.
- Ensure that the hosted files are accessible from the application where the Web Component will be used.
Web Component Package Structure
The generated ZIP typically contains:
- Compiled JavaScript bundles
- Bootstrap script
- Documentation files
Integrate the Web Component in a Parent Application
To integrate the Web Component into a parent application like, React, Angular, or Vue, follow these steps:
Include the Custom HTML Tag
Insert the custom HTML tag for the Web Component into your application’s HTML using below code.
<wm-<prefabName>></wm-<prefabName>>
Include the JavaScript File
- Add the following script tag to your application’s HTML to load the Web Component.
<script src="https://<hostname>/bootstrap-<prefabName>.js data-api-url=<url>></script>
- Replace
<hostname>with the URL of your hosted server. - Replace
<prefabName>with the name of your Prefab. - The
data-api-urlattribute is optional and specifies the backend API endpoint for the Web Component.
Pass Inbound Values
If the Prefab requires inbound values, provide them as attributes on the custom HTML tag. For example,
<wm-<prefabName> attribute1="value1" attribute2="value2"></wm-<prefabName>>
Testing and Deployment
Once the Web Component is integrated, the Web Component can be accessed from the parent application like React, Angular, or Vue.
Test its functionality within the parent application to ensure proper behavior. After successful testing, deploy the application to production.
Security and Best Practices
- Implement Proper CORS Configurations: Ensure that resources accessed by the Web Component comply with Cross-Origin Resource Sharing (CORS) policies to prevent unauthorized access.
- Use HTTPS for Script and API Endpoints: All resources and endpoints should be served over HTTPS to guarantee secure communication.
- Validate and Sanitize Input Attributes: Input attributes provided to Web Components should be validated and sanitized to prevent injection attacks and ensure data integrity.
Example - Using Prefab as a Web Component
In this example, a Prefab takes two integers as input that are inbound values and returns their sum.
Trigger the Job
- Create a sample prefab which takes two integers as input and returns their sum.
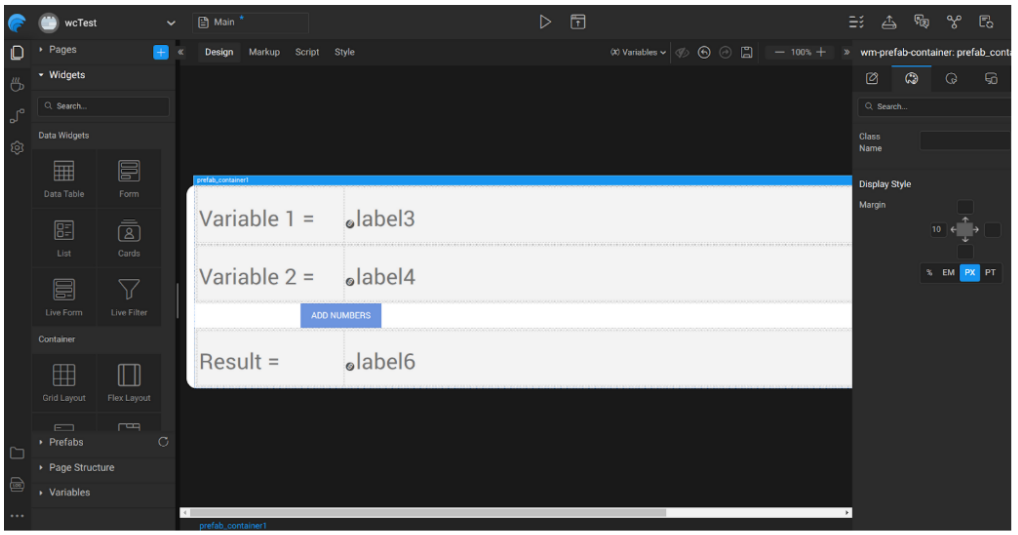
- Pass the input integers, var1 and var2, as inbound values.
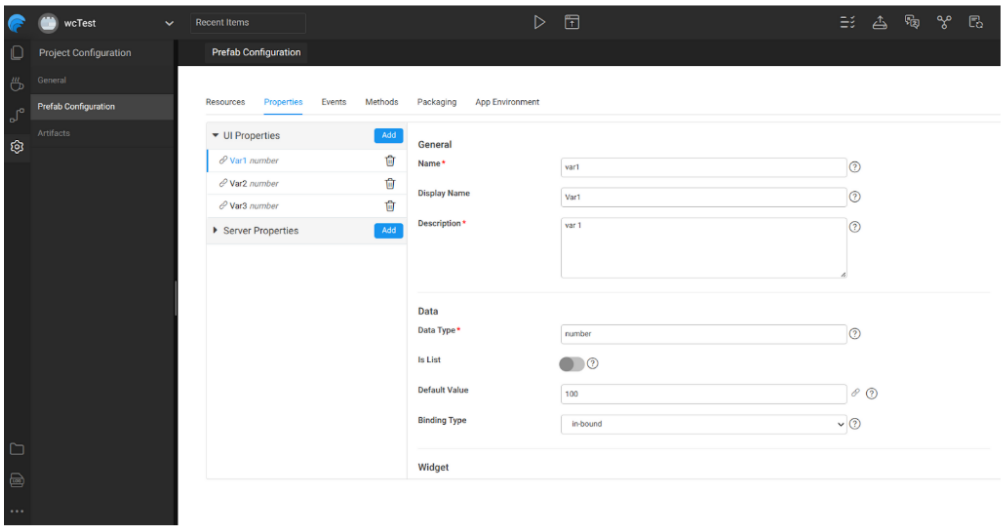
- Export the prefab as Web Component by choosing your desired profile.

- You see a confirmation message indicating that the process has started.
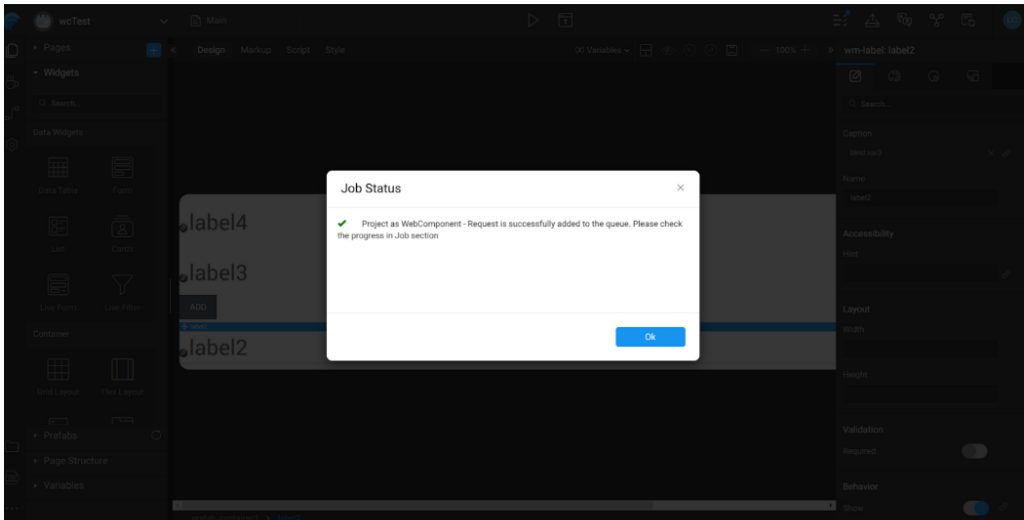
- In the jobs section, once the process is downloaded the Web Component zip generated.

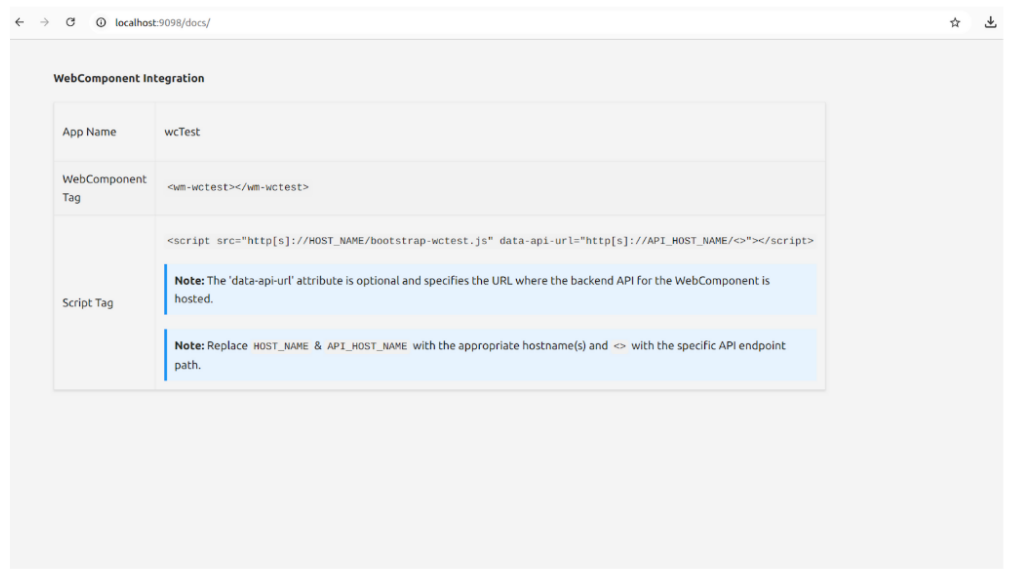
Download and Host the Web Component
- Upon Downloading the zip host it in your preferred server.
- Ensure that the hosted files are accessible from the application where the Web Component will be used
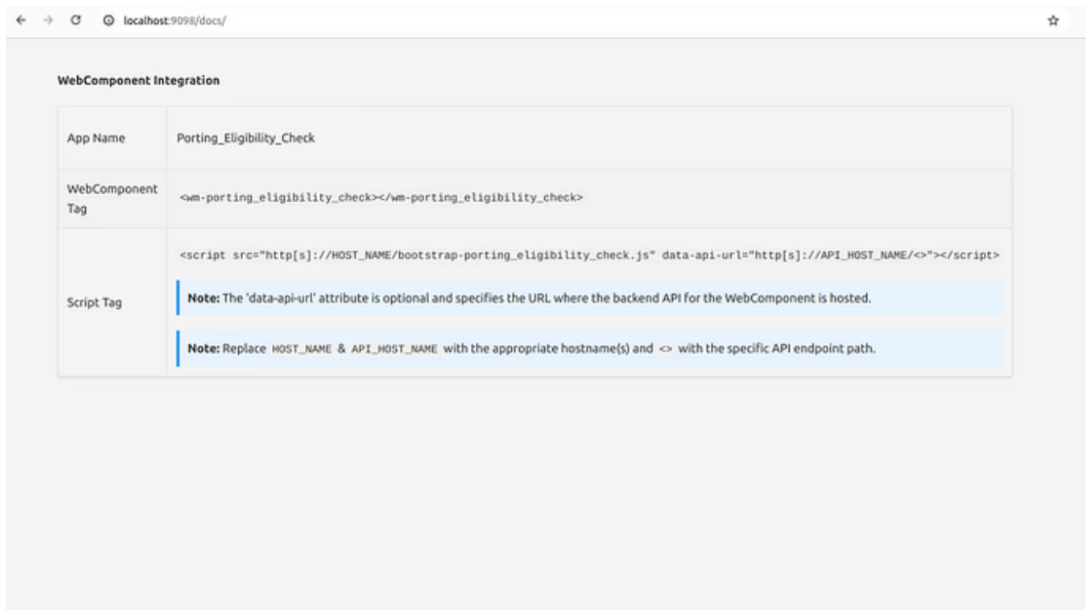
- For reference, on using the hosted web component refer to the docs file located in the zip.
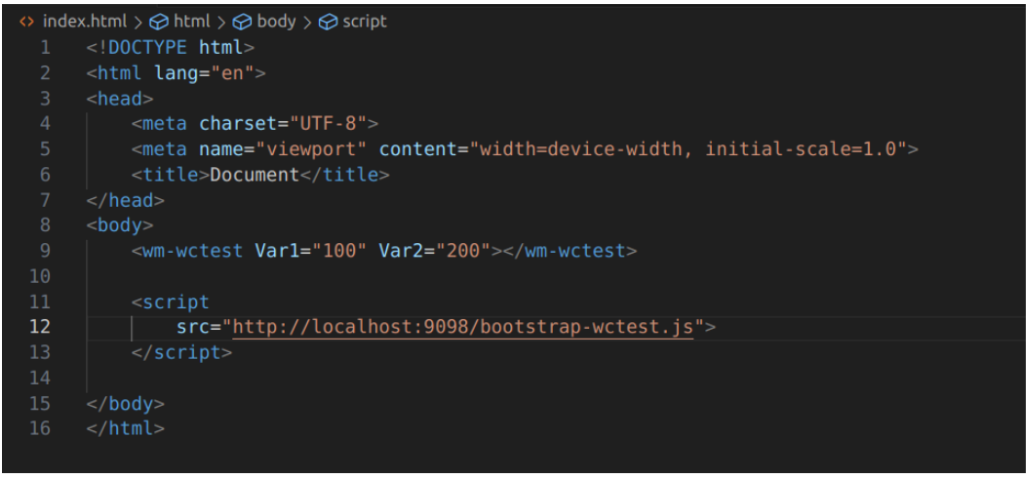
Integrating Web Component into Parent Application
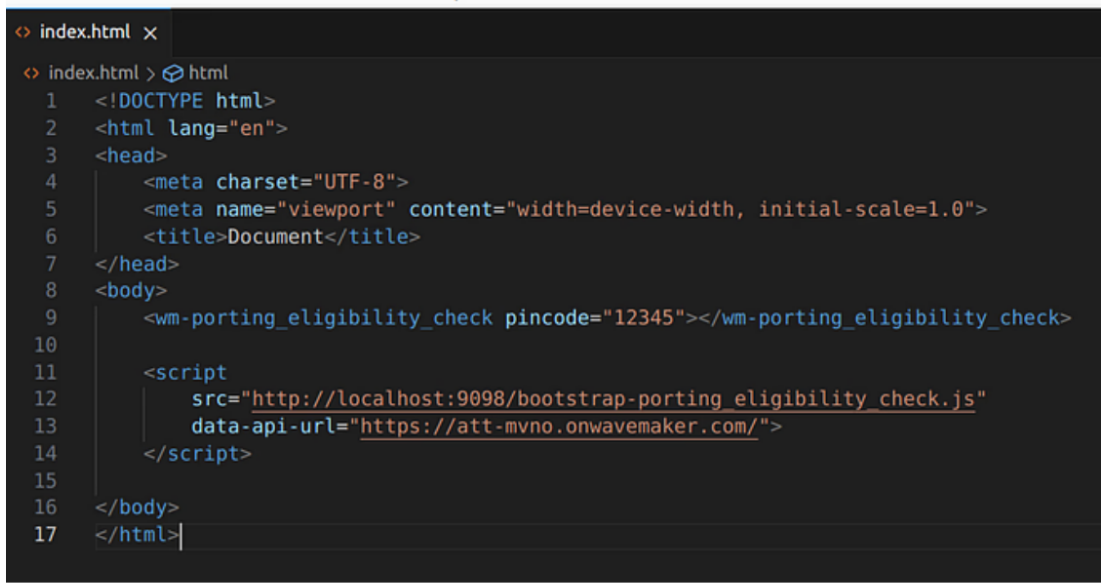
- You need to include the custom HTML tag as mentioned above in your parent application.
<wm-wctest></wm-wctest>
- Along with the HTML tag, include the following javascript tag to load the Web Component.
<script src="https://localhost:9098/bootstrap-wctest.js ></script>
- To pass the integers as input, pass them as attributes to the html tag.
Result
By following these steps the Web Component will be rendered.
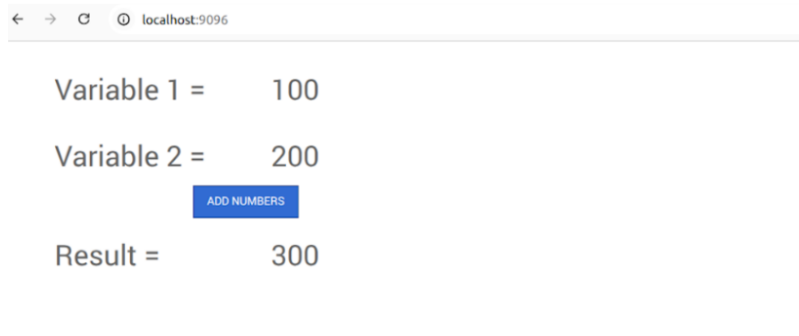
Once it’s rendered, test its functionality within the parent application to ensure proper behavior. After successful testing, deploy the application to production.