Push Notifications
Push notifications in mobile applications are a critical feature for engaging and retaining users. They serve as a direct communication channel between an app and its users, allowing for the delivery of timely, relevant information. This can significantly enhance user experience and increase app usage.
For instance, in e-commerce apps, push notifications can alert users about special deals, new arrivals, or abandoned cart reminders, thereby driving sales and engagement. In the case of social media apps, these notifications keep users informed about new messages, comments, or likes, which encourages more frequent interactions within the app.
Moreover, push notifications can be personalized based on user behavior and preferences, making them a powerful tool for delivering tailored content. This personalization not only increases the relevance of the notifications but also strengthens the user’s connection to the app.
In news and utility apps, they are instrumental in providing critical updates and information, enhancing the app's value to the user. For example, a weather app sending real-time alerts about severe weather conditions can be both useful and life-saving.
In this how-to guide, we will walk you through implementing push notifications in a WaveMaker app through Firebase.
Firebase Setup
For the push notification, you need to integrate Firebase messaging into the WaveMaker application's codebase. If you don't have a Firebase project, create one on the Firebase Console. If you have an existing Google project associated with your mobile app, select the project in Firebase Console.
Android
- Click on the Android icon.
- Fill in the input fields Android package name (e.g.,
com.wavemaker.pushnotification). - Fill in any optional fields.
- Click on the "Register" button.
- Download
google-services.json.
iOS
- Click on the iOS icon.
- Fill in the input fields Apple bundle id (e.g.,
com.wavemaker.pushnotification). - Fill in any optional fields.
- Click on the "Register" button.
- Download
GoogleService-info.plist.
Adding Firebase Plugin to WaveMaker App
Firebase plugins can be installed in a few steps in WaveMaker. Refer to this page on how to install a plugin. Additionally, you need to add the react-native-app-badge package to the app for the app icon badge count.
@react-native-firebase/app- version:22.2.1@react-native-firebase/messaging- version:22.2.1expo-build-properties- version:0.13.1
Adding google-services.json and GoogleService-info.plist
Move the downloaded google-services.json and GoogleService-info.plist files into your resource folder
src/main/webapp/resources/files/google-services.json.
src/main/webapp/resources/files/GoogleService-info.plist.
Updating app.json
Now, create an app.json file with the below config and add it to the webapp folder src/main/webapp/app.json.
Note:
- Android package name and iOS bundleIdentifier should match with Firebase to get Push Notifications.
- For development builds, use
"aps-environment": "development". For production/App Store builds, use"aps-environment": "production".
Implement Firebase messaging to the WaveMaker App
Since Firebase modules are native modules and will not work in Web preview, we will implement web and native separately.
Web Implementation
As we can't use Firebase modules, we will be returning No Token string as a response.
Create a file notification.web.js with the below content and add it to the resources folder src/main/webapp/resources/files/notification.web.js.
Native Implementation
Create a file notification.native.js with the below content and add it to the resources folder src/main/webapp/resources/files/notification.native.js.
Note: If a production IPA is installed through AltStore or BrowserStack, the APNs entitlement may be stripped during the IPA installation process due to re-signing, which can cause push notification failures. For production testing, use TestFlight which preserves the entitlements correctly.
Main Page - Markup
Main Page - Script
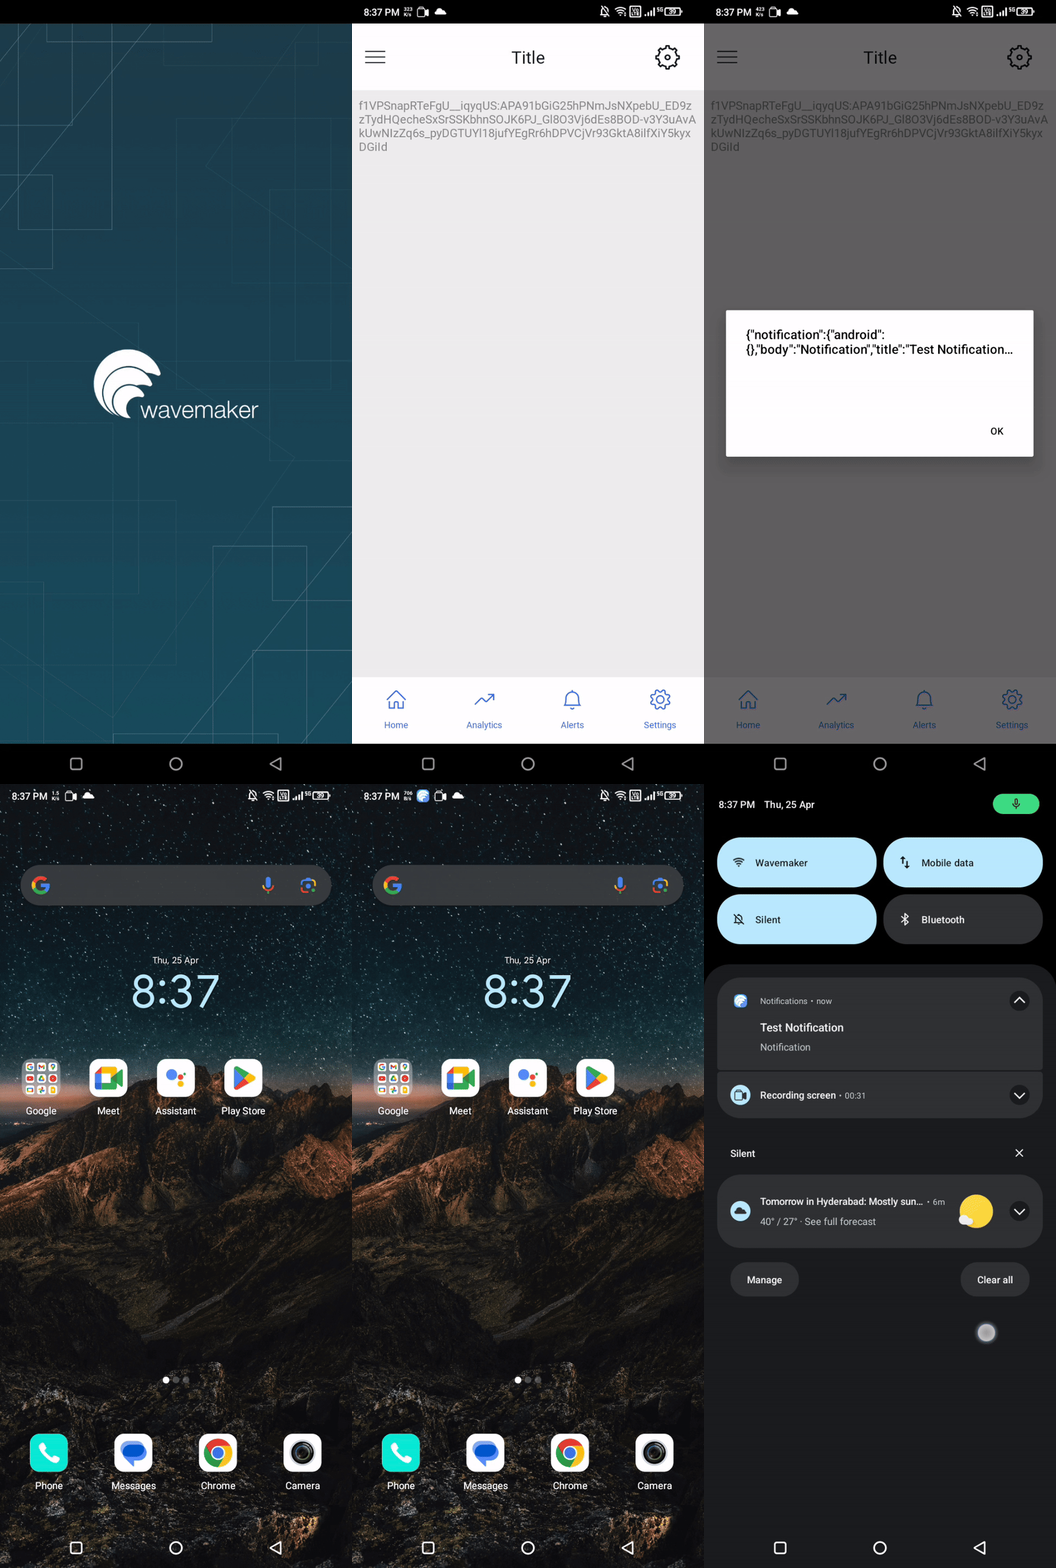
Preview

Test Firebase push notification
Log In to Firebase Console
- Open your web browser and go to the Firebase Console: console.firebase.google.com.
- Log in using the Google account associated with your Firebase project.
Using FCM Tester
To test the push notification, we can use services
like FCM Tester. To test the notification, we require FCM Registration Token (Device Token) which we are showing it as a label caption in our app and we need a Server Key from Firebase Console: console.firebase.google.com. Also, we need to fill required fields for notification also there are some optional fields.
To get server key from Firebase Console
- If you have multiple projects, select the appropriate project from the Firebase project list.
- Click on the Setting icon in the left-hand menu and select Project Settings and then click on Cloud Messaging Tab.
- Now, Select Your server key from Cloud Messaging API (Legacy). If your Cloud Messaging API is disabled first enable it by clicking on the triple dot on the right-hand side.
Using Campaigns
- In Firebase Console console.firebase.google.com select Messaging in the left Navigation, here we can create a new campaign or we can use the test option firebase provides while creating the Campaign.
- Under the Campaigns tab, select create New Campaign and fill the Notification Title and Notification Text.
- Now select Send test message button, and add FCM Registration Token (Device Token) and click on test.
- You can also continue creating a Campaign by submitting all required fields.