Configure JWS and Opaque providers
WaveMaker offers many security providers to enable authentication to the WaveMaker applications from the security dialog. The security providers like DEMO, Database, LDAP, Active Directory, SAML, OpenID, and Custom Security are the primary security providers. Additionally along with the primary provider a secondary provider can also be enabled like JWS or Opaque Token provider.
Enabling JWS Provider
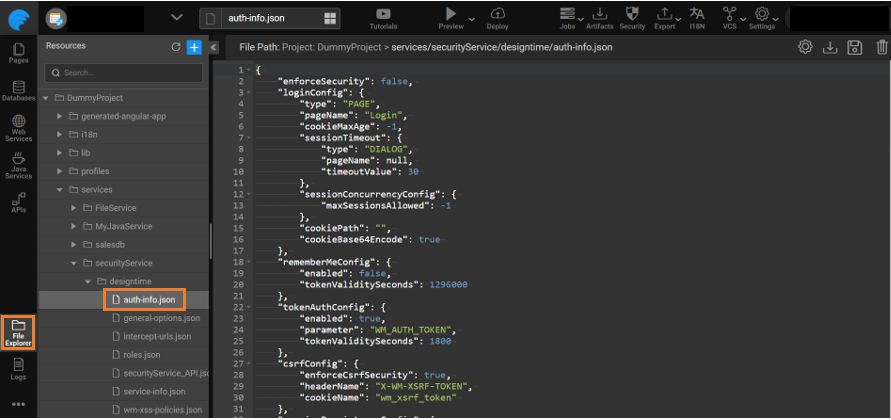
- Navigate to the File Explorer and search auth-info.json.
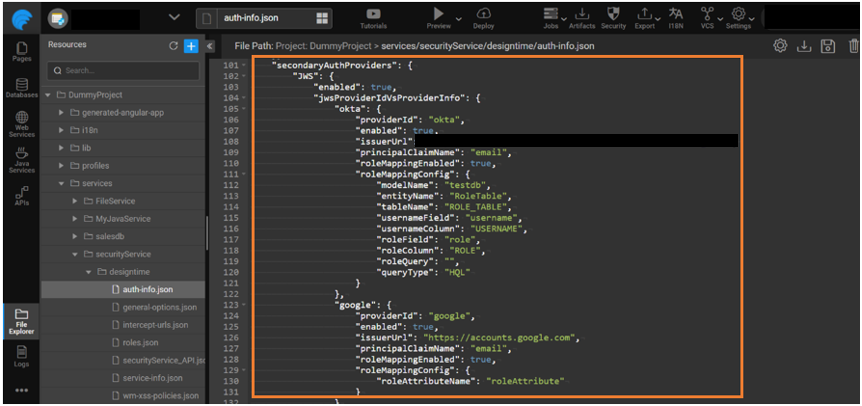
- Add the below JSON content to auth-info.json which is a sample JSON structure to enable JWS.
- Go to
${openid-server-url}/.well-known/openid-configuration APIthat returns the issuer URL and other details of the server. This helps to find the issuer URL if the provider that is being configured follows OpenID spec. - Under the JWS section set
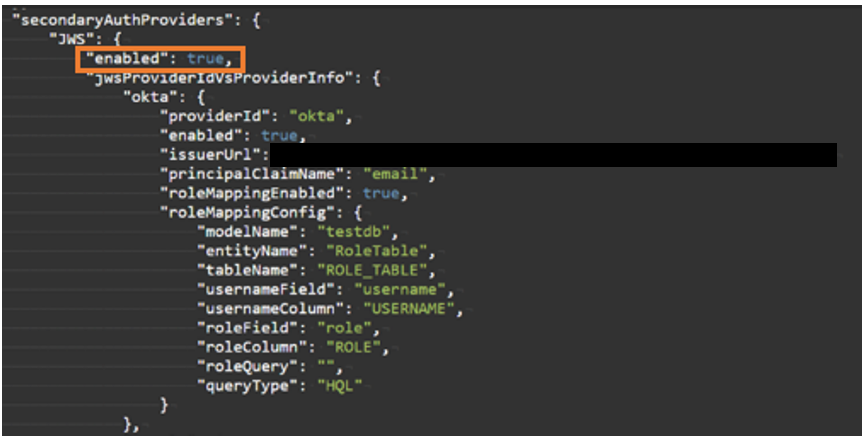
enabledas true.
JWS provider can have multiple providers configured like Google, Okta, and each sub-provider can be enabled/disabled.
| Field | Description |
|---|---|
| providerId | A unique provider ID for each sub provider in JWS |
| issuerUrl | The issuer URL of the open ID provider. |
| principalClaimName | The claim name in the ID token which will be used as current logged in user’s userID |
| roleMappingEnabled | role mapping can be enabled/disabled for each sub provider |
| roleMappingConfig | JWS supports two types of role mappings |
Role Mapping in JWS
The role attribute is configured using the JWS or database. To know more about role mapping, see Role Mapping.
JWS Role Attribute Mapping
Configure a role attribute in the issuer. The attribute should be available in the ID token claims. This attribute value is used for role mapping authorization. Add roleAttributeName in the JSON structure as shown below.
Database Role Attribute Mapping
Configure a role table and once the token is authenticated the current logged-in user role is retrieved from the database. Add the modelName, entityName,tableName, usernameField, usernameColumn, roleField, roleColumn or roleQuery, queryType in the JSON structure as shown below for the Okta provider.
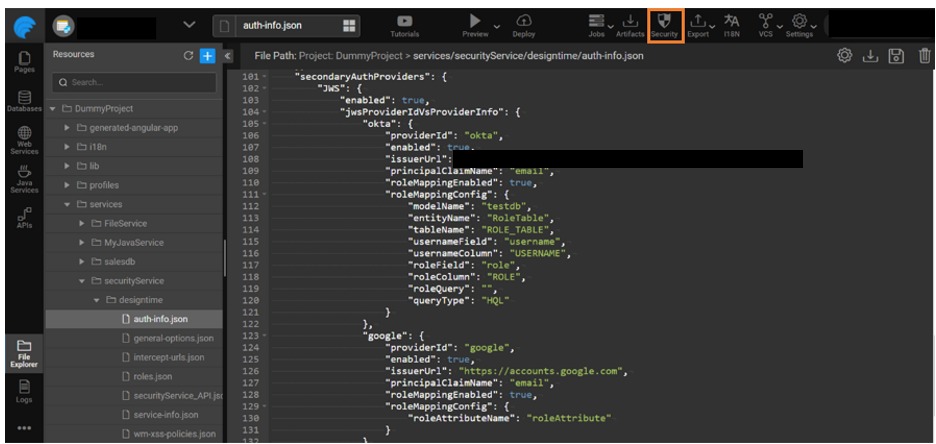
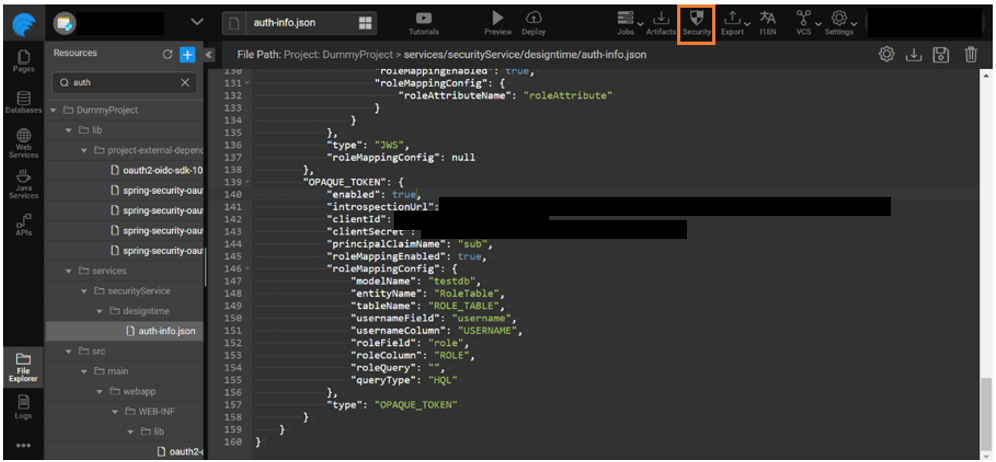
- Save the auth-info.json file and open the security dialog.
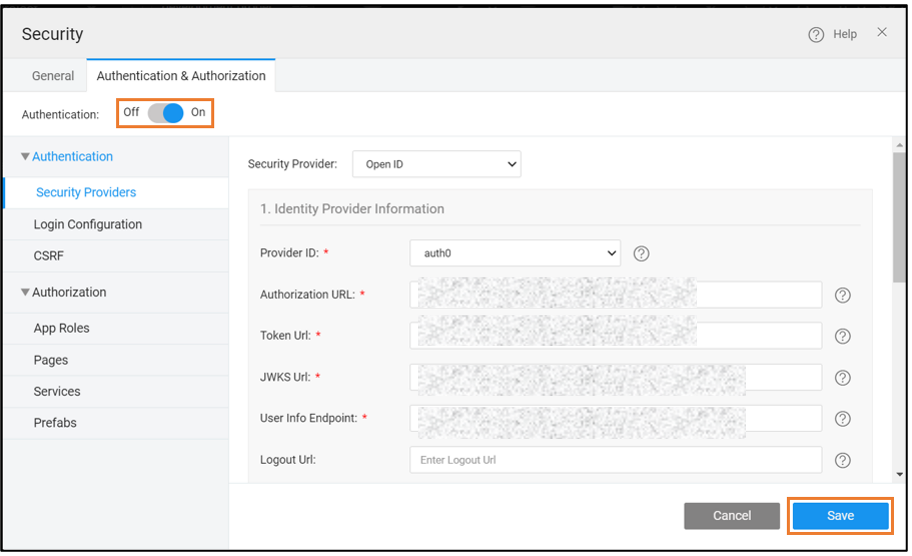
- Go to the Authentication and Authorization tab to enable the primary security provider. Click Save.
A primary security provider should be enabled to apply a secondary provider to the application.
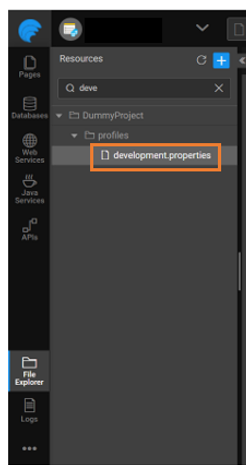
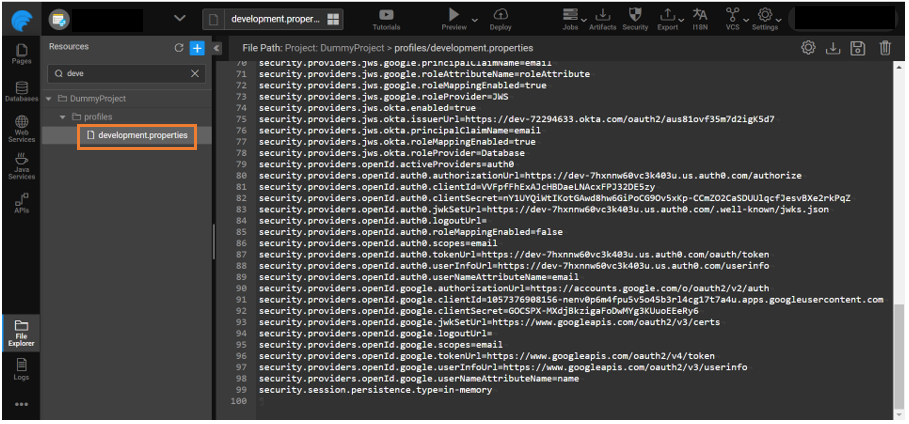
- Navigate to the File Explorer and open the required profile properties file.
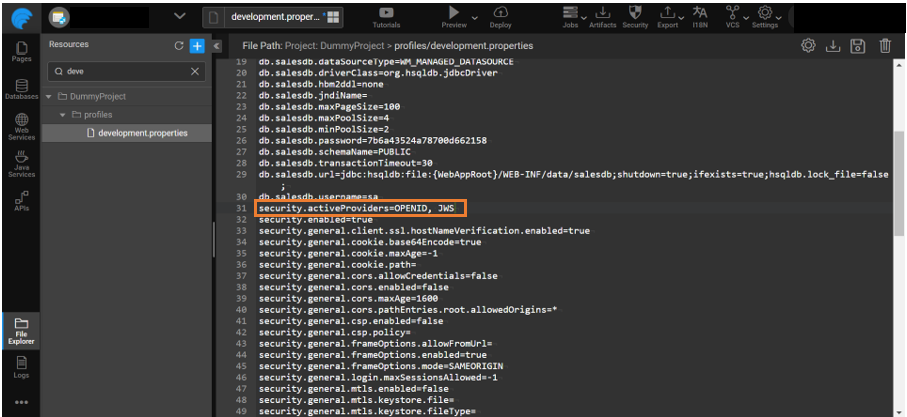
- Update the property security.activeProviders by adding JWS to it. Example: DEMO, JWS.
- Invoke an API by passing the ID token as a bearer token. To know how to pass the ID token as a bearer token in the WaveMaker application, see How to Pass Logged-In User ID/Access Tokens as Header.
If the incoming token is of JWS format then enable the JWS provider.
Enabling Opaque Token Provider
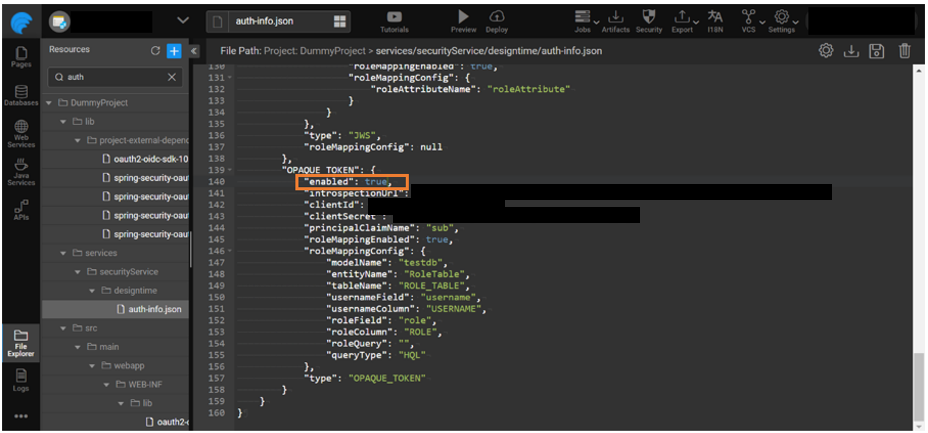
- Navigate to the File Explorer and search auth-info.json.
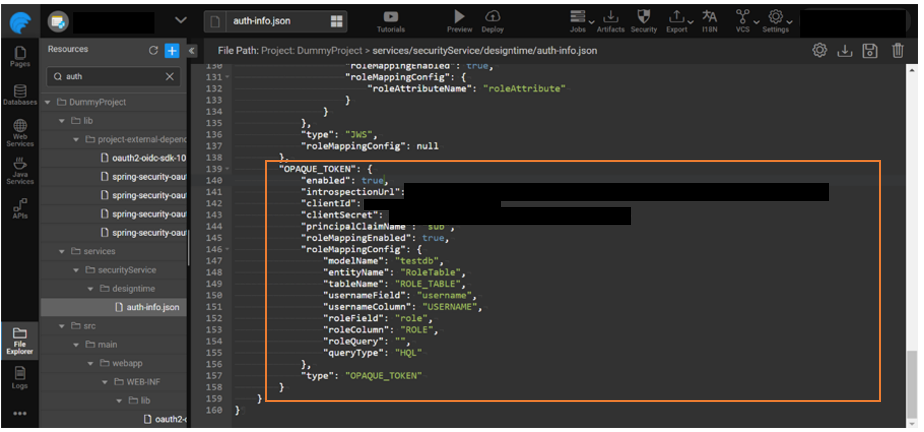
- Add the below JSON content to auth-info.json to enable the Opaque token provider.
- Go to
${openid-server-url}/.well-known/openid-configuration APIthat returns the introspection URL and other details of the server. This helps to find the introspection URL if the provider that is being configured follows OpenID spec. - Under the OPAQUE_TOKEN section set
enabledas true.
Opaque token provider can be enabled only if the OpenID provider that is used supports introspection.
| Field | Description |
|---|---|
| introspectionUrl | Introspection endpoint is used to validate the access token and should be supported by the provider. |
| clientId and clientSecret | Provided by the open ID provider once the app is registered. |
| principalClaimName | The claim name in the Access token which will be used as current logged-in user’s ID. |
| roleMappingEnabled | role mapping can be enabled/disabled for each sub provider. |
| roleMappingConfig | Opaque token provider supports two types of role mappings. |
Role Mapping in Opaque Token
The role attribute is configured using the Opaque token or database. To know more about role mapping, see Role Mapping.
Opaque Token Role Attribute Mapping
Configure a role attribute in the issuer. The attribute should be available in the ID token claims and the attribute value will be used for authorization(role mapping). Add roleAttributeName in the JSON structure under the roleMappingConfig as shown below.
Database Role Attribute Mapping
Configure a role table and once the token is validated using the introspection endpoint the current logged-in user role is retrieved from the database. Add modelName, entityName, tableName, usernameField, usernameColumn, roleField, roleColumn or roleQuery, queryType in the JSON structure as shown below.
- Save the auth-info.json file and open the security dialog.
- Go to the Authentication and Authorization tab to enable the primary security provider. Click Save.
A primary security provider should be enabled to apply a secondary provider to the application.
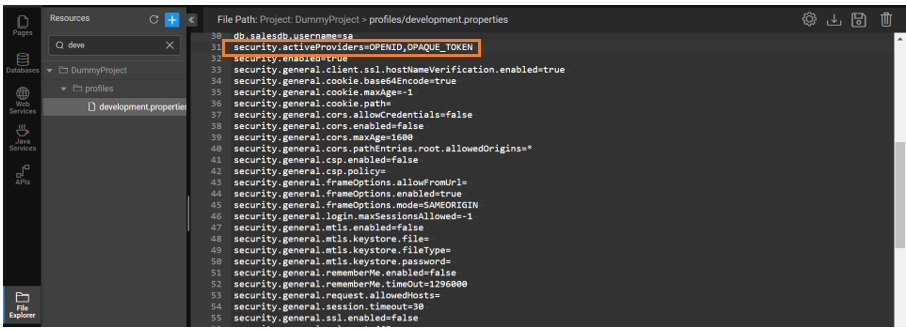
- Navigate to the File Explorer and open the required profile properties file.
- Update the property security.activeProviders by adding OPAQUE_TOKEN to it. Example: DEMO, OPAQUE_TOKEN.
- Invoke an API by passing the access token as a bearer token. To know how to pass access token as bearer token in the WaveMaker application, see How to Pass Logged-In User ID/Access Tokens as Header.
If the incoming token is of Opaque format then enable the Opaque token provider.
