SAML Integration - ADFS
Active Directory Federation Services (ADFS) is a software component developed by Microsoft that can be installed on Windows Server operating systems to provide users with single sign-on access to systems and applications located across organizational boundaries.
Active Directory Federation Services (AD FS) simplifies access to systems and applications using a claims-based access (CBA) authorization mechanism to maintain application security. AD FS supports Web single-sign-on (SSO) technologies that help information technology (IT) organizations collaborate across organizational boundaries.
AD FS is an identity access solution that provides browser-based clients (internal or external to your network) with seamless, "one prompt" access to one or more protected Internet-facing applications, even when the user accounts and applications are located in completely different networks or organizations.
Pre-requisites
The testing was done with ADFS 3.0 in Windows Server® 2012 R2.
- You should have already installed AD CS - Certificate Service, AD DS - Domain Service, AD FS - Federated Service on Active Directory.
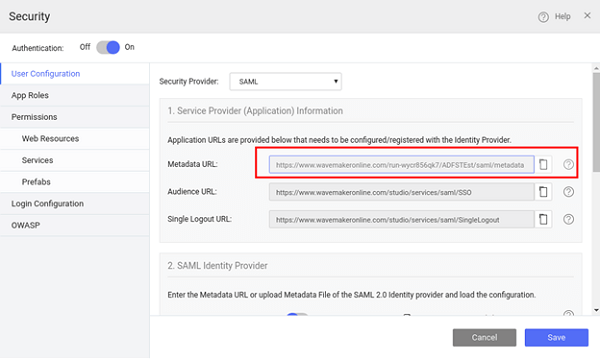
- You have the Metadata URL for the WaveMaker App: Steps to obtain the Metadata URL:
- You should have already created an app using WaveMaker integrated with SAML as security provider (see here for more).
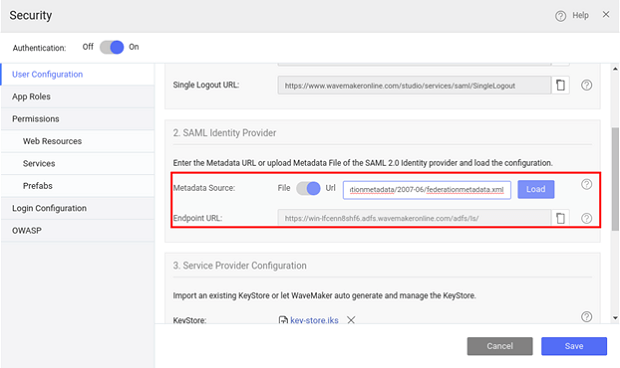
- Configure ADFS Federation Metadata details in WaveMaker App. You can either use the URL or upload file.
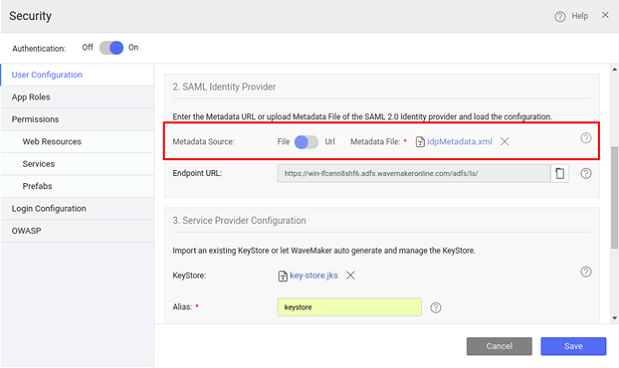
- From Service Provider Configuration, generate Keystore.
- Preview the app and open the Security dialog again. Note the Metadata URL from the WaveMaker App:
Due to US export limitations, Java JDK comes with a limited set of cryptographic capabilities. Usage of the SAML Extension might require an installation of the Unlimited Strength Jurisdiction Policy Files which removes these limitations.
Implementation Steps
(NOTE: The screenshots were current from AD FS at the time of documentation and they might differ from actual)
- Launch Active Directory
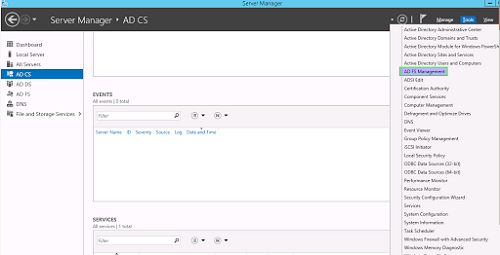
- Select AD FS from Server Manager AD FS
- From Tools select AD FS Management
- In AD FS 2.0 Management Console select "Add Relying Party Trust"

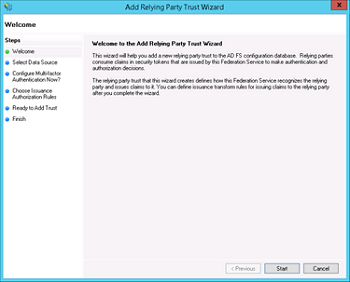
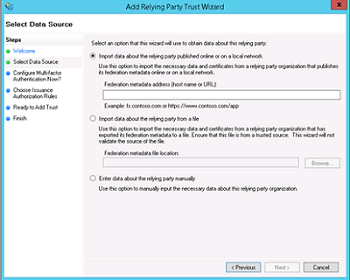
- Select "Import data about the relying party from a file"
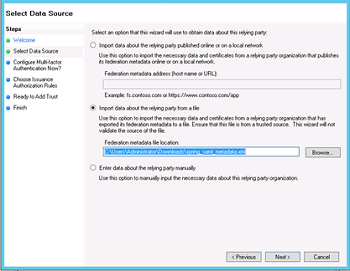
- Select the metadata.xml file from the WaveMaker app as mentioned earlier in the prerequisites section (ignore any warning messages).
- On the "Ready to Add Trust" make sure that tab endpoints contain multiple endpoint values. If not, verify that your metadata was generated with HTTPS protocol URLs.
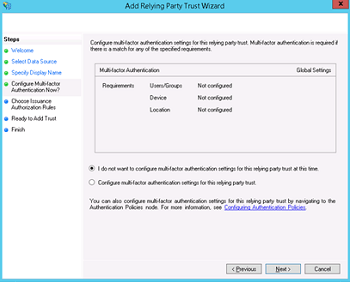
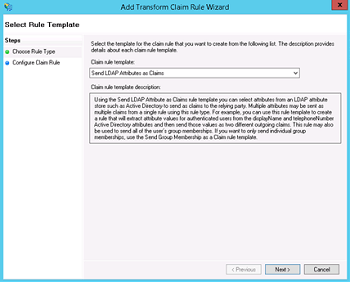
- Leave "Open the Edit Claim Rules dialog" checkbox checked and finish the wizard.
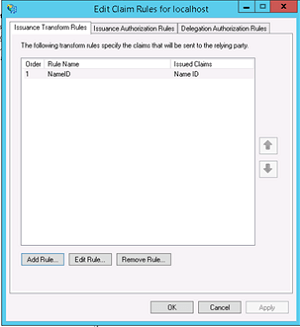
- Select "Add Rule", choose "Send LDAP Attributes as Claims" and press Next
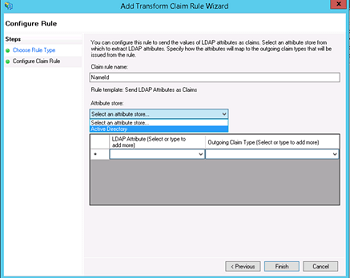
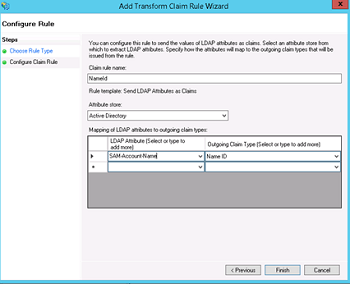
- Add NameID as "Claim rule name", choose "Active Directory" as Attribute store, choose "SAM-Account-Name" as LDAP Attribute and "Name ID" as "Outgoing claim type", finish the wizard and confirm the claim rules window, in ADFS 3.0 you might need to configure the Name ID as a Pass Through claim - As we are using Spring SAML Security it expects the Name ID Parameter in the Spring SAML Response.
- Open the provider by double-clicking it, select tab Advanced and change "Secure hash algorithm" to SHA-1
Preview
- Now when you preview the WaveMaker app, you will be redirected to the ADFS login page.
Deployment
Before deployment, ensure that you configure the deployment profile with the ADFS Server details.
- Get the deployment URL from Profile Configuration dialog
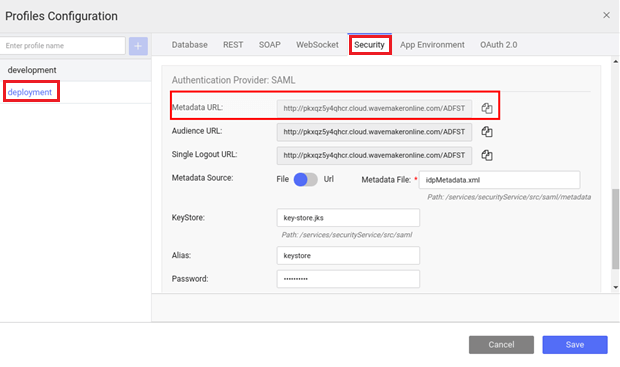
- Configure Metadata in ADFS Server with this URL
- Repeat the above steps (preview) with the new ADFS metadata details and deploy the app.