Theme builder app is expanding its capability of creating a theme with an Edit feature to customize advanced changes. This feature will extend the ability to develop themes beyond the basics and add more advanced styling based on projects. This will also help to preview applied changes and test the theme's overall look and feel.
Why?
Over time, we have seen that though the theme builder tool was efficient to kick start with branding changes, it lacked in the styling details of what each project needs. There was a need to handle the advanced styles with an option to view the changes. We understand that only coding without preview is baseless, So here is the solution to those problems that every developer faces.
With the new enhancement to the theme builder tool, We have introduced a new code editing option to create themes more efficiently. The new feature will help develop a full-fledged theme with the branding configuration and advanced modifications as per project requirments.
How does it work?
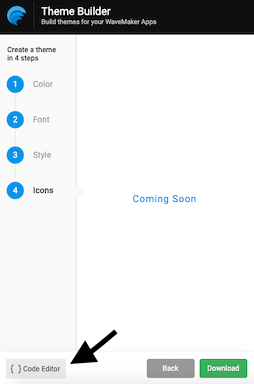
Theme editor will continue the styling configurations till Step 4, followed by a new "Code Editor" button, which starts a new window to the bottom of the screen.
Steps to follow:
- Click next to continue the initial flow till Step 4.
- Click on the code editor button to the left corner in the footer.
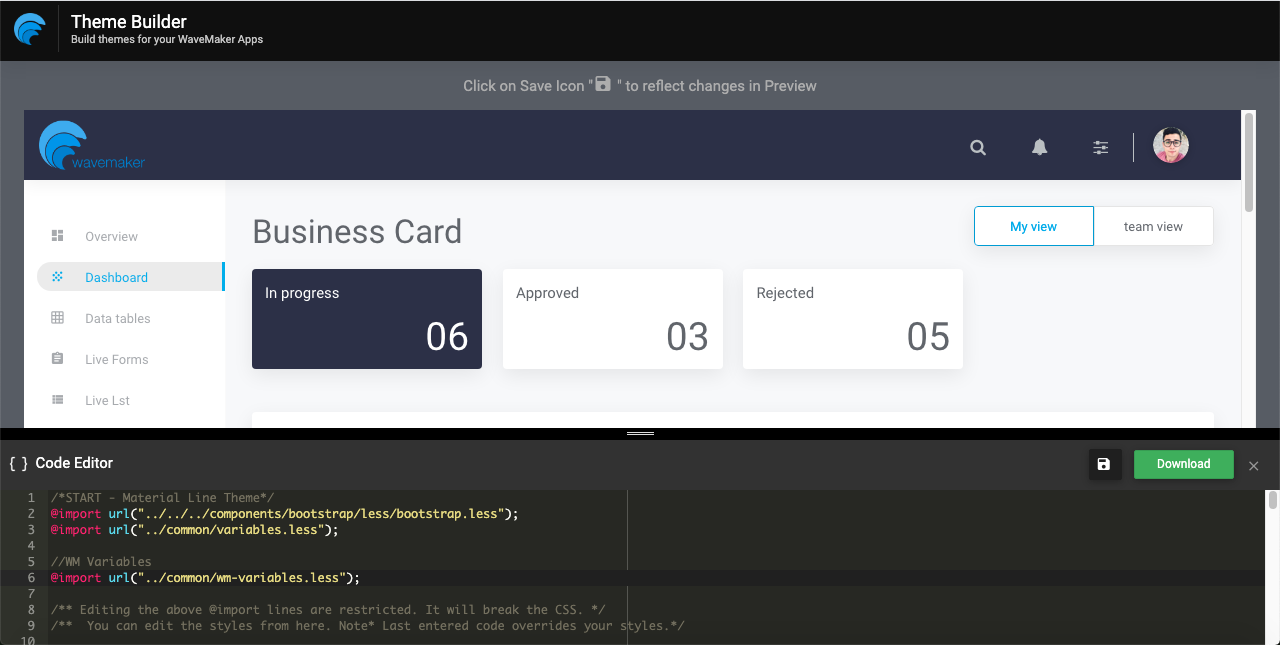
- A code panel will popup to the bottom, with the preview application vertically sectioned.
- Explore the capabilities like Add, Override, and Modify based on the needs of each project and save the file.
All the changes will reflect in the preview application only when clicked on save button.
- Checked your changes and repeat the steps to style more.
- Bring the focus to the editing lines and try Ctrl F to search for classnames whenever required.
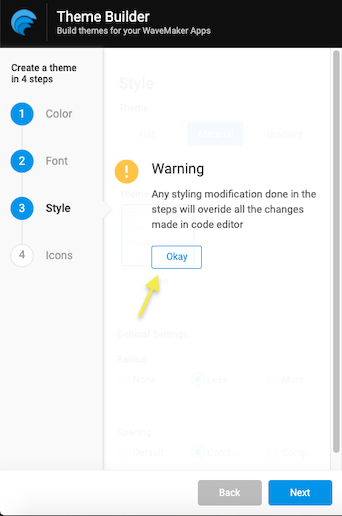
- Close the editor to go back to the branding changes anytime and choose "Okay" to override the progressive changes made.
- When ready, download the theme and import to the projects.
For information on how to import a theme, see Importing Theme.
Editor's tips and tricks
We will share few easy way tips to help you get faster and more productive while editing the theme file.
- The editable file is in .less format. Hence, the changes should start inside the class name parenthesis .wm-app{ }.
- The code editing starts from the 11th line from .wm-app{ }. The lines above are not editable due to complications with the respective path.
- With every change, saving the file is mandatory to reflect the changes in the preview application
- The CtrlF function will work when focused on the editable lines.
- CtrlZ function will revert your changes to the initial state.
- To override the styles, search for the class name and address applicable changes.
- If theme selected is flat or gradient, The classnames might duplicate for overriding purpose. Search and modify accordingly.
Order of precedence for code edited will be last come first to apply.
- Add proper comments for every piece of code rewritten in the file.
Bug Fixes
- Added more screens in the preview application with all the WaveMaker components to test the theme styles.
- Checkboxes and radio button borders were half cut when set the font size to 10px or 11px. Fixed now
- When the secondary button is focused, the text changes to primary color instead of active contrast color. Fixed now.
- Changed the build settings of the preview application to load the assets faster.
- Fixed the alignment issue for the select widget down arrow when the gradient theme is selected and imported to projects.
- Dynamic form labels were not vertically aligned when selected a flat theme or gradient theme. Fixed now.
Will be back with more updates.